Importing Animated Unity Assets into Bakin
This article covers something I struggled with quite a bit: the steps for importing animated Unity assets into Bakin. Since Bakin is still a relatively new game development tool, its asset library isn’t especially large.
However, by repurposing assets developed for major engines like Unity, you can access a much richer set of assets in Bakin.
That said, the process comes with a number of steps and prerequisites. This article focuses on those tricky parts.
The Asset Used This Time
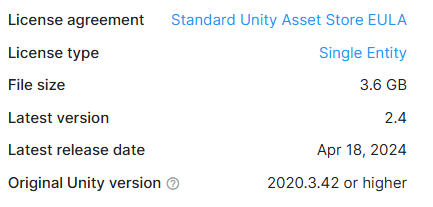
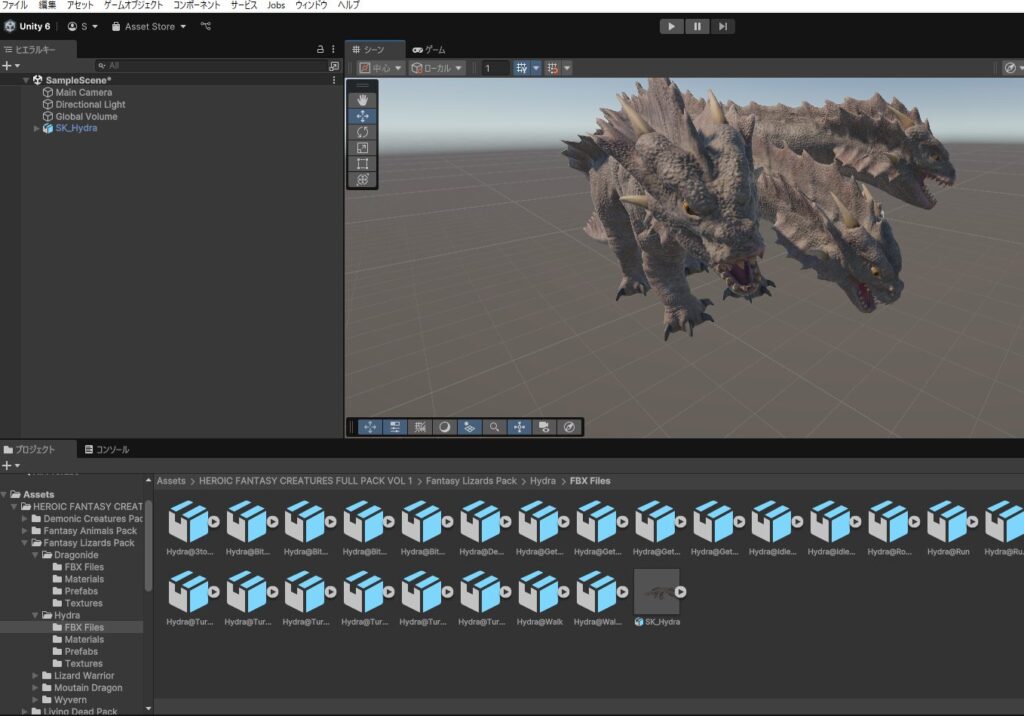
The Unity asset I’m importing is called “HEROIC FANTASY CREATURES FULL PACK Volume 1.”
It includes a wide variety of 3D monster models, making it great for enemy characters in a game. The assets use the FBX format, which is easy to work with, and the attack animations are extensive—highly recommended.
The downside is that it’s quite expensive (roughly $400, which is close to $400 at current exchange rates), but it goes on sale around 70% off during events like Black Friday, so wait for one of those.
Of course, the same import procedure described here should generally work with other assets too, so feel free to try it out with free assets first.
Be aware that some assets may not import cleanly depending on compatibility, so keep that in mind.

To import a Unity asset into Bakin, you can’t do it directly for various reasons.
Instead, the Unity asset must first be brought into Blender (a 3D software application), then converted to a format Bakin can use and exported from there.
The overall workflow is as follows:
- Purchase a Unity asset
- Import the asset into a Unity project
- Import the Unity project’s asset into Blender
- Convert it in Blender to a Bakin-compatible format (shading setup, armature setup, animation setup) and export
- Import the Blender-converted asset into Bakin
Step 4 is where the difficulty lies. It took me several days to work through, so there’s definitely some complexity involved.
Someone with solid Blender knowledge would probably get through it without much trouble, but as a Blender beginner, it was quite challenging for me.
Prerequisites for This Guide
As described above, the workflow takes a Unity asset through Blender and into Bakin. The following prerequisites are assumed to be already in place:
- Unity asset has been purchased
- The asset’s terms of use do not prohibit use in other games
- Unity is installed
- Blender is installed
- Bakin is installed
For the Unity asset, just purchase something from the Asset Store that interests you.
Most Unity assets allow use in other games, but a small number prohibit it. Check the asset page—if the “License agreement” field shows “Standard Unity Asset Store EULA,” the asset uses standard terms and repurposing should be fine.
For installing Unity, Blender, and Bakin, the official installation guides for each make the process straightforward.
Complete these prerequisites before proceeding to the import steps below.
Importing the Asset into a Unity Project
First, I’ll cover how to import the asset into a Unity project. Launch Unity ahead of time and create any project (you can do it without launching Unity first, but this approach saves some steps).
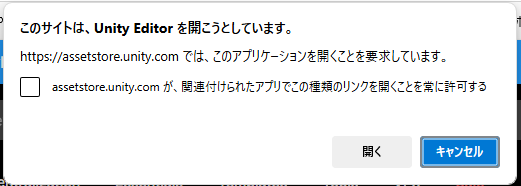
Then, on the page where you purchased the Unity asset, click “Open in Unity.”
Clicking “Open in Unity” will show a prompt at the top of your browser. Click “Open” to proceed.
Unity’s “Package Manager” will then appear. Click the “Import [asset name] into project” button.

Depending on the asset size, this may take a while, but generally finishes within a few minutes.
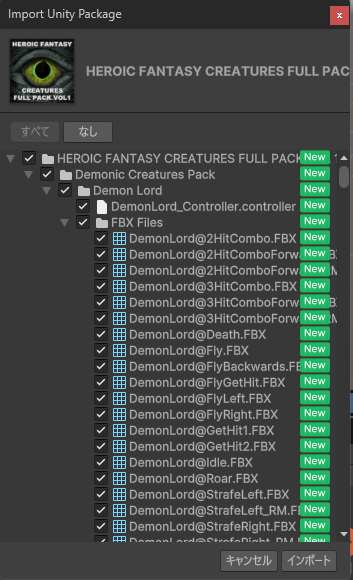
After a moment, a screen appears letting you choose which parts of the asset to import into the project. Just click “Import” to import all contents.
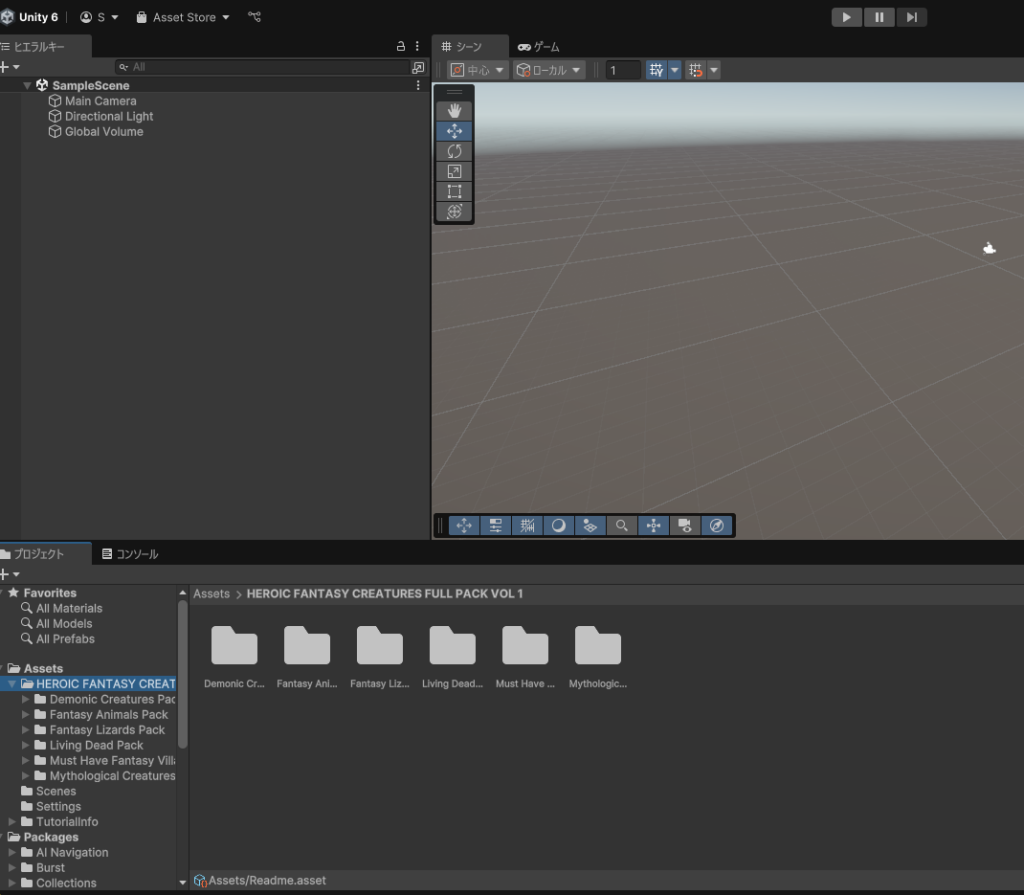
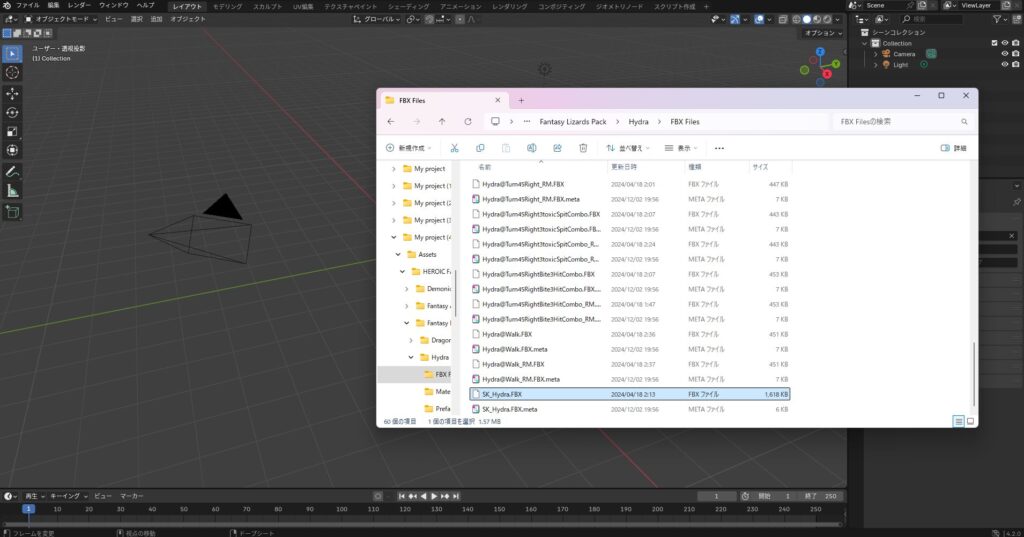
Once the import completes, a folder with the asset’s name should appear inside the project’s “Assets” folder (look in the lower-left of the following image for the folder).
Try placing the imported asset in the Unity scene to verify it. You can do so by dragging and dropping the FBX file or Prefab file onto the scene. Check it in Unity before moving on.
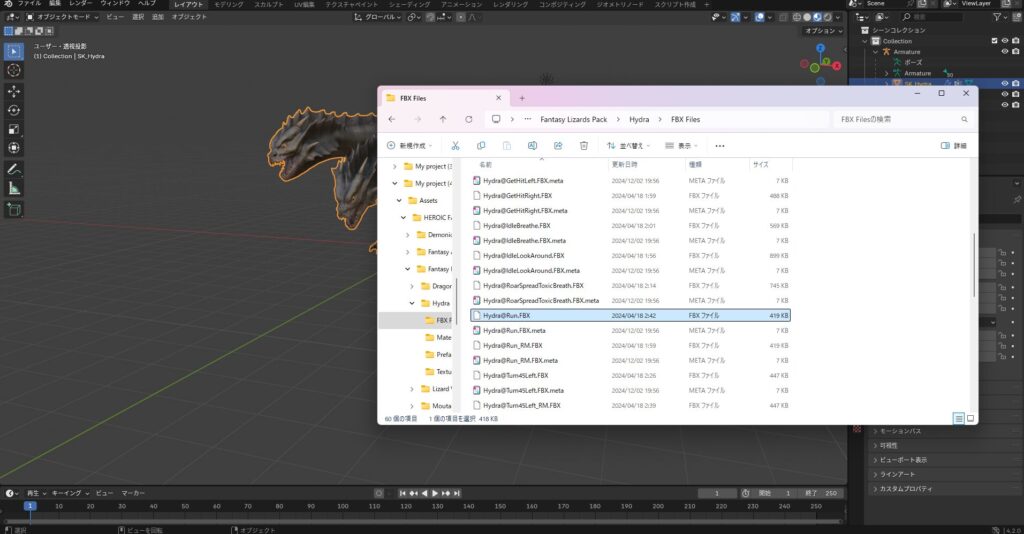
Most assets organize FBX files in a clearly named folder like “FBX Files,” so they shouldn’t be hard to find. Note that some assets don’t include FBX files at all, so keep that in mind.
If there are any issues with the asset, you’ll need to investigate and resolve them individually. For now, I’ll proceed on the assumption that the import was successful.
Once you’ve located the FBX file in Unity, right-click it and select “Show in Explorer.”
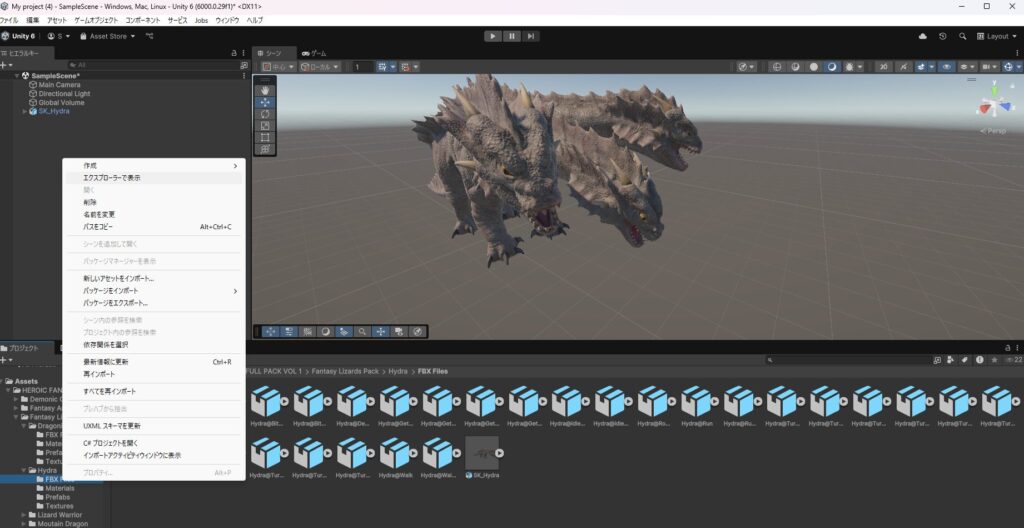
This opens the file’s location on your PC. The files at this location will be used in the next steps.

Converting the Unity Asset in Blender
Importing the Unity Asset into Blender
Now let’s import the Unity asset into Blender and convert it for use in Bakin. Launch Blender and get to a screen like the one below.
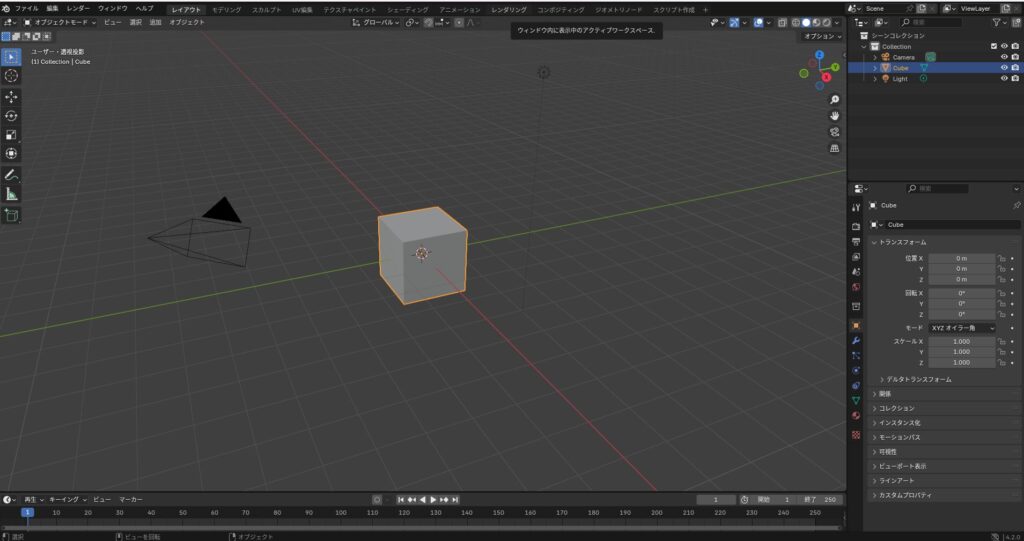
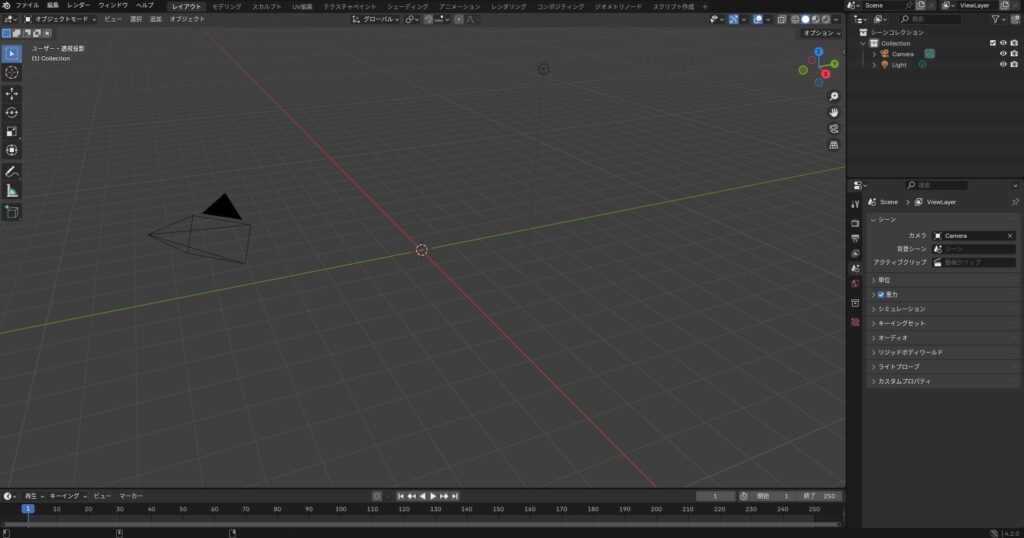
Delete the default Cube that appears. You can remove it later, but I prefer to clear it first.
From your PC file explorer, drag and drop the model FBX file from the Unity asset folder into Blender.
You can also import via Blender’s “File” → “Import” → “FBX” menu, but drag and drop is faster.
In this asset, model files are named like “SK_XX.FBX,” and animation files are named like “XX@Walk.FBX.” Naming conventions vary by asset, so check Unity first before selecting the file.
Dropping the FBX file into Blender brings up an import settings dialog.
Check “Ignore Leaf Bones” and “Force Connect Children” under Armature settings, and leave everything else at defaults, then click “Import FBX” (sometimes unchecking these works better, depending on the asset).
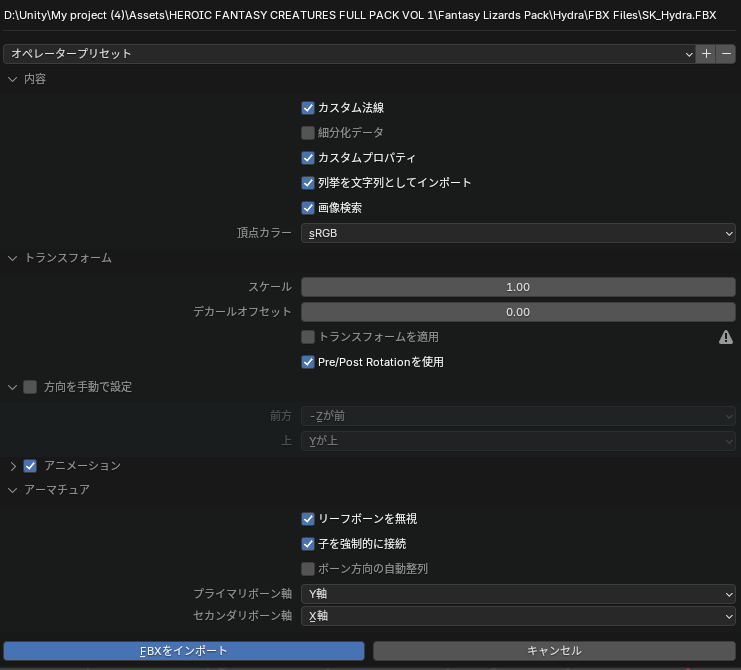
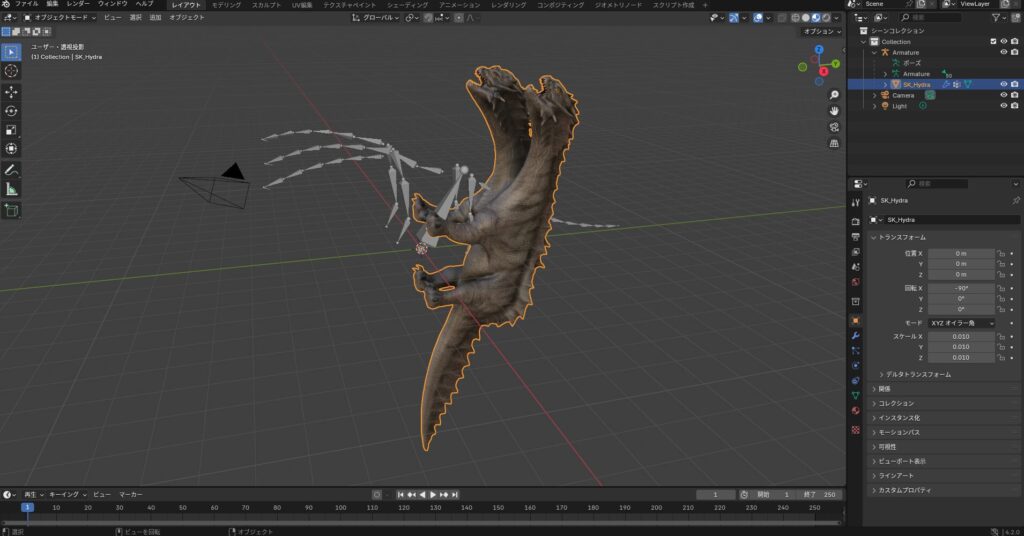
The Unity asset should now appear in Blender. If the model orientation is off, correct it manually.
Shading Setup in Blender
This step may not be necessary for some assets.
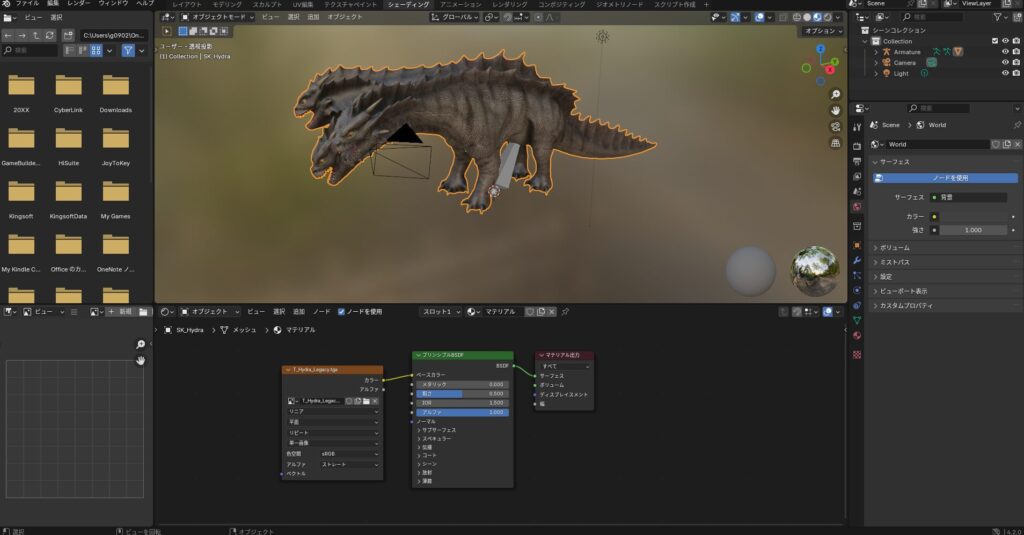
Imported FBX files often have their materials set up incorrectly. In that case, open the “Shading” tab and click the “New” button to the right of “Slot” in the center panel.
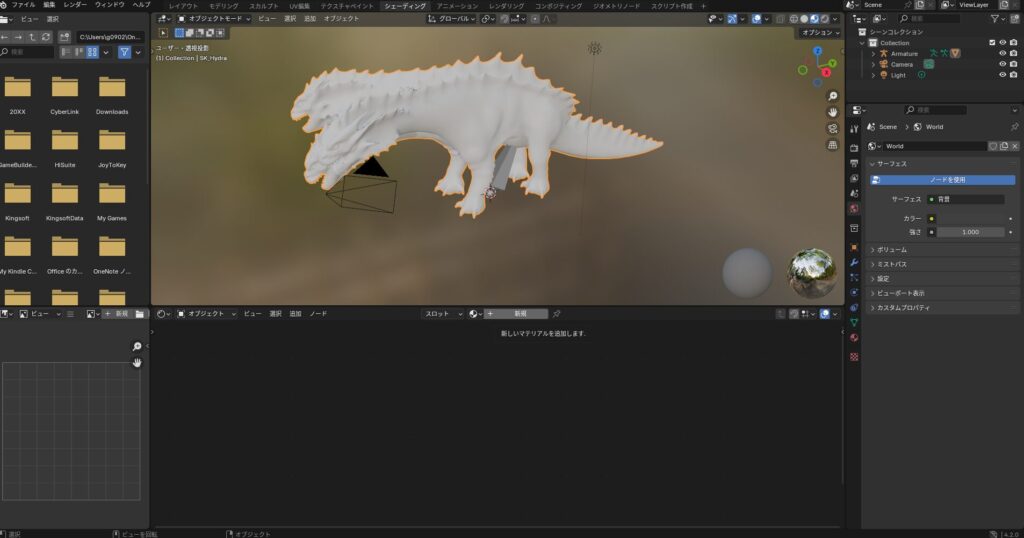
Next, drag and drop the texture image file into the material setup area in the center.
For this asset, there were TGA files in a “Textures” folder. Other assets may use JPG or PNG files, so be aware that material image formats vary.
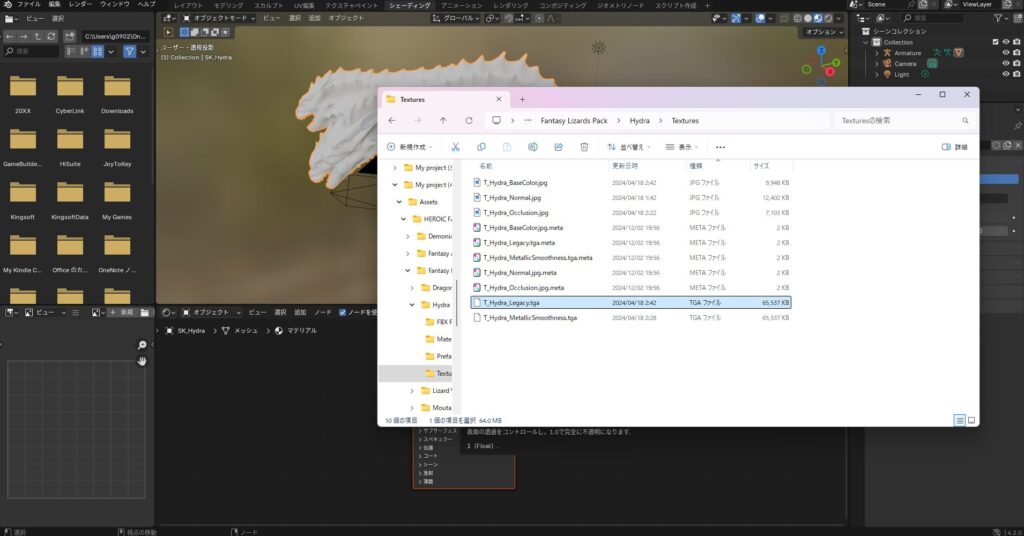
Connect the “Color” output of the image node to the “Base Color” input of the “Principled BSDF” node. The model should then appear with the same colors as it did in Unity.
Linking the Model and Armature
This step may not be necessary for some assets.
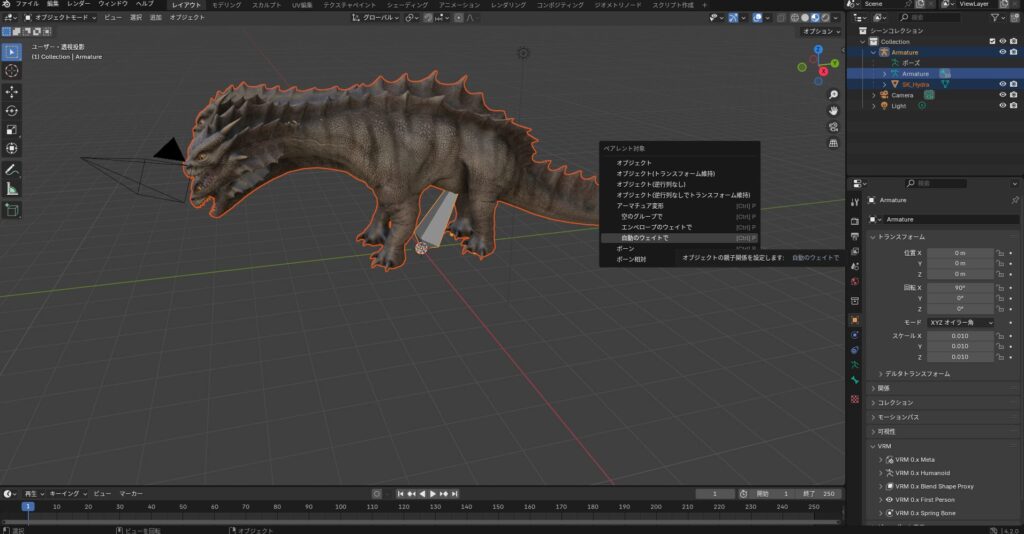
Once the material is applied, you might think the model is ready—but with most assets, the result at this stage would just be a static, unanimated model.
If the model doesn’t need to move, that’s fine. But for an asset with animations like this one, you need to properly link the model with its armature (skeleton) to make it animate.
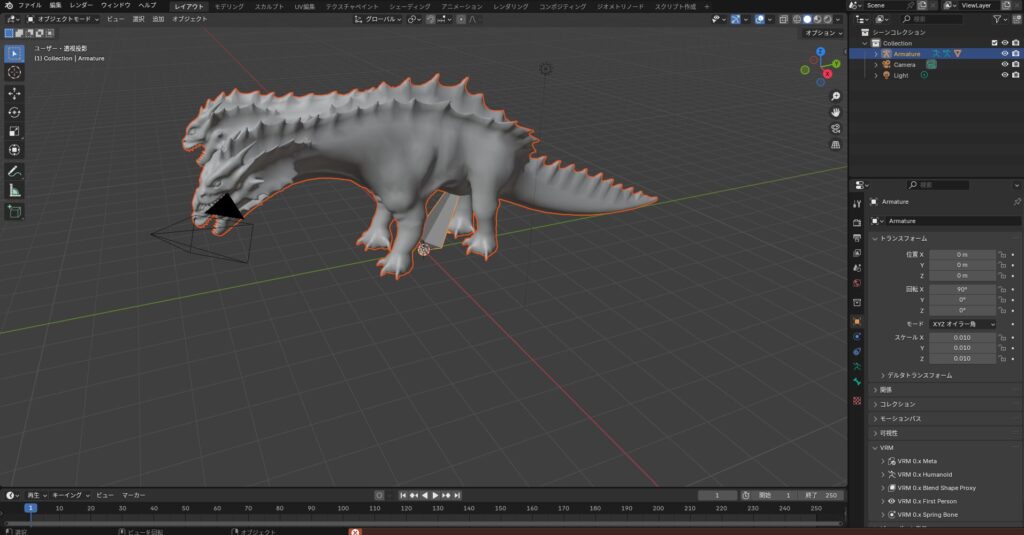
To do this, select both the model (in this case “SK_Hydra”) and the Armature in the right-side outliner, then press Ctrl + P.
A “Set Parent To” dialog will appear. Select “With Automatic Weights.” This establishes the parent-child relationship between the model and armature, and automatically calculates the bone weights (how much each bone influences each vertex).
Manual weight painting would give better results, but without specialized knowledge it’s very difficult, so automatic weights are a reasonable starting point.
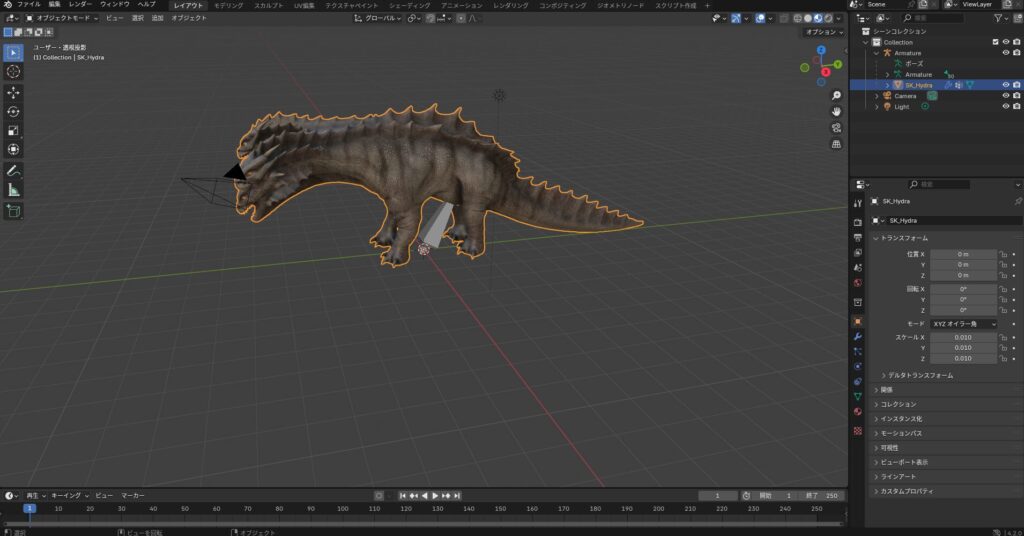
After this operation, the scale gets reset unexpectedly. This is because the model was originally imported from Unity at a scale of 0.01 in Blender, and the operation changed it to 1.00.
Change the model’s scale back to 0.01 on all axes to restore the original size.
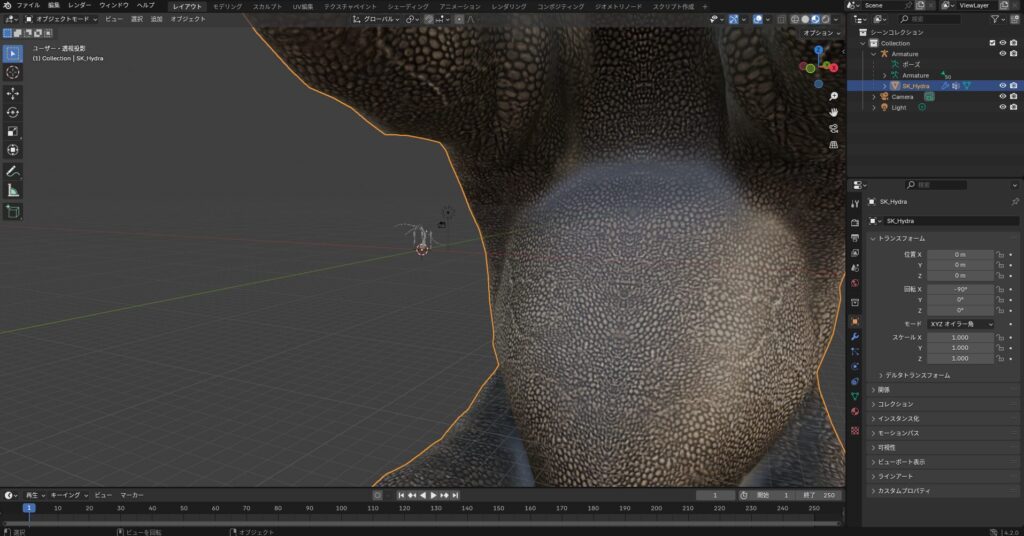
With the model selected, open the “Object” properties panel on the right and change the “Transform” scale values all to 0.01. The model and armature should then be properly sized relative to each other.
The model orientation may also be slightly off. Open the same “Object” properties panel and set “Rotation X” to 0 degrees to align it correctly.
Importing Animations
This step may not be necessary for some assets.
After linking the model and armature, import the animations. Drag and drop one of the animation FBX files into Blender.
The FBX import dialog will appear again. Leave the settings at default and click “Import FBX” (animation import is checked by default).
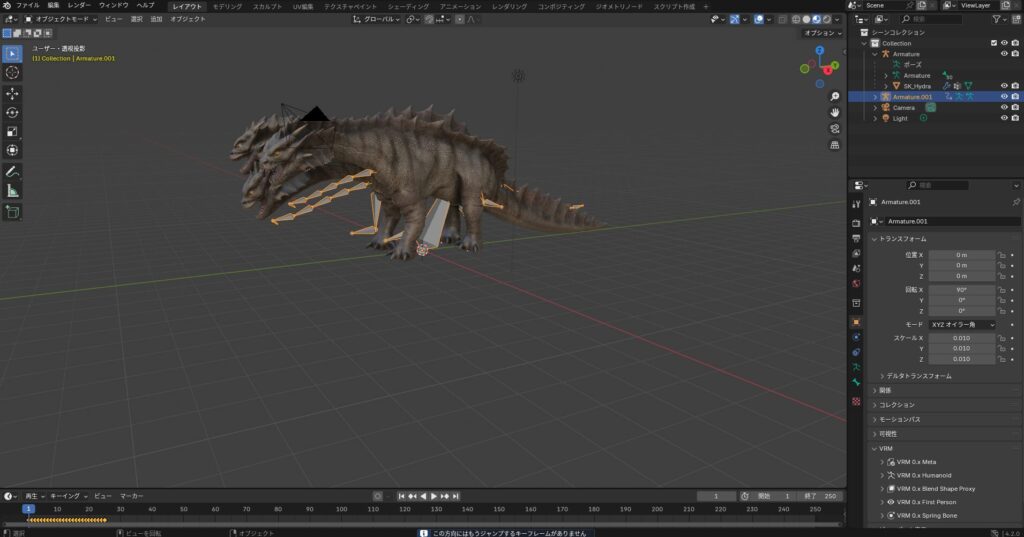
A new armature will appear in the top-right outliner. Try clicking the “Play (▶)” button at the bottom center of Blender.
You’ll likely see that the model doesn’t move—only the new armature’s skeleton animates.
This is because the two armatures are in separate hierarchies, and the animation is linked only to the newly imported one.
To transfer this animation to the model’s armature, open the “Animation” tab at the top of Blender.
In the “Animation” tab, various animation settings appear at the bottom of the screen. Change the “Dope Sheet” dropdown in the lower-left to “Action.”
An action name like “Armature.001|Take 001|BaseLayer” should appear.
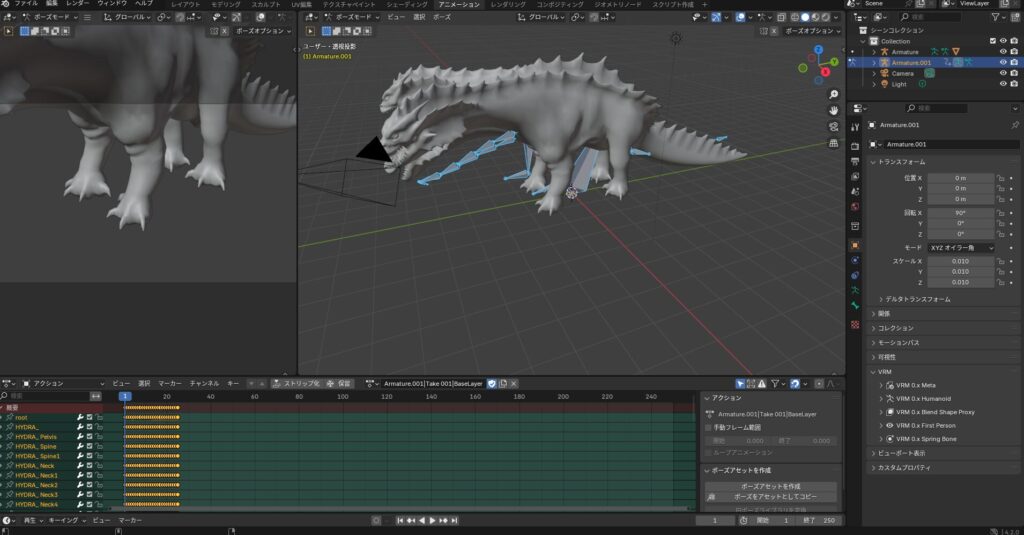
Confirm that the checkbox to the right of this entry is checked. Then switch back to the “Layout” tab, select the model’s armature, and return to the “Action” view.
Since the model’s armature has no animation yet, a “New” button should appear.
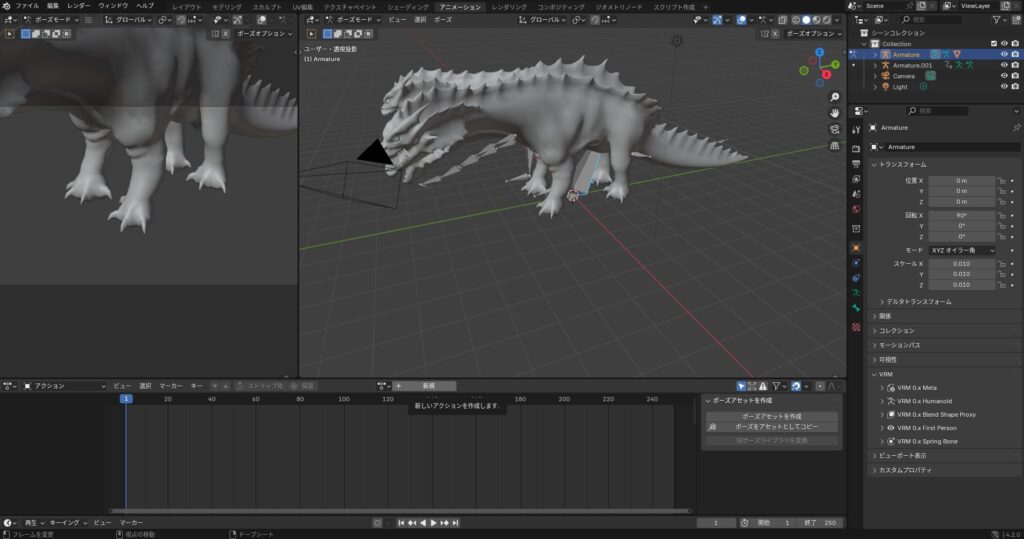
Clicking “New” lets you add an animation. Only the animation you checked in the other armature should appear in the list. Select it.
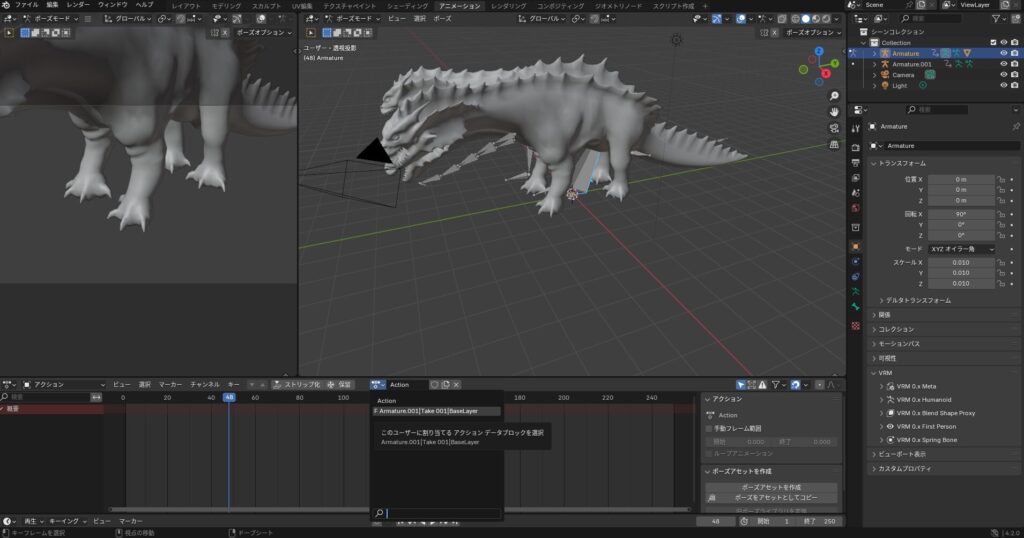
The model’s armature should now show the animation in the top-right outliner.
Once the animation has been transferred, the animation-only armature is no longer needed. Select it in the outliner and delete it.
If all the steps up to this point have been completed correctly, pressing play should show the monster model animating.
If it doesn’t move, there’s likely an issue somewhere in the steps, or the asset itself may not be compatible with Blender’s import. You’ll need to investigate that individually.
Be aware that this kind of debugging requires a fair amount of Blender knowledge and can take considerable time and patience (it certainly did for me).
To apply multiple animations, simply repeat the same process—you can build a model with as many animations as you need.
Importing the Blender-Converted Asset into Bakin
Exporting an FBX File from Blender for Bakin
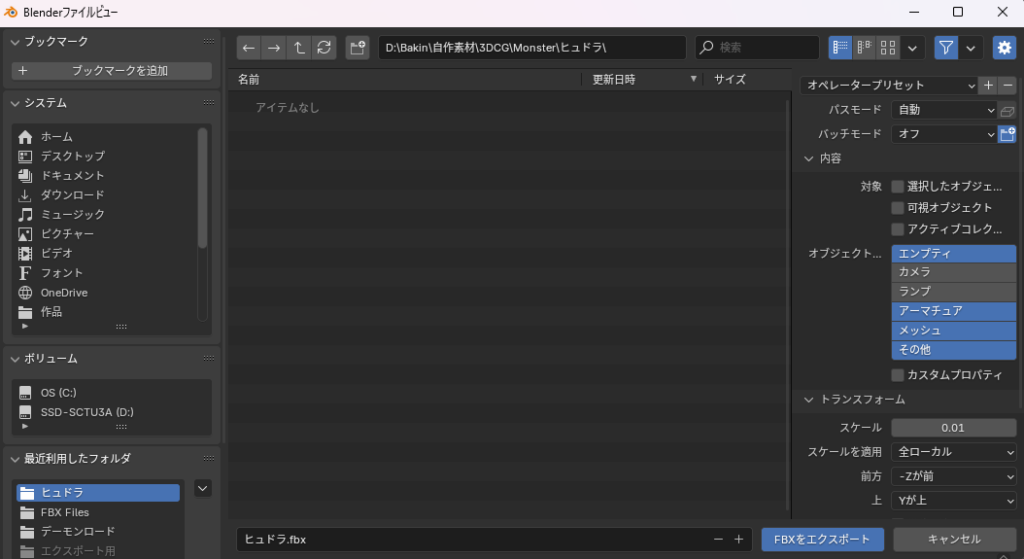
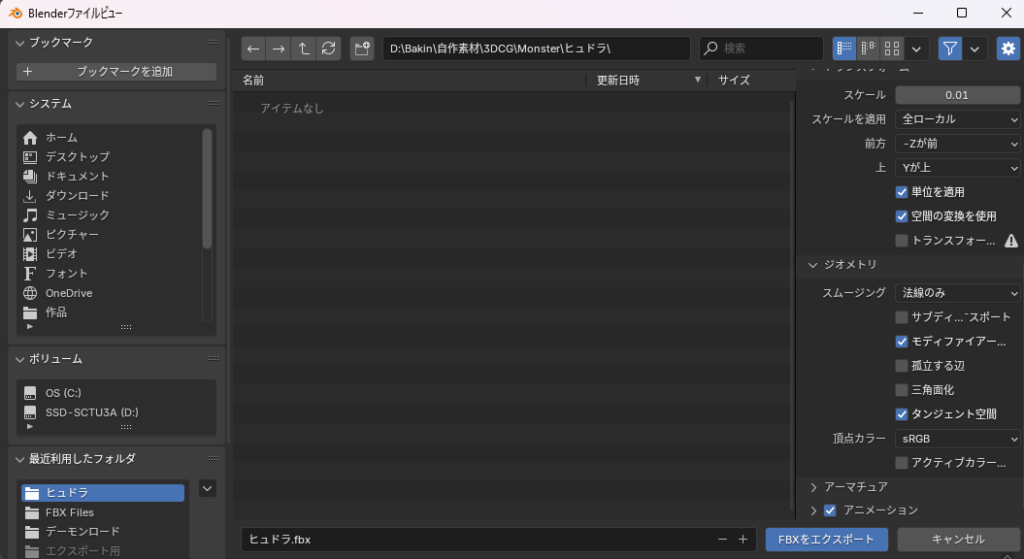
Now let’s export the Blender-converted asset for use in Bakin. Go to “File” → “Export” in the top-left and choose “FBX” as the output format.

The export settings to change from defaults are as follows:
- Save location: choose a convenient location
- File name: whatever you like
- Object types: select “Empty,” “Armature,” “Mesh,” and “Other” (hold Shift to select multiple)
- Scale: 0.01 (adjust per asset to match Bakin’s scale)
- Geometry (Smoothing): check “Tangent Space”
Once configured, click “Export FBX” and confirm the FBX file was saved to the specified location.
Importing the FBX File into Bakin
Launch Bakin and make sure your target project is already created. In the project, open “Resources,” go to “3D Stamps,” and click the ”+ Add” button.
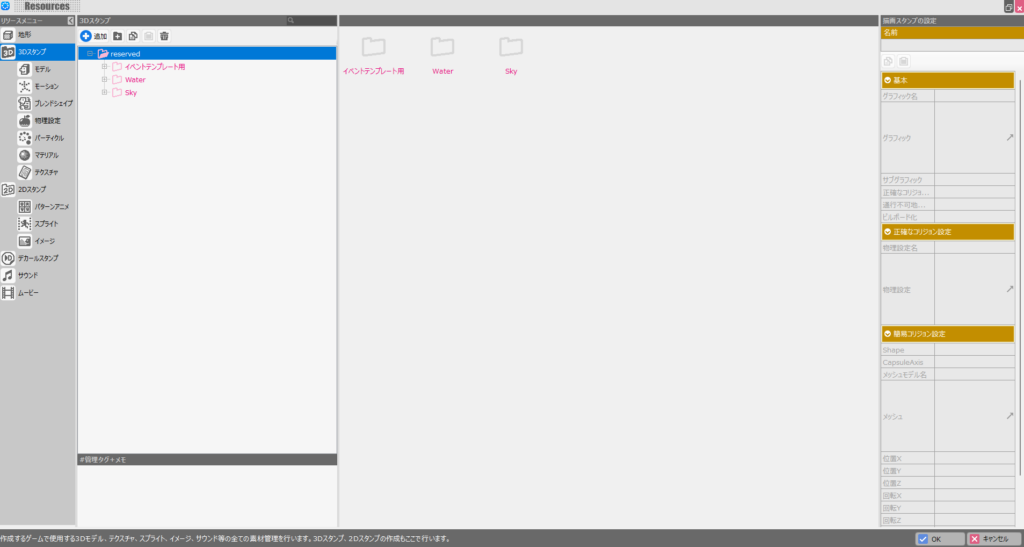
The resource import screen will appear. Select the “Create from File” tab, navigate to the FBX file exported from Blender, select it, and click “Add and Finish” in the lower right.
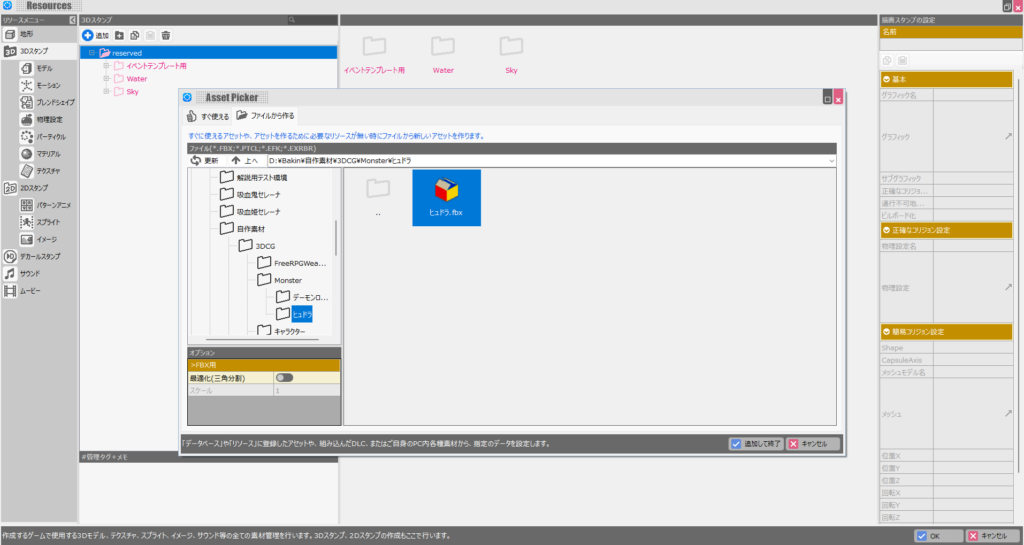
The Unity asset should now appear as a 3D stamp in Bakin.
If the import fails, the most common cause is that the model is too large. Try reducing the scale value in the Blender FBX export settings.
Although we set up shading with colors in Blender, Bakin won’t show the colors on import by default—they need to be set up in Bakin separately. Select “Material” in the right-side settings panel to apply colors.
In “Material,” just like with Blender shading, select the texture image file that came with the asset and Bakin will apply the colors accordingly.
For this asset, I used a JPEG file called “T_Hydra_BaseColor.jpg.”
Select the “Create from File” tab, navigate to the image file inside the Unity asset folder, select it, and click “Select and Finish.”
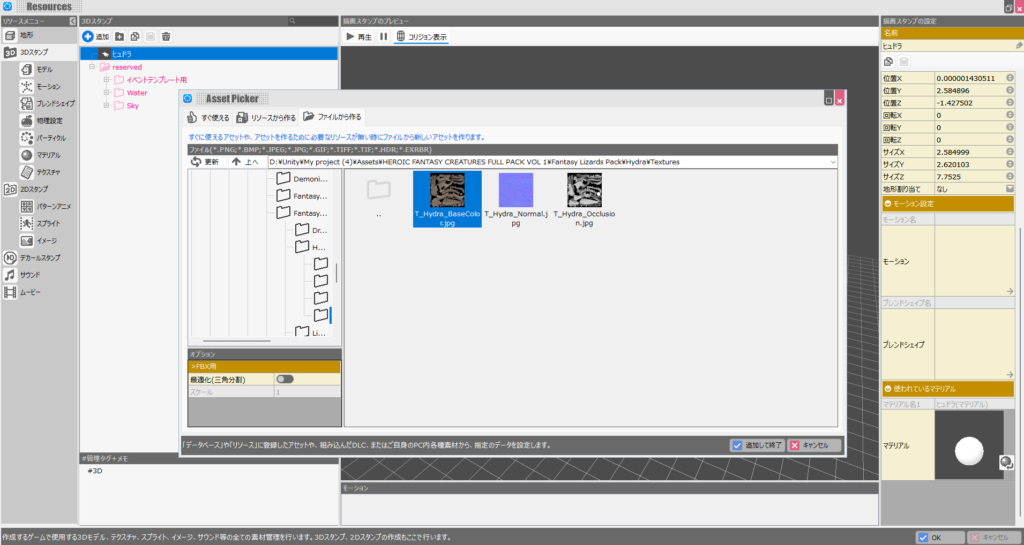
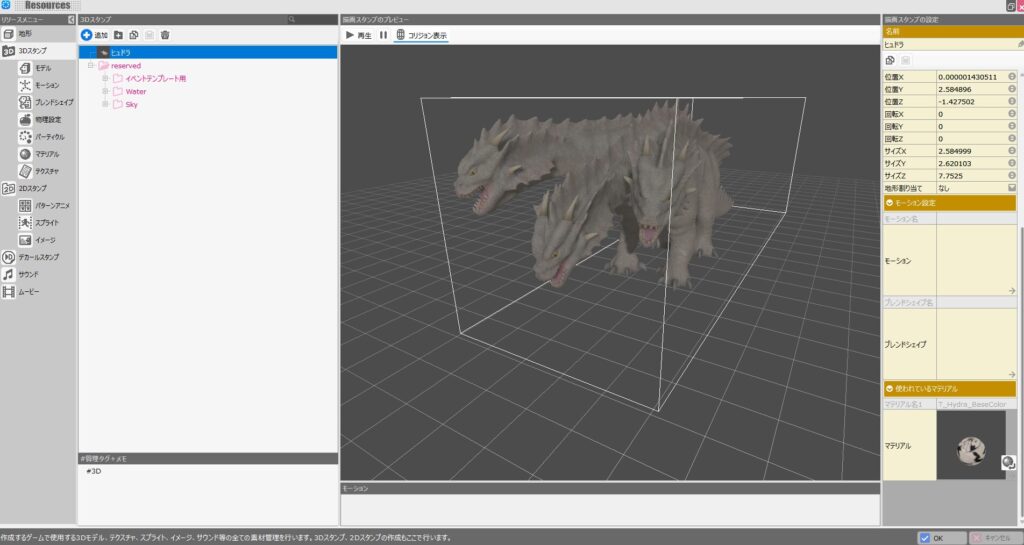
The model should now appear with its colors applied in Bakin, just as it did in Unity.
Keep in mind that since Bakin is primarily designed for pixel-art style games, the rendering difference will make the textures look noticeably rougher compared to Blender or Unity.
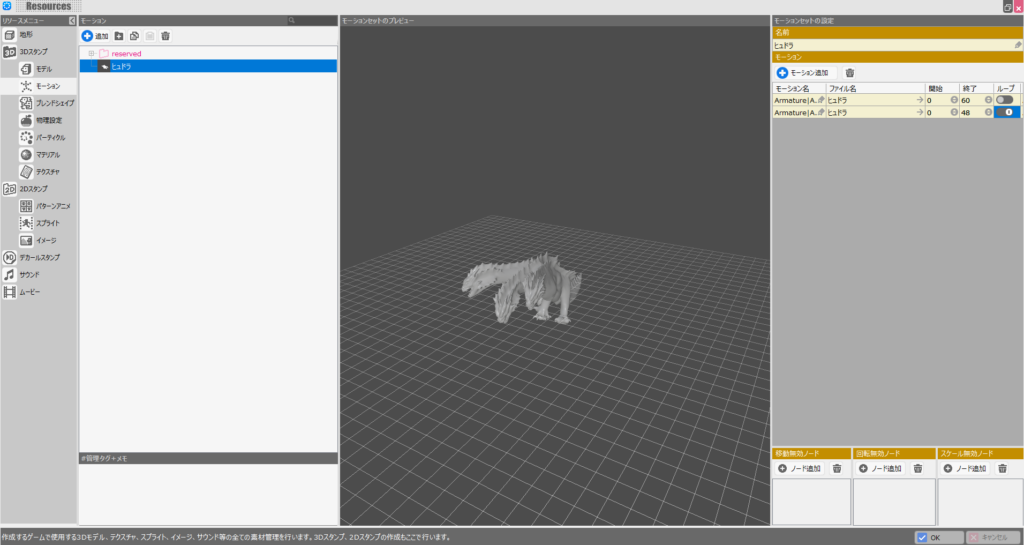
Next, let’s bring in the animations. With the newly added 3D stamp selected in “Resources” → “3D Stamps,” click the area to the right of the “Motion” label (currently empty) to open the motion file selection screen.
Since the FBX file we created already contains animations, select the “Create from Resource” tab, choose the file we just added, and click “Select and Finish.”
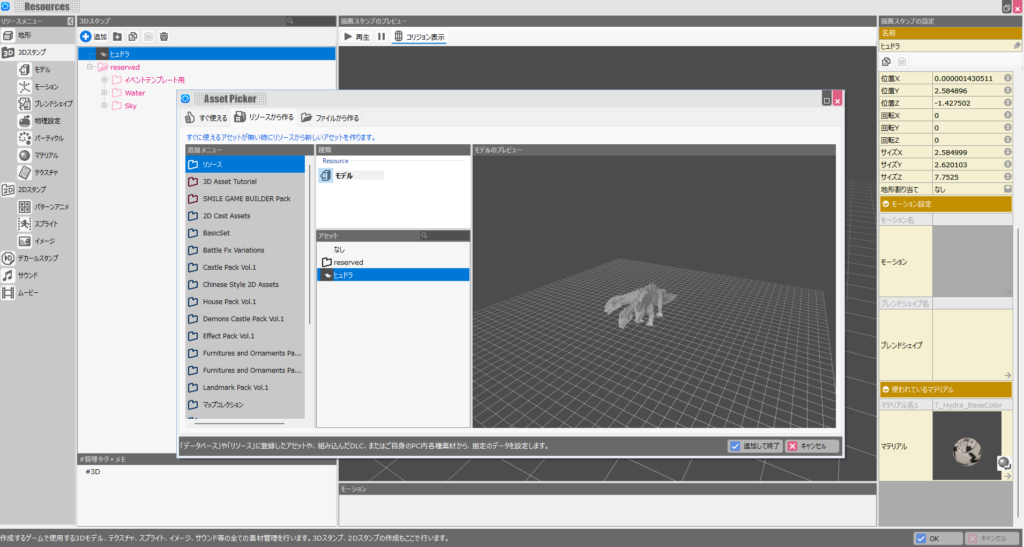
Bakin’s animation settings screen will open. Selecting a motion on the right should show the model animating according to the stored animation data.
Bakin has naming conventions for motions. Assigning animations to the corresponding motion names will allow the model to animate naturally for each of Bakin’s built-in actions.
Of course, you can also use custom motion names and reference them from cast events, so the choice is up to you.
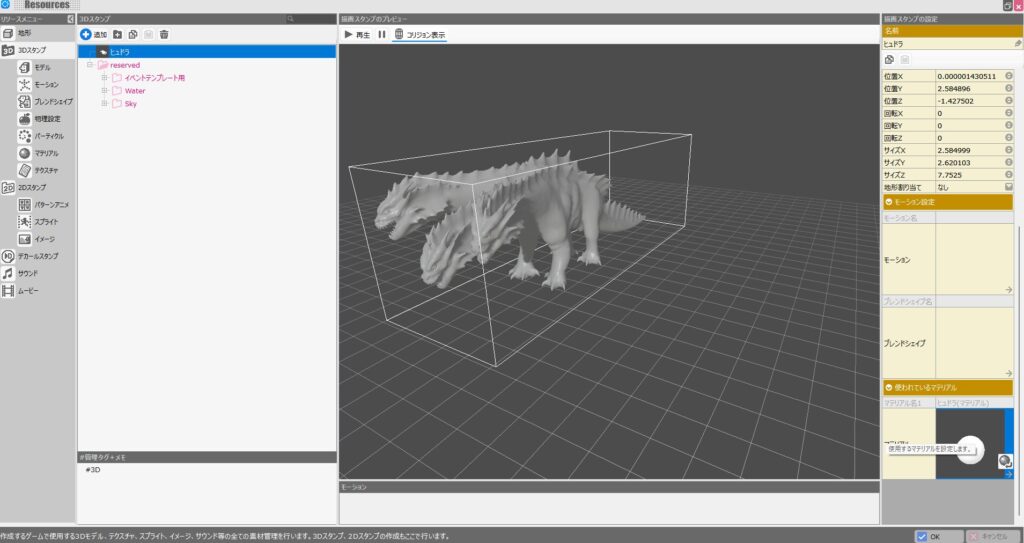
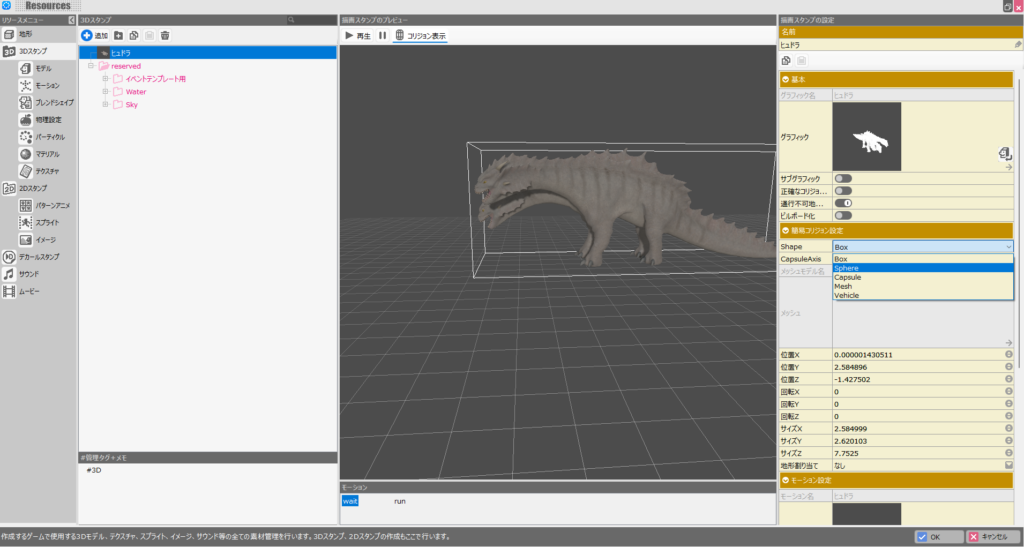
Once the material and motion settings are done, the stamp is essentially complete—but at this stage the collision (hitbox) is set much too large.
The collision is displayed as a white rectangular outline. The default size imported from the FBX will feel very out of place when you put the model into an actual game.
To adjust the collision, fine-tune the “Simple Collision Settings” on the right side to fit the model. Basic types include “Box” and “Capsule,” among others.
In my experience, “Box” is usually the best starting point and most natural-feeling option for most models, with the dimensions adjusted to match.
Collision settings should be tuned individually based on the model’s shape and the game’s needs.
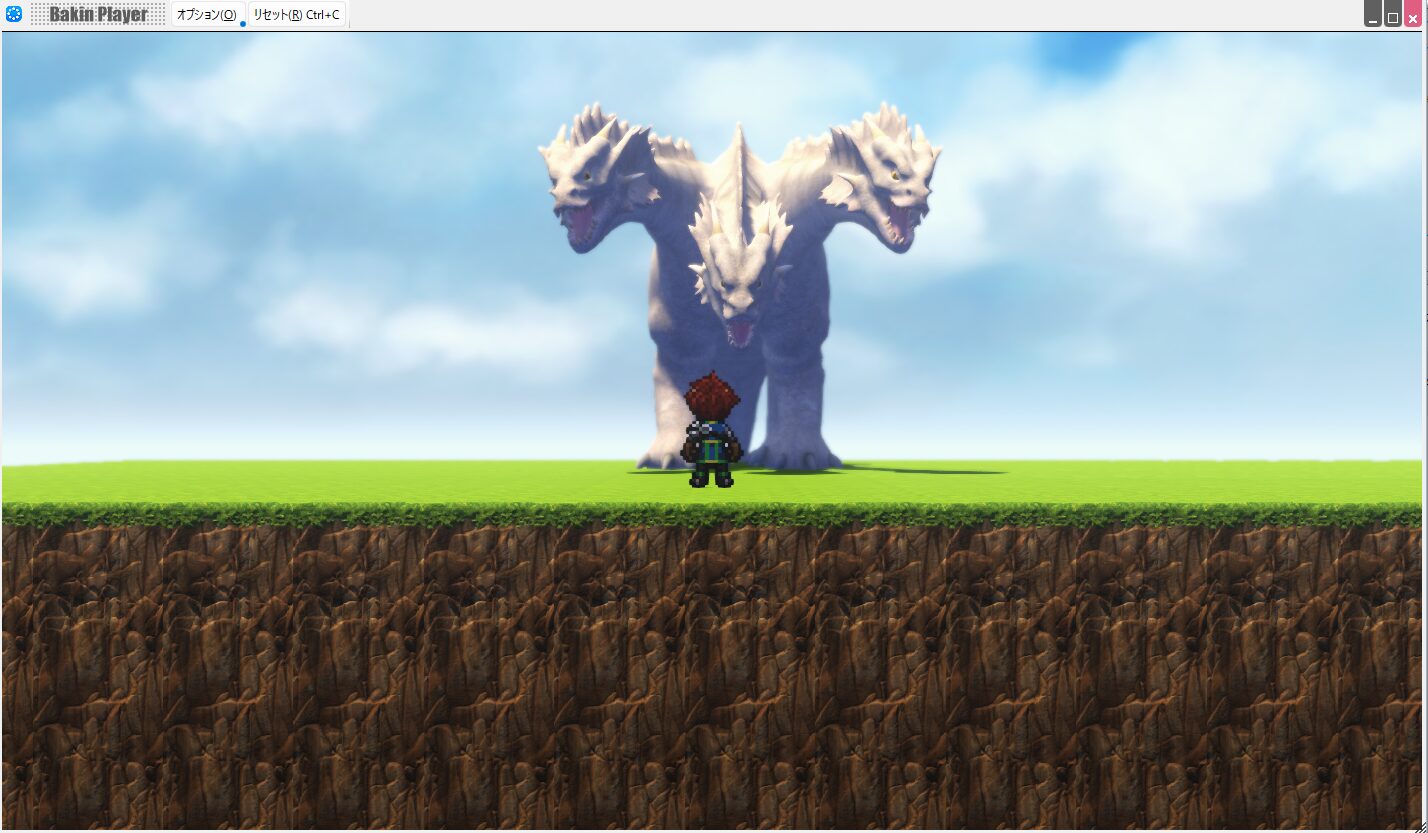
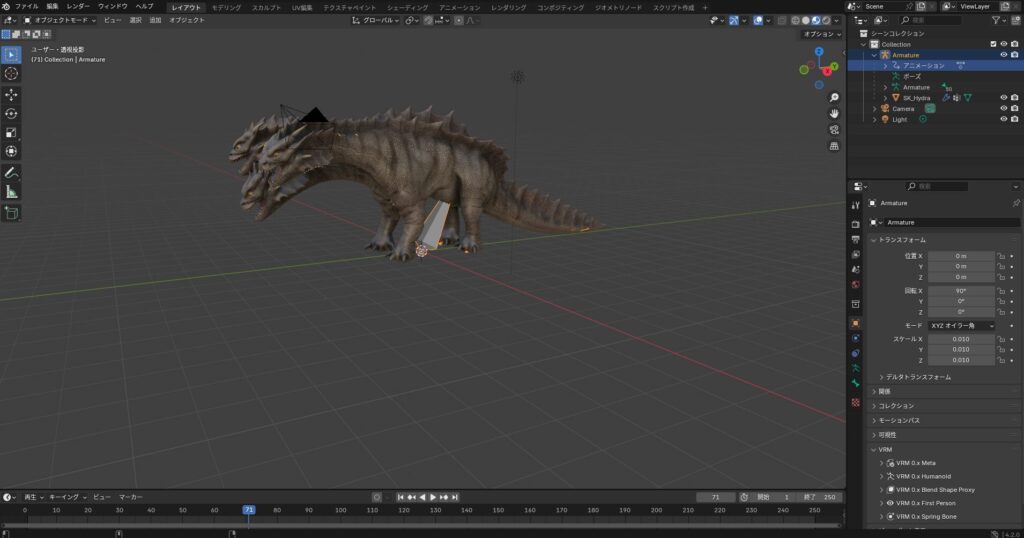
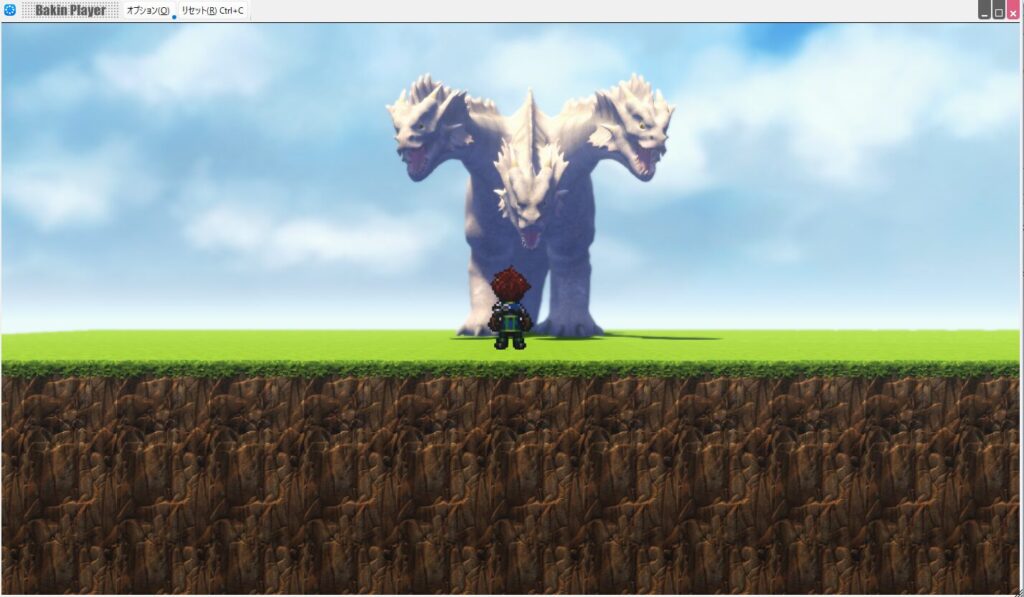
Here’s the final result displayed in Bakin. A powerful-looking monster that couldn’t be achieved with Bakin’s default assets is now part of the game.
Summary
In this article I covered how to import an animated Unity asset into Bakin via Blender. I thought it would be straightforward since I’d imported VRoid models before, but the Blender operations ended up taking more time than expected.
This article serves as a personal reference so I don’t forget the steps—I hope it’s useful to someone else in the future. I’ll continue covering how to build games in Bakin going forward—check back if you’re interested.
📚 Series: RPG Maker Bakin: Game Development Guide (12/17)