Introduction
This article explains how to publish a self-made manga on Kindle. This guide assumes you’ve already created your manga. If you haven’t made one yet, start with the article below:

About Kindle Publishing
Kindle publishing means making your self-created book available on Amazon’s Kindle Store.
Once published, your book can earn royalties either by being sold at a price you set, or by being read by Kindle Unlimited subscribers.
The basics of Kindle publishing are covered in detail in an earlier article — if you’re unfamiliar with the platform, read that one first:

Publishing a manga on Kindle follows essentially the same process as publishing a text-based book — but there’s one key difference. Text-based books and manga use different file formats.
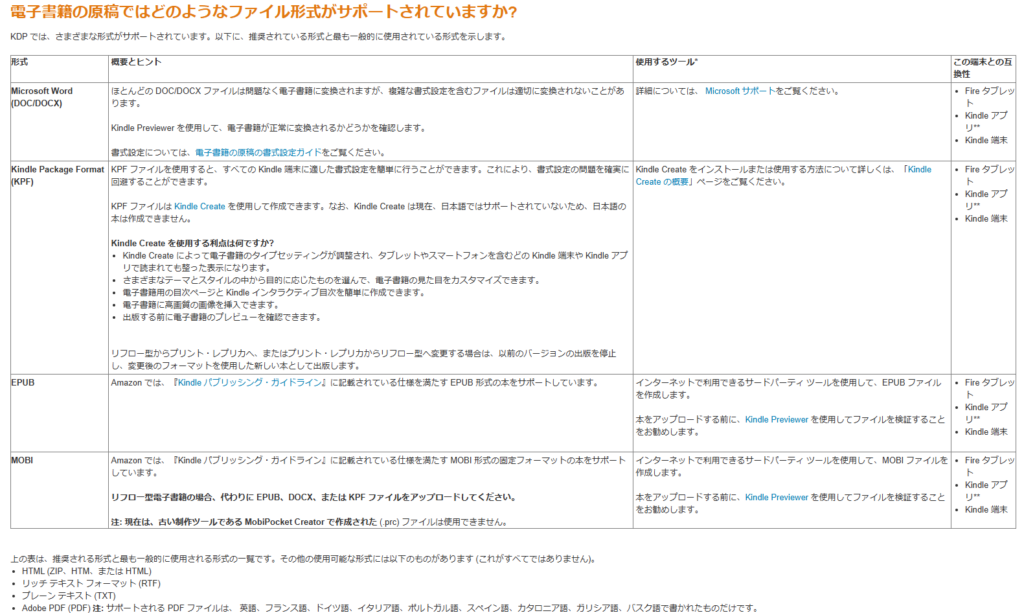
A text-based book created in Word can be uploaded directly to Kindle without any conversion. Manga, however, is made up of image files (GIF, PNG, JPG, etc.) — and image files alone are not supported for Kindle publishing.
The file formats Kindle accepts include Word files, HTML, TXT, PDF, and Kindle’s own formats (KPF and MOBI). Raw image files (GIF, PNG, JPG, etc.) are not on that list.
You could technically force a manga into Word by inserting each image with a page break — but it’s unnecessarily tedious and the result doesn’t look great. For image-based manga, the right tool is Kindle Comic Creator, which converts your image files into a Kindle-compatible format.
How to Use Kindle Comic Creator
Kindle Comic Creator is an official Amazon tool for creating manga and comic books for Kindle.
First, download it from the official page (https://kdp.amazon.co.jp/ja_JP/help/topic/G201217140) and install it on your computer.
Before launching the tool, prepare all the image files you want to include in your manga book. You’ll need them ready during setup.
When you launch Kindle Comic Creator, you’ll see the following screen:
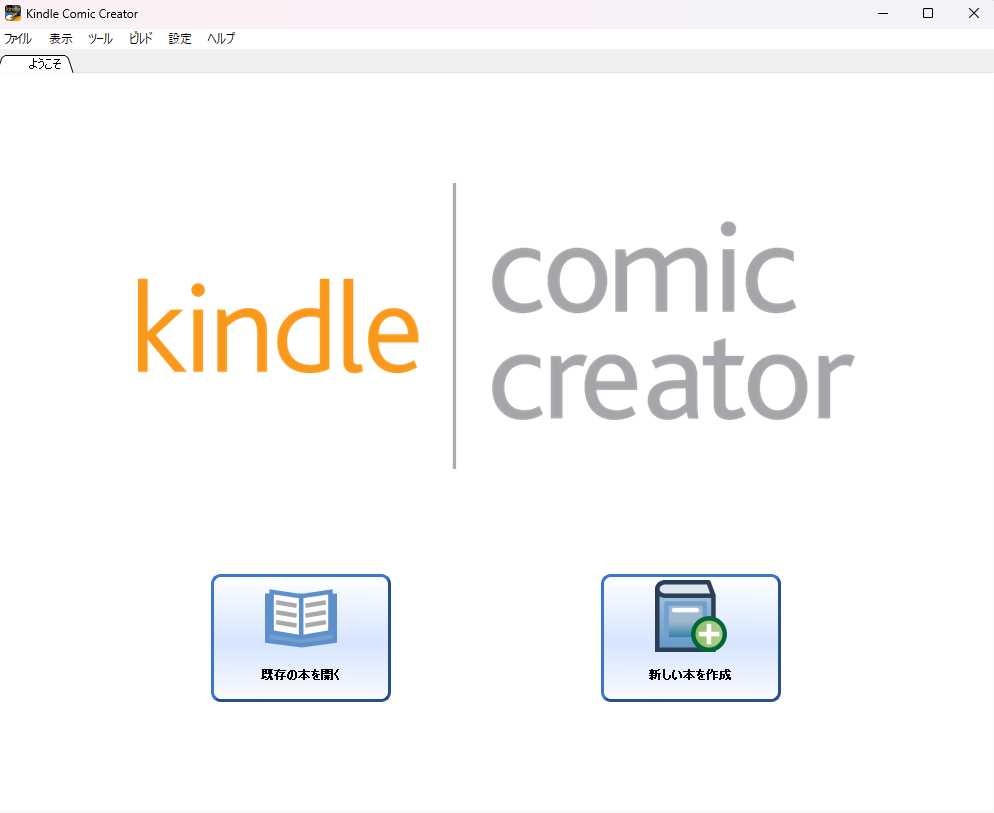
Click “新しい本を作成” (Create a new book) to start a new project. After you’ve created one, you can reopen it with “既存の本を開く” (Open an existing book). You’ll then be asked to configure the settings for your new book:
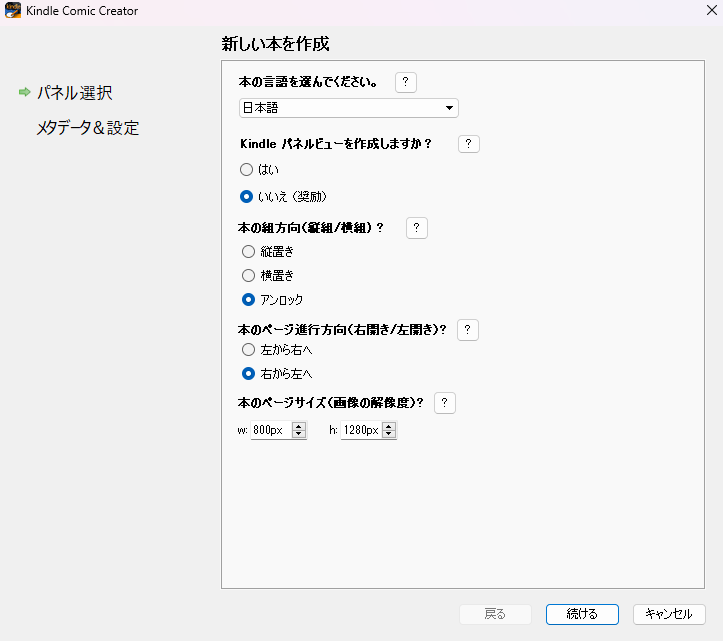
For first-time users, the default settings shown in the image above are fine as-is. The one setting to check is the page direction: Japanese-style manga is typically read right-to-left, so select that option if applicable.
Once you’ve confirmed the settings, click “続ける” (Continue) to proceed to the next screen:
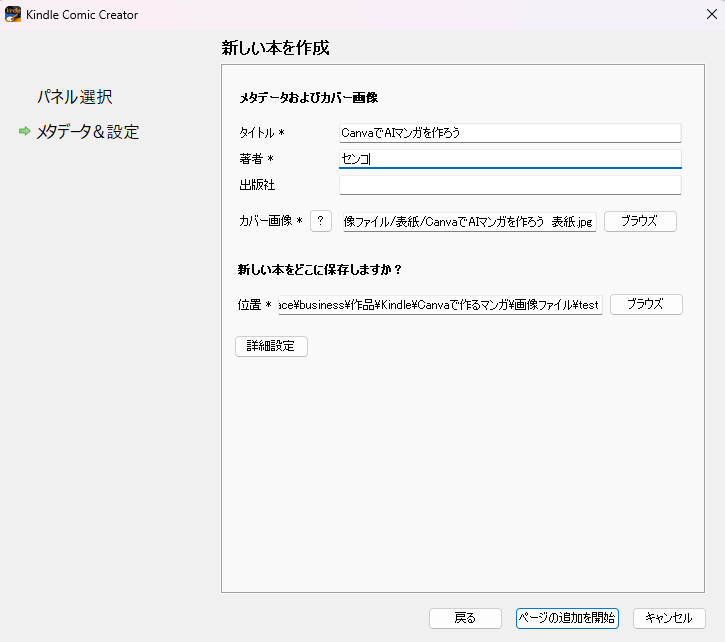
- Title: Enter the name you want to give your manga book.
- Author: Enter your pen name. If you plan to publish multiple books, keep the name consistent across all of them.
- Cover image: Set the cover image for your book — prepare this image in advance.
- Save location: Choose a folder where the project files will be saved. Create an empty folder somewhere convenient and select it.
When all settings are complete, click “ページの追加を開始” (Start adding pages). This opens a file selector — choose all the image files for your manga.
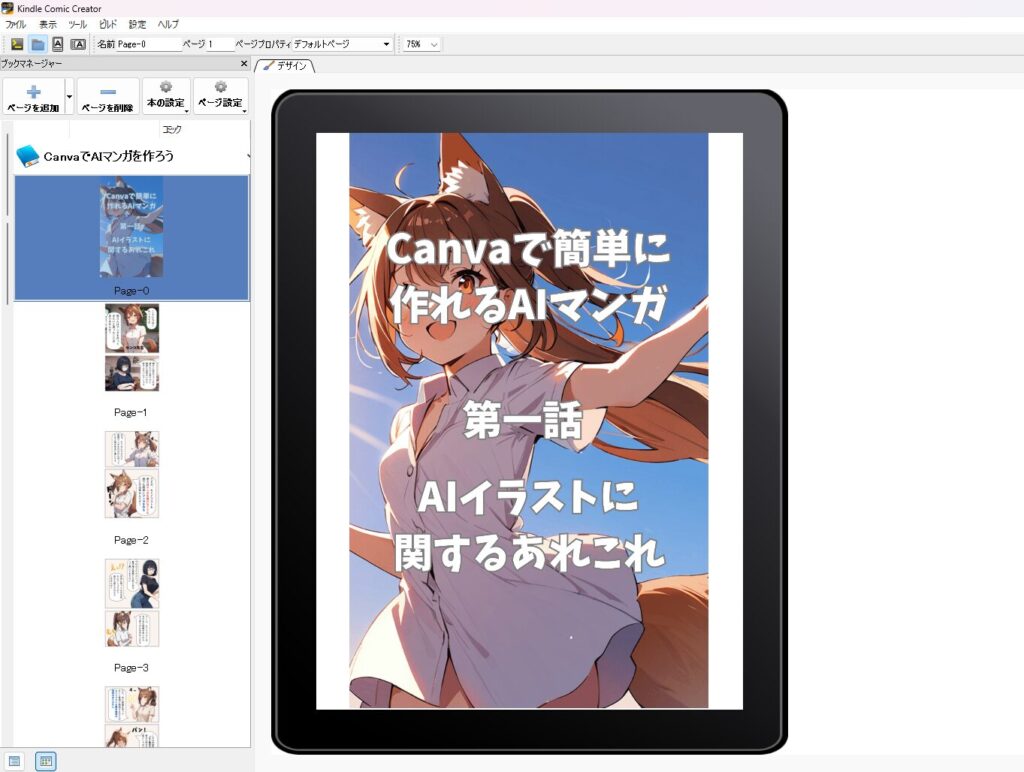
The selected image files will appear as pages in the tool, as shown above. Verify the page order is correct. If your manga has multiple chapters stored in separate folders, use “ページを追加” (Add pages) to include them all.
By default, pages are displayed one at a time — even on tablets or wide screens. This is fine for phone readers, but on a tablet held horizontally, a typical manga shows two pages side by side.
To enable two-page display, click “ページ設定” (Page settings) and select “2ページ表示” (Two-page display), as shown below:
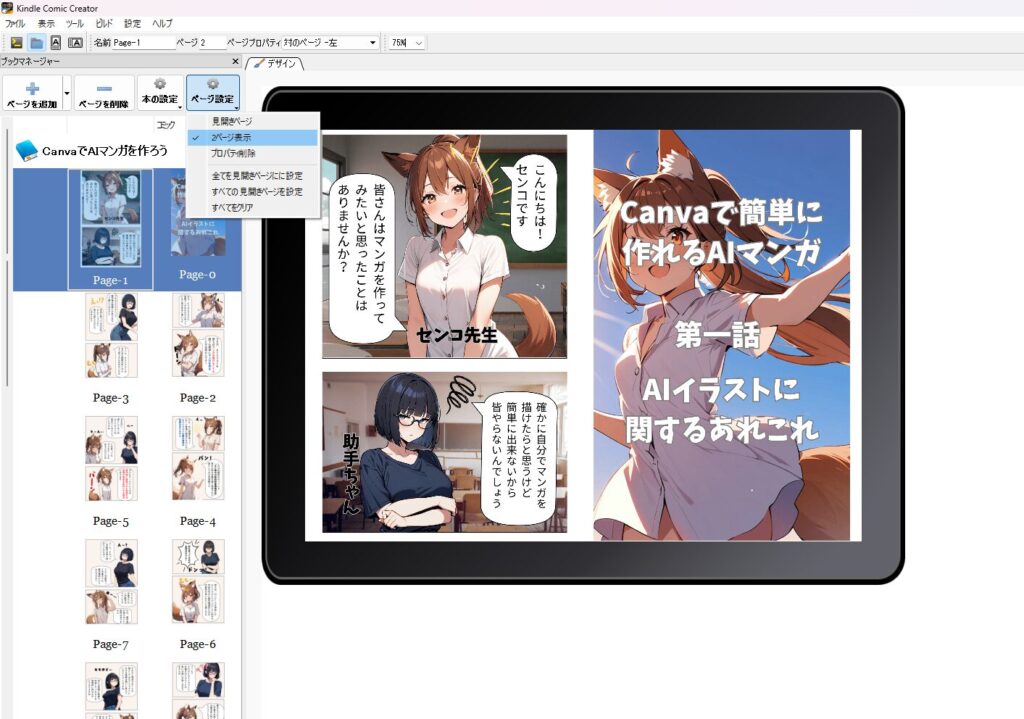
If you have a specific page selected in the left panel, the two-page setting applies only around that page. To apply it to all pages at once, select all pages in the left panel first, then change the setting.
Finally, export your book in Kindle format. Go to “ファイル” (File) → “KF8ブックとしてエクスポート” (Export as KF8 book) and save the file to your preferred folder.
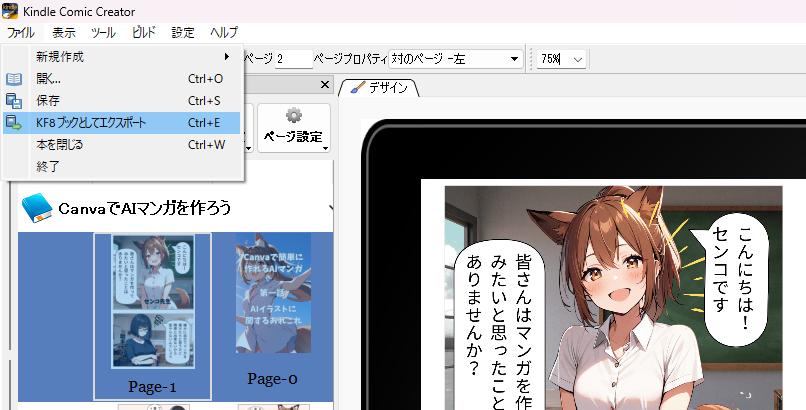
The export produces two MOBI files in the destination folder. The file with parentheses in the name appears to be a tool artifact — use the file without parentheses for your Kindle submission.
MOBI is one of the Kindle-supported formats mentioned earlier. This MOBI file contains your completed manga book, ready for publication.

Publishing Your Manga on Kindle
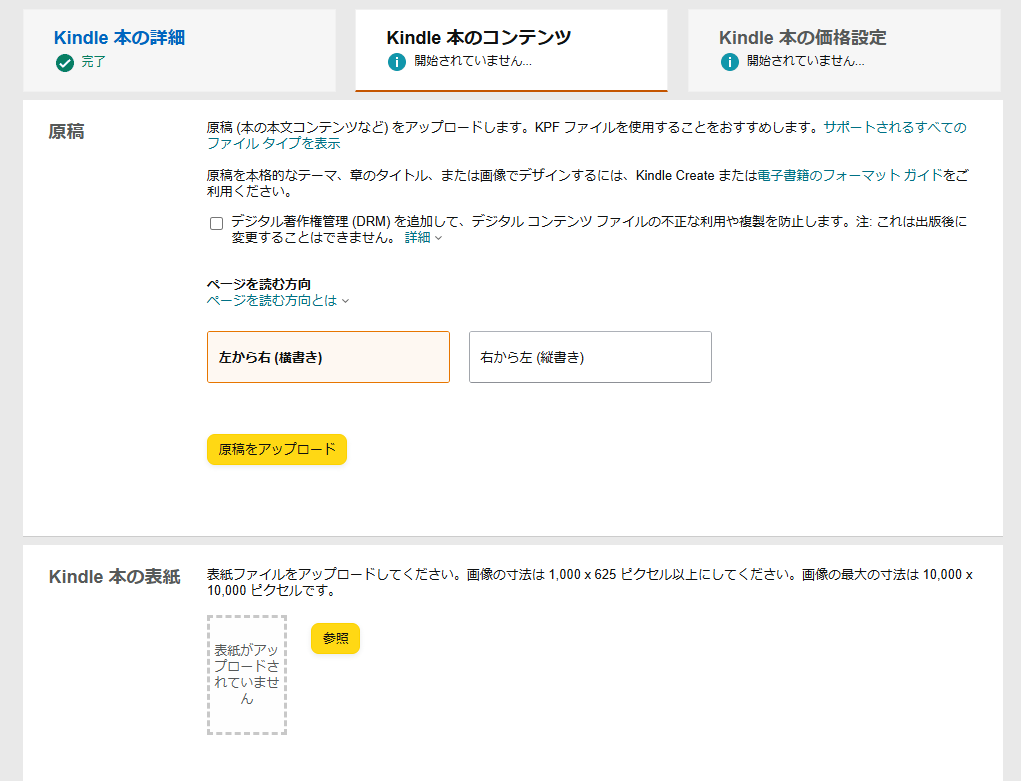
Once you have the MOBI file, the rest of the process is identical to publishing a Word-based book. Work through the KDP publishing steps and upload your MOBI file when you reach the “原稿” (Manuscript) field.
Everything else follows the same process described in the earlier Word publishing article. Your manga is now ready to be published on Kindle.
Summary
This article explained how to publish a self-made manga on Kindle. Combined with the earlier article, you now have everything you need to publish both text-based books and image-based manga on Kindle.
Self-publishing on Kindle is only going to become more common — and manga in particular has a far larger market than text-only books. AI-generated manga created by individuals is likely to become increasingly widespread (in my opinion, at least).
If you’re interested in publishing your own work, now is a great time to get familiar with the process.