Introduction
This article explains how to use Canva and Word — two free tools — to publish a self-made book on Kindle.
Publishing a self-written book used to require careful preparation, complex procedures, and considerable time — even at the doujinshi (independent publishing) level.
But with the spread of ebooks, anyone can now publish their own book digitally with minimal effort. Unlike print publishing, ebook publishing on Kindle requires very little paperwork, takes a short amount of time, and puts your book in front of every Kindle user on Amazon.
The ebook market is growing year over year and is projected to eventually surpass print. Within that market, Kindle — operated by Amazon — commands one of the largest market shares in the ebook space. The fact that anyone can now publish to that market, for free, is something genuinely remarkable about this era.
I’ve already published on Kindle myself, and I was surprised by how easy it actually was.
Here is a Kindle book I published:
Amazon: Canva Beginner’s Guide — How to Use Canva from Scratch (Kindle)

The Tools: Canva + Word
Kindle accepts a variety of formats, so you can use almost any tools to create your book. My recommendation is Canva + Word.
Canva is a graphic design tool with an extremely intuitive interface that anyone can learn quickly. It lets you use templates to easily create book cover images and the diagrams or images you want to embed inside your book.
Canva has more templates and is easier to use for image creation than most competing tools — it’s my top recommendation for anyone who wants to create images without a design background.
Canva has both a free and paid plan. Creating a simple book cover only requires the free plan, so there’s no cost for this use case.
Word is Microsoft Office’s word processing application — most people already have it installed.
You can technically write your book in any text editor, but Word has two key advantages: it makes heading styles easy to control, and it can automatically generate a table of contents.
Kindle recommends that ebooks include a table of contents with working links to each section. Books that don’t meet this requirement can be rejected during submission. Word makes this easy: assign heading styles to each section, and Word will auto-generate a linked table of contents from those headings.
Word also provides automatic proofreading for typos and awkward sentence structures — another quality-of-life benefit.
For these reasons, Canva + Word is my recommended combination for Kindle self-publishing.
The Publishing Process: Overview
Here’s the overall workflow:
- Create the book cover image — using Canva
- Write the book content — using Word (use Canva for any embedded diagrams/images)
- Preview the book before submission
- Register and publish on KDP (Kindle Direct Publishing)
Steps 1 and 2 can be done in either order. The key point is that you need two things: a cover image and the manuscript.
Step 3 uses a tool provided by Kindle to check the final layout before submitting. Even if your Word file looks fine on screen, the actual Kindle output can sometimes have broken layouts — previewing first is essential. Kindle can reject books with poor formatting.
Step 4, registering on KDP, requires some one-time setup, but after that initial registration, each new book only needs its own individual details filled in.
Step 1: Create the Book Cover Image in Canva
Open the Canva website (https://www.canva.com/) and create a free account (if you have a Google account, linking it takes just seconds).
Once you’re in Canva, create a new design with a custom size of 1600 × 2560 px — this is the ideal size for a Kindle book cover.
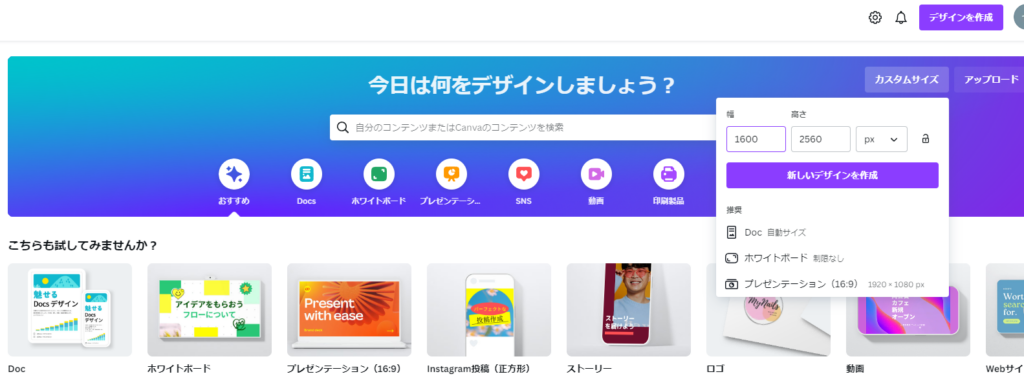
A blank white canvas at 1600 × 2560 px is now ready. All you need to do is design your book cover on this canvas.
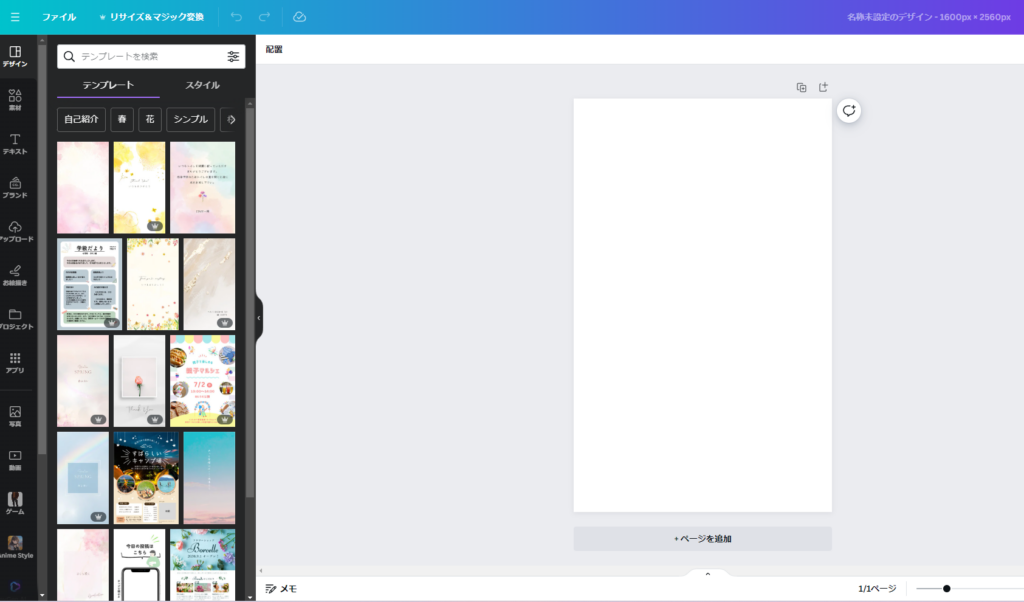
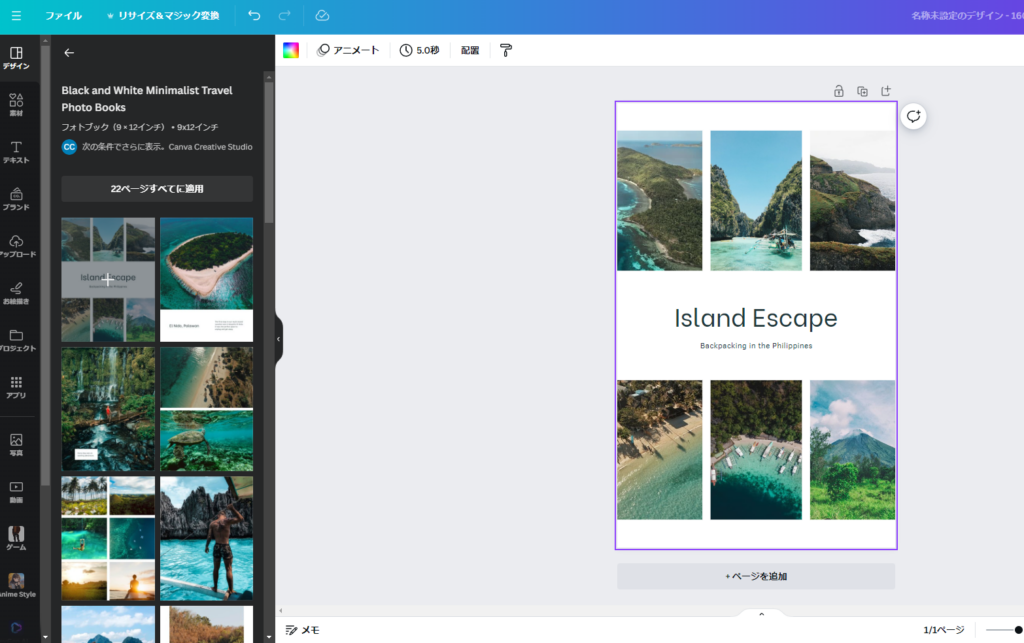
If you’re not sure where to start, Canva has a huge library of templates — even people with no design experience can produce a polished cover.
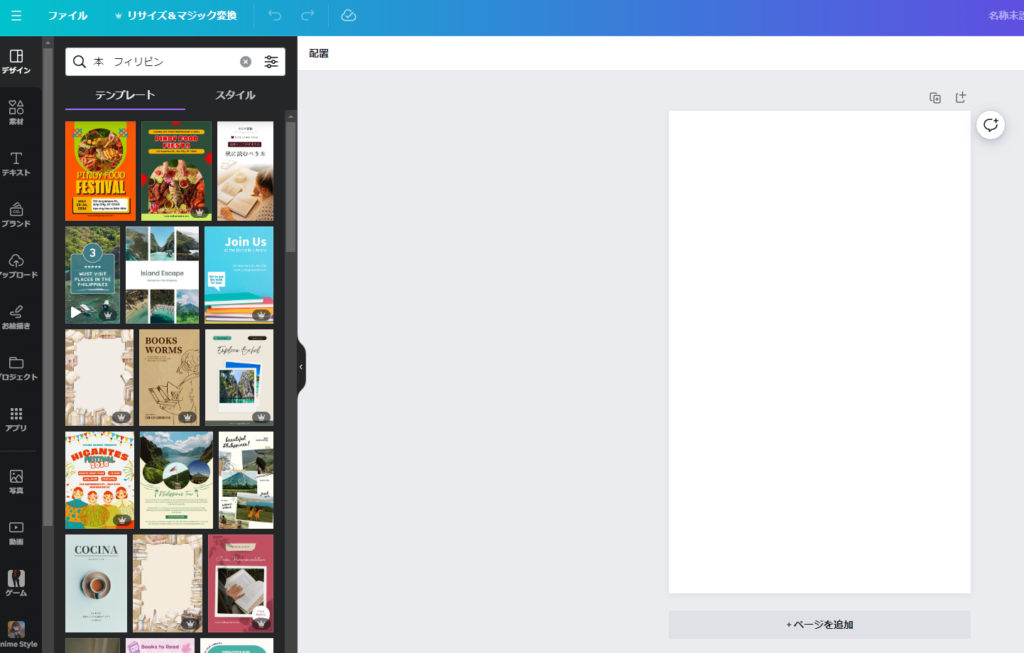
To find a template: select the “Design” tab on the left panel and search for a keyword like “book” or “book Philippines” (to get non-Japanese templates). Browse the results and click one you like to apply it.
Note: some templates are only available in the paid plan.
Canva designs — including those made with the free plan — are available for commercial use. That said, using a template as-is without adapting it to match your book’s content will likely result in low ratings from readers — you’ll need to customize it.
How much to customize is up to you. In my case, I replaced all the stock photos with my own photographs and added several text elements. The result:
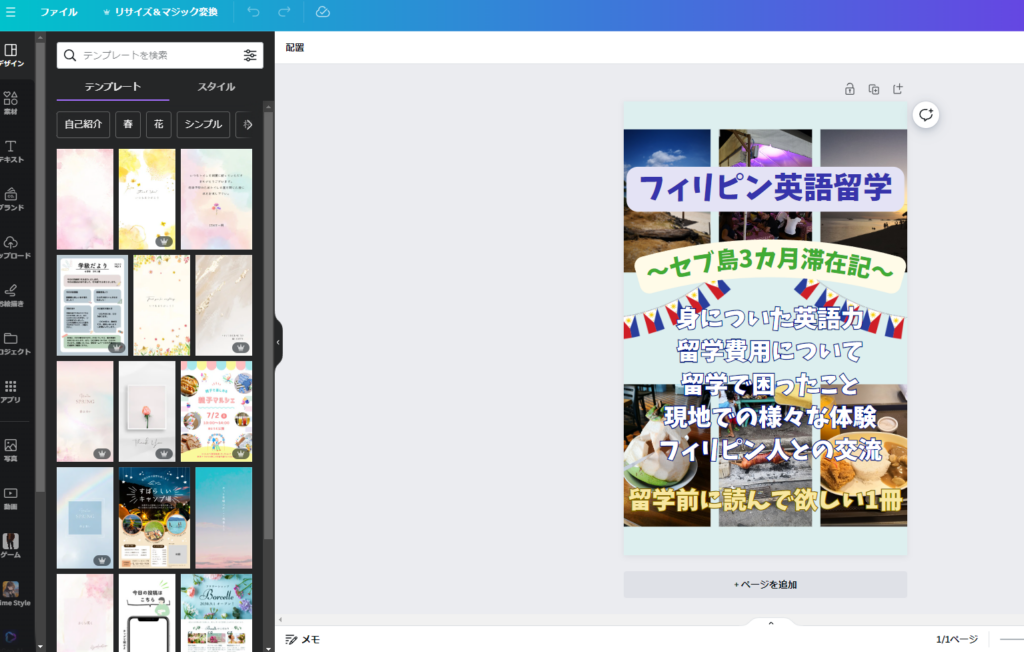
The end result looks completely different from the original template, despite only replacing the photos and adding text (plus a Philippine flag asset). It reads as a proper book cover — and it took less than an hour.
Design has tremendous depth, and normally it isn’t something an amateur can just do. But with a template as a starting point, anyone can produce something respectable in a short time. That’s exactly why I recommend Canva for this.
When you’re done, download the cover image: select “File” → “Download,” choose JPG format, keep the other settings as-is, and click “Download.”
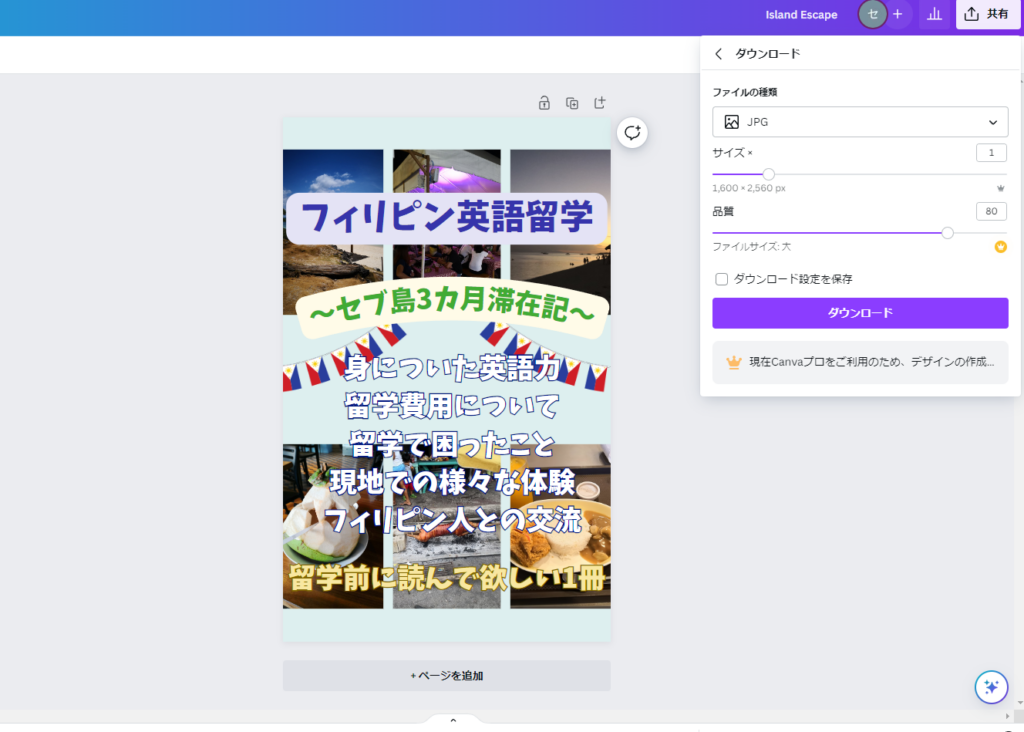
A save dialog will appear — choose your preferred folder and save. Cover image done. Now on to the manuscript.
Step 2: Write the Book Content in Word
Write your manuscript in Microsoft Word.
First, decide on your topic. If you’re not sure what to write about, ChatGPT is useful here. Give it some information about your interests or skills and ask it to suggest book titles and summaries that might be popular — that’s a solid starting point.
Of course, if you already know what you want to write about, use that.
Setting Up Heading Styles
Before you start writing, set up your heading styles first. If you skip this, the automatic table of contents won’t work, and navigating your document while writing will be much more difficult.
To create heading styles, in the Home tab, find the “Styles” section in the middle of the ribbon and click the small arrow button to the right of “Styles.”
Alternatively, press Alt + Ctrl + Shift + S simultaneously.
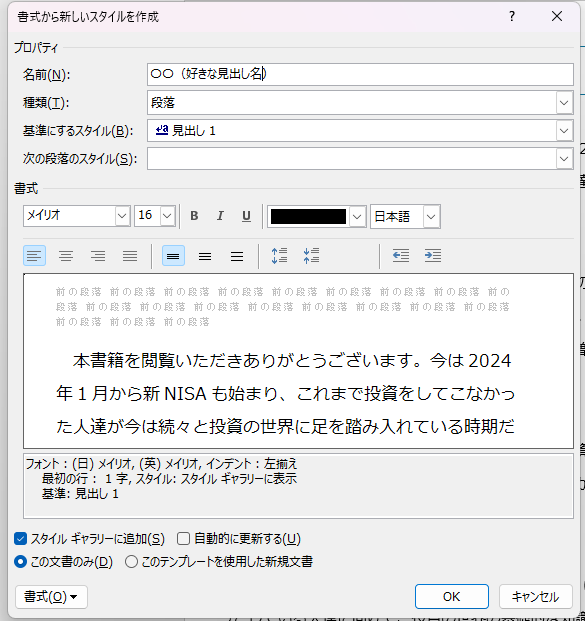
This opens the Styles panel. Click the “A+” icon in the lower left to create a new style.
A “Create New Style” window will appear. Set:
- Name: anything that will be easy to identify (e.g., “Chapter Heading”)
- Style type: Paragraph (leave as-is)
- Based on style: “Heading 1” for top-level chapter headings, “Heading 2” for sub-headings within chapters
Format these headings to stand out — bold text, borders, etc. work well.
It’s also fine to first style the headings the way you want in your document, then register those styles as heading levels using this method.
I recommend creating at least three styles upfront: a parent heading (chapter level), a child heading (sub-section level), and normal body text. This makes writing significantly smoother.
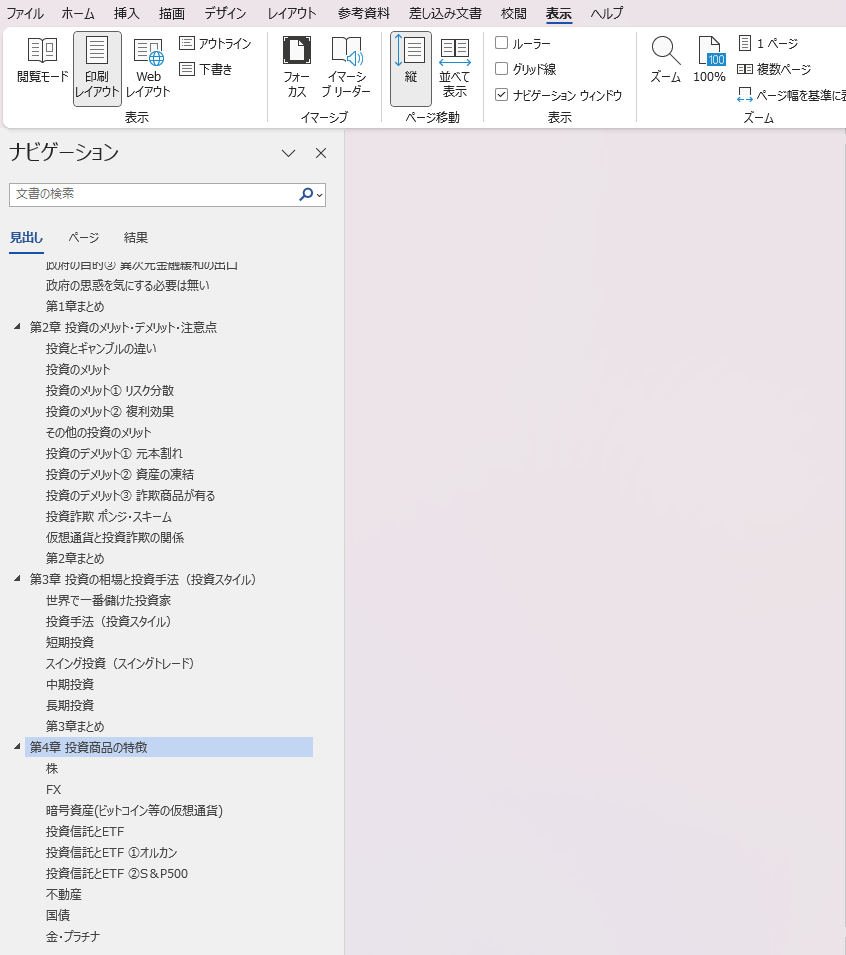
In my documents, I use large centered text for chapter headings and blue-bordered text for sub-section headings. The left navigation panel in Word shows chapters as parent items and sub-sections as child items:
With this structure in place, automatic table of contents generation is straightforward.
Generating the Table of Contents
With headings configured, generating a table of contents is simple.
First, create a blank page where you want the table of contents to go, and place your cursor there.
Then go to the “View” tab in the top ribbon and check “Navigation Pane” to see your heading hierarchy.
Next, go to the “References” tab and click “Custom Table of Contents.”
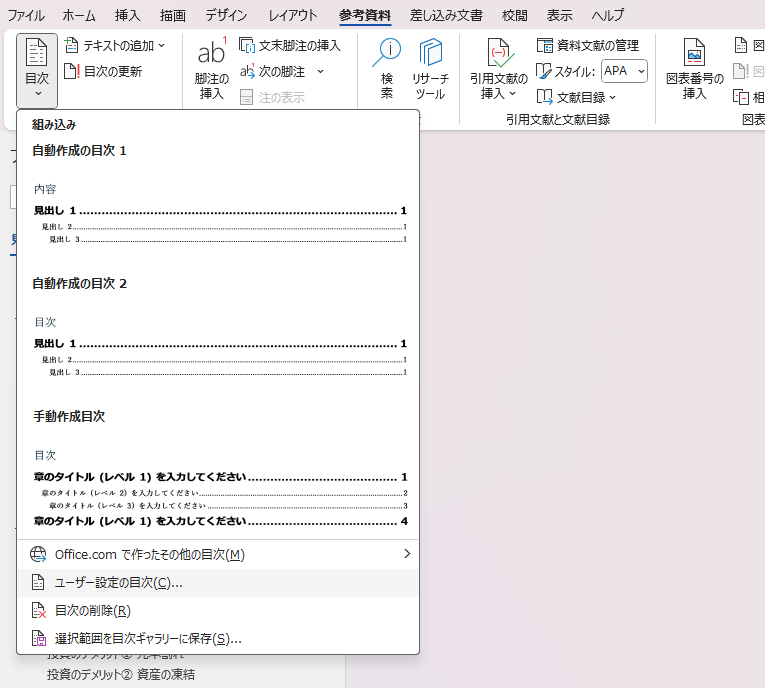
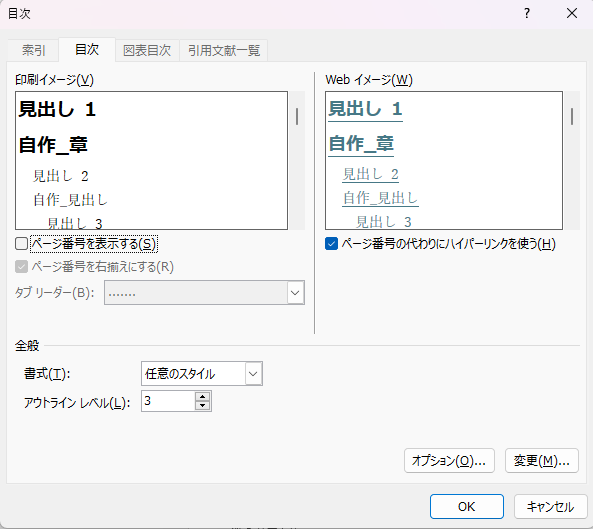
In the dialog that appears:
- Make sure “Use hyperlinks instead of page numbers” is checked
- Uncheck “Show page numbers”
For ebooks, page numbers don’t make sense — the page layout changes depending on the reader’s device and font settings. Removing page numbers and using hyperlinks instead is the correct approach.
Click “OK” when done.
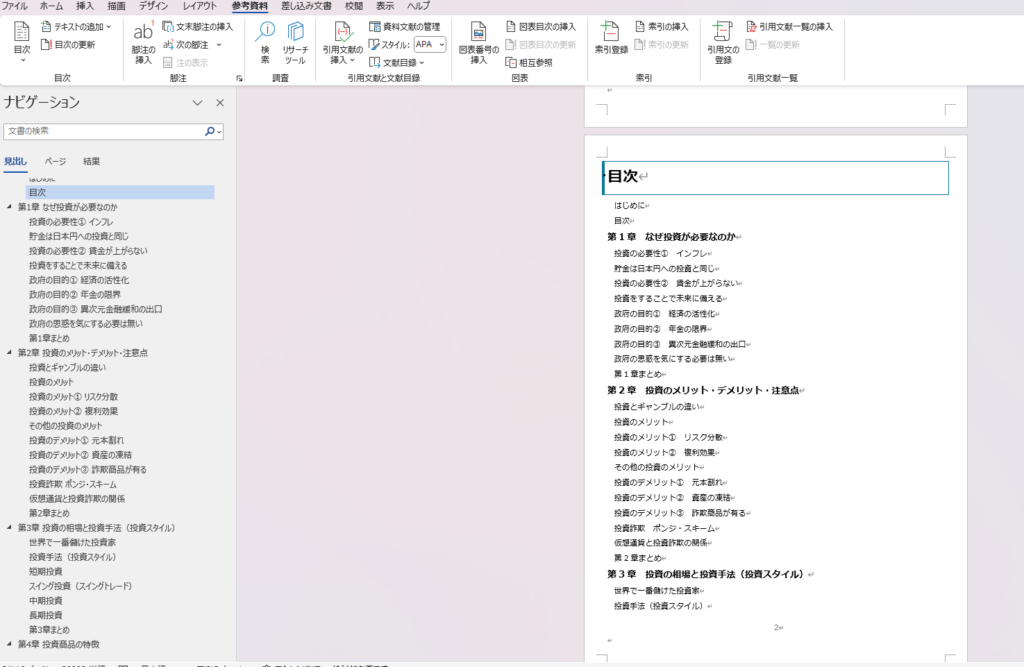
The table of contents is inserted, mirroring your navigation structure:
The default formatting may result in more pages than necessary. Adjust the font size and paragraph spacing to your taste.
A note: some publishers try to pad their page count (since Kindle Unlimited pays by pages read) with an unnecessarily long table of contents. I think this is counterproductive. A bloated table of contents makes a bad first impression, and putting your energy into quality content will generate more revenue in the long run.
Step 3: Preview the Book Before Submission
Before submitting to Kindle, you need to verify that the layout looks correct and that the table of contents links work properly. Submitting a book with broken formatting or non-functional links risks rejection.
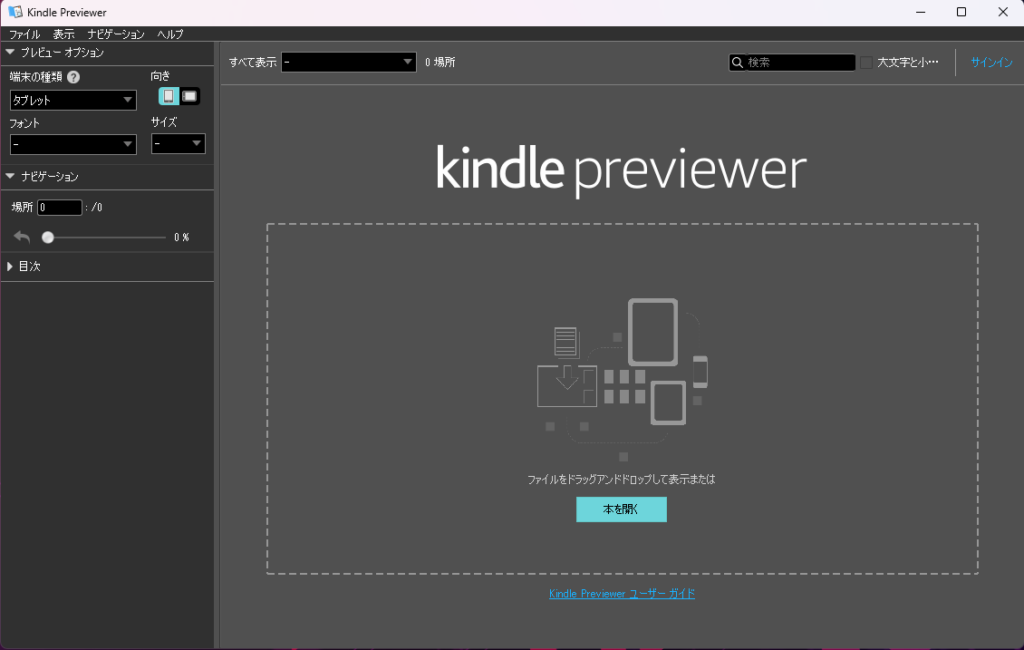
Use Kindle Previewer 3 — the tool Kindle provides for this purpose.
(There’s also Kindle Comic Creator, but that’s specifically for comics — it’s not needed for text-based books.)
Download and install Kindle Previewer 3 from:
https://kdp.amazon.co.jp/ja_JP/help/topic/G202131170
Once installed, open it.
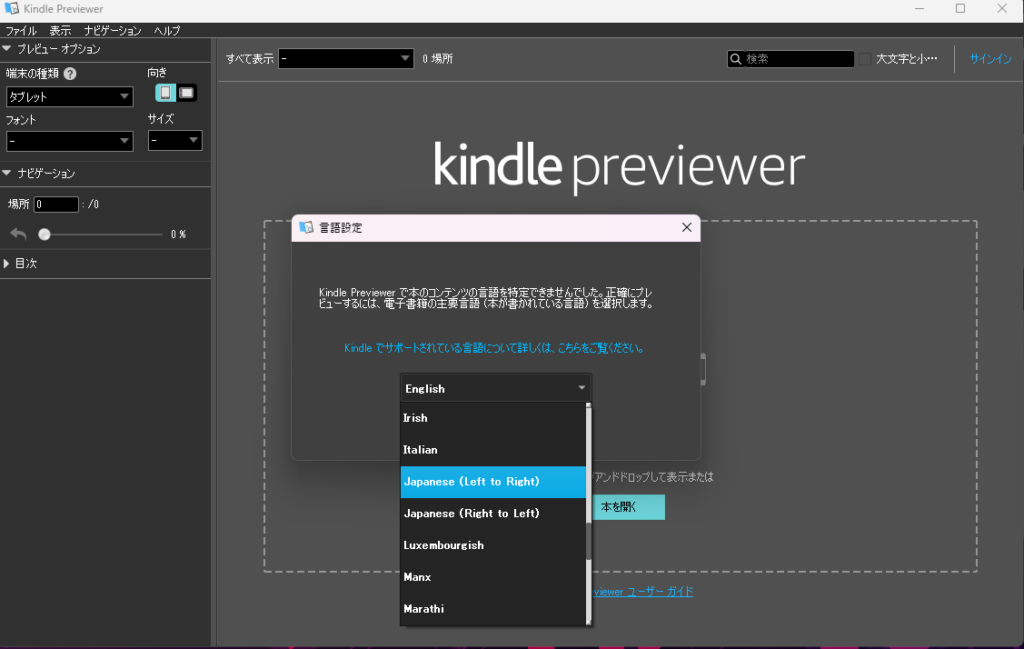
Drag and drop your Word file into the center of the screen. Before doing so, you’ll need to set the book’s language and reading direction:
- For Japanese text, choose left-to-right (horizontal writing) or right-to-left (vertical writing)
- I write horizontal text, so I use left-to-right
The preview will load and display your book as it will appear on Kindle:

Go through every page and check for layout issues. If something looks broken, fix it in the Word file and re-preview.
Also test every table of contents link — click each entry and confirm it jumps to the correct section.
At the top left of the preview window, there’s a “Device” dropdown. Test the layout on multiple device types (not just the default “Tablet”).
Once everything looks good, you’re ready to publish.
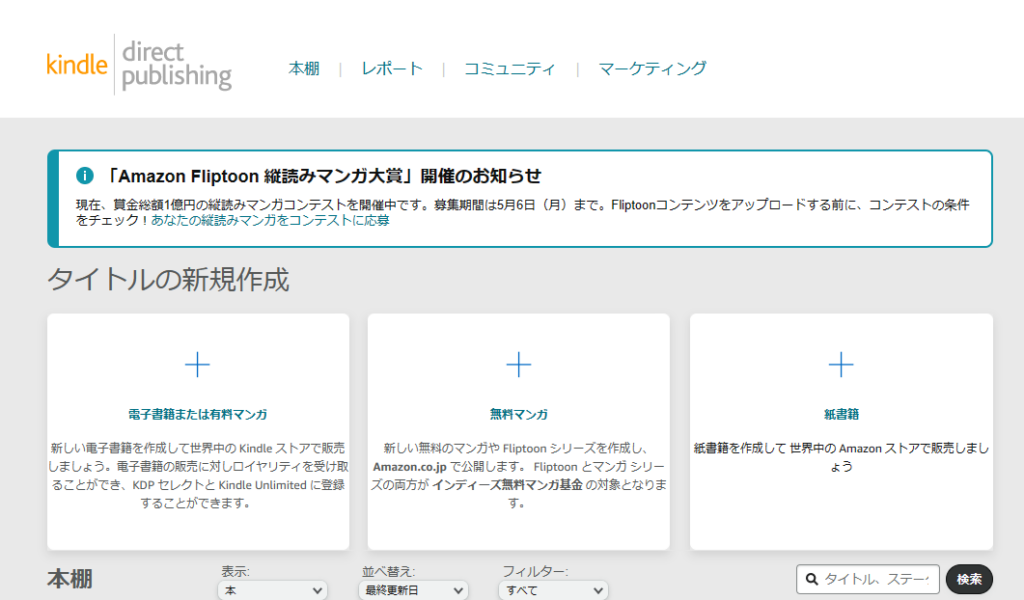
Step 4: Register and Publish on KDP
To publish on Kindle, you need a KDP (Kindle Direct Publishing) account. If you have an Amazon account, registration is straightforward:
https://kdp.amazon.co.jp/ja_JP
You’ll need to register a bank account and complete tax-related information during setup. Review those sections carefully.
After registration, you’ll see the KDP dashboard. Select “eBook or Paid Manga” on the left.
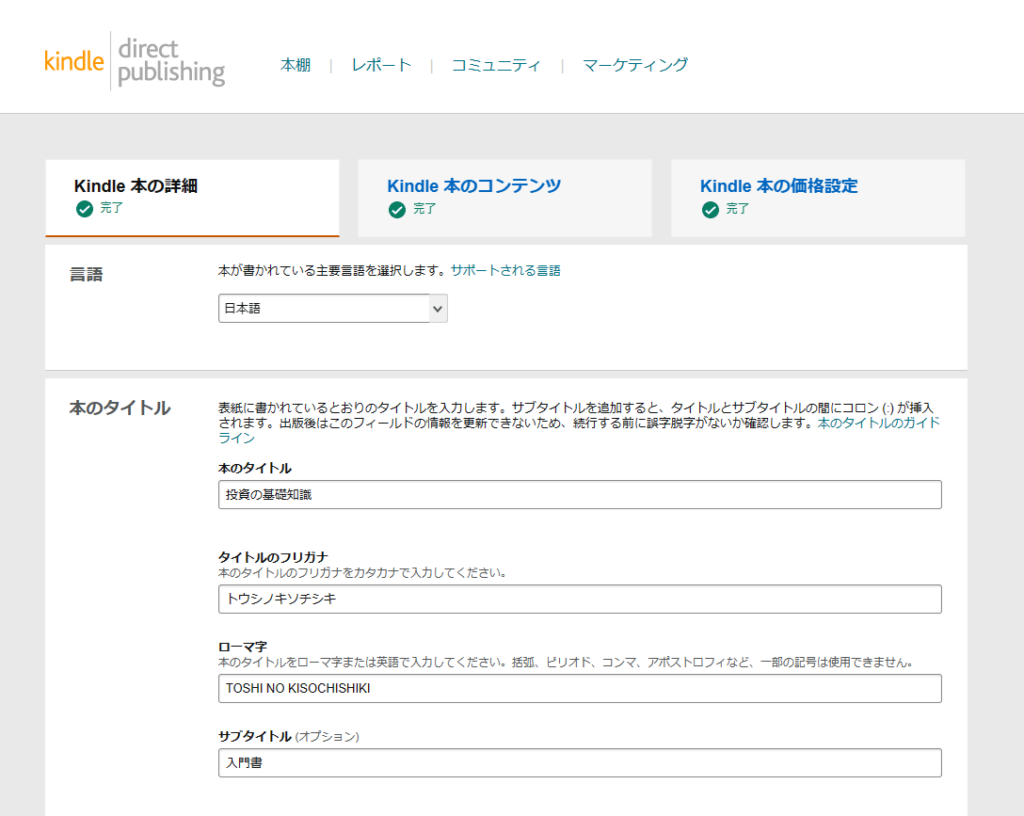
A form will appear where you fill in your book’s language, title, and other basic information. Most fields are self-explanatory.
A few particularly important fields:
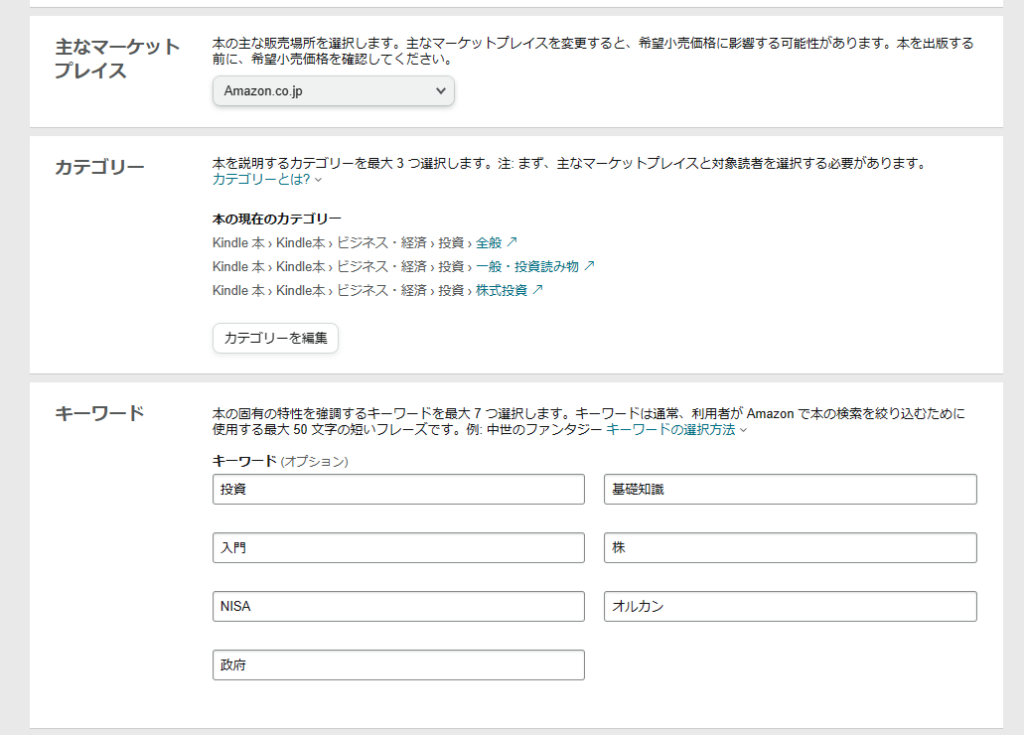
- Primary marketplace: for Japanese books, use
Amazon.co.jp. For English books, considerAmazon.com— the US market is vastly larger. - Category and keywords: set these carefully. Like SEO for a blog, these determine whether readers can find your book through search.
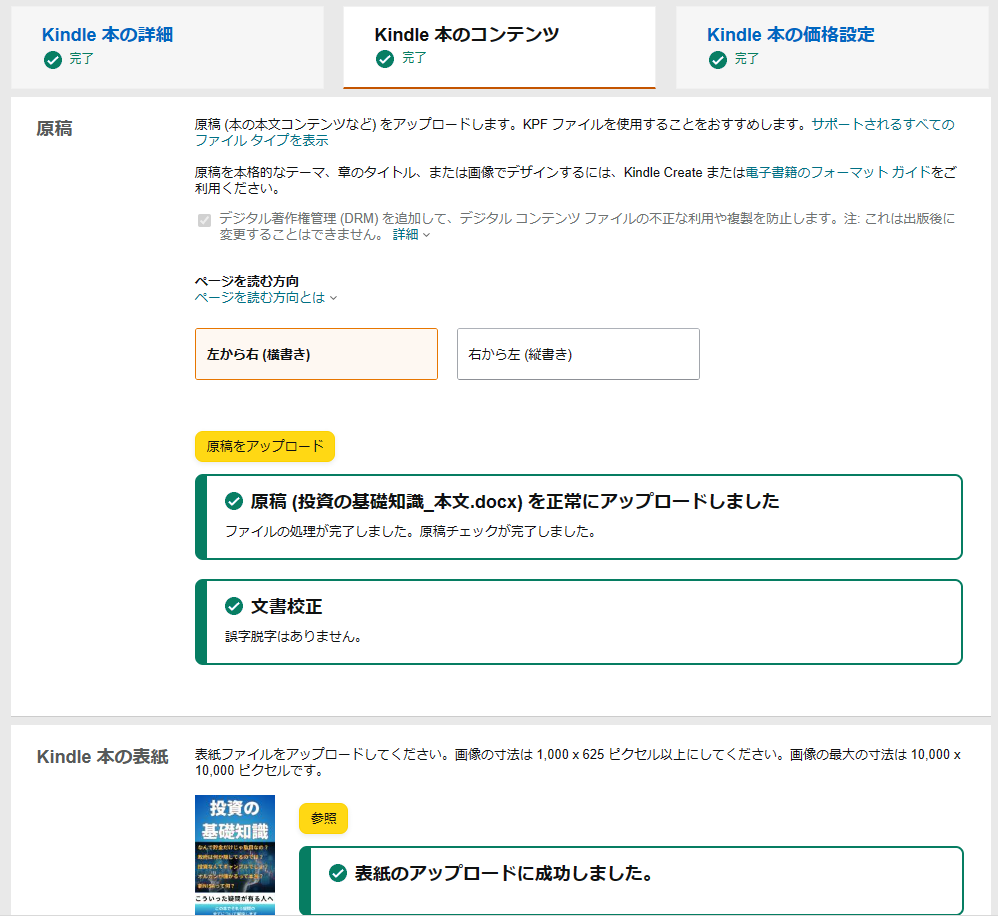
The next screen lets you upload your manuscript (the Word file) and cover image (the JPG from Canva).
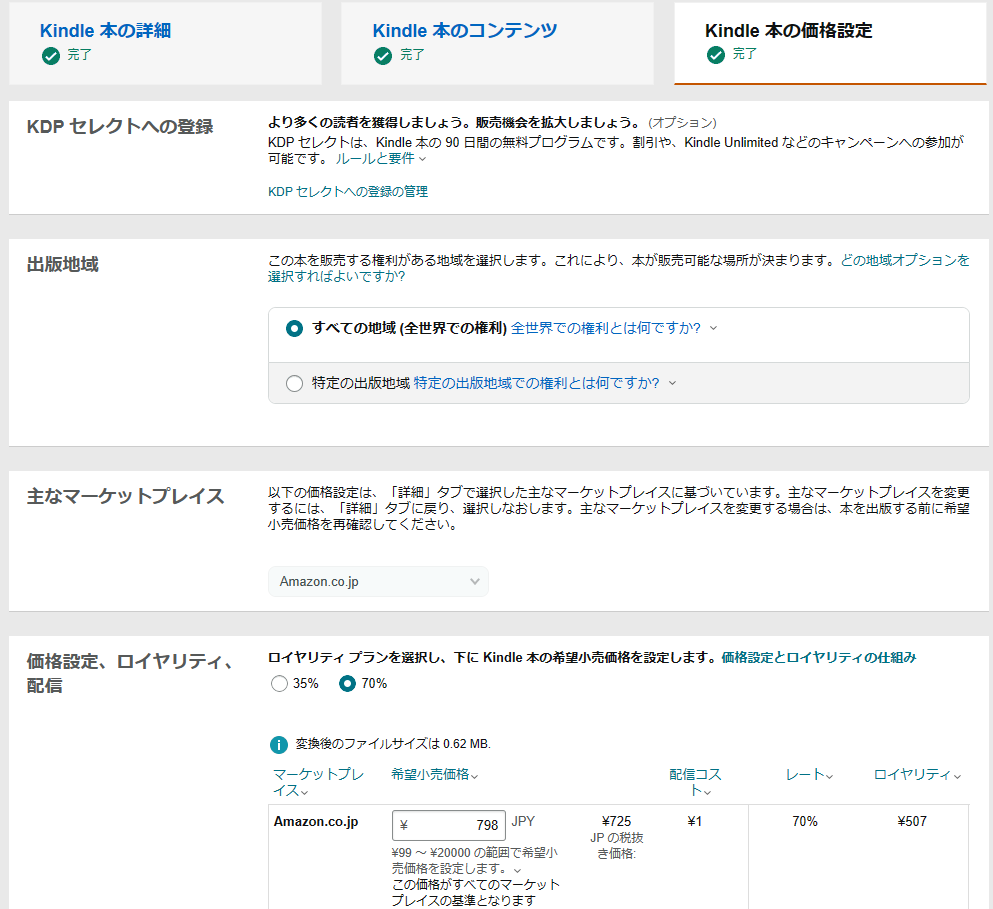
After that, the pricing screen appears. The most important setting here is the royalty rate — 35% or 70%.
To qualify for 70%, you must enroll in KDP Select. Enrolling in KDP Select requires that the book be exclusive to Kindle for 90 days. Selling the same book elsewhere during that period is a terms violation — potentially resulting in a permanent ban from Kindle publishing. If you enroll, follow the rules.
KDP Select also makes your book available through Kindle Unlimited, earning revenue based on pages read. For most self-published authors, Kindle Unlimited earnings will exceed individual sales revenue, so enrolling in KDP Select is generally the better choice.
Once all fields are complete, click “Publish Your Kindle eBook.”
Kindle will review the submission — this can take up to 48 hours. They’re checking that the book meets quality standards. If everything passes, you’ll receive an email confirmation and the book status will change to “Live” in your KDP dashboard.
Then it’s up to readers to find and read your book. (You can run paid ads through Amazon if you want to promote it.)
When you step back and look at the whole process, it’s surprisingly simple. As long as you have a cover image and a manuscript, you can publish.
Kindle Publishing as a Side Business
For anyone considering Kindle publishing as a side income — here’s a realistic picture of what to expect.
There are two revenue streams:
- Book sales — royalty rate × book price per sale
- Kindle Unlimited pages read — approximately ¥0.5 per page read (subject to change)
For a 500-yen book at 70% royalty: ¥350 per sale.
For a 100-page book: ¥50 per full read through Kindle Unlimited.
Realistic Monthly Revenue
Assume one 100-page book at ¥500, enrolled in KDP Select at 70% royalty. A realistic month might look like: 10 sales + 10,000 pages read.
That works out to: ¥3,500 (sales) + ¥5,000 (Kindle Unlimited) = ¥8,500/month.
But 10 sales and 10,000 pages read are actually challenging goals for a self-published first-time author. Many authors will earn less than this.
Kindle publishing is genuinely hard to monetize quickly.
Realistically, a good first book might earn ¥3,000 over its lifetime. If it takes two weeks to write one book, you’re looking at maybe ¥5,000–6,000 per month working at full pace.
Kindle Publishing Works Long-Term
That said, Kindle publishing has one key advantage: once a book is published, it can continue selling indefinitely.
Books tend to sell most in the first month, when they’re newest — but a quality book can keep selling months and years later.
If you consistently publish two books per month, that’s 24 books per year. At that scale, monthly revenue can realistically exceed tens of thousands of yen.
And as you publish more, you’ll develop an intuitive sense for what makes a book sell. Some titles will become relative hits that outperform others.
The key is consistency: don’t be discouraged by minimal early earnings — keep publishing regularly, and the returns compound over time.
Summary
This article covered how to publish a Kindle book using Canva and Word. Both are tools I use myself and can wholeheartedly recommend.
With these two tools, anyone can self-publish on Kindle for free — a genuinely remarkable feature of today’s world.
Monetizing Kindle publishing takes real time and effort. But writing a book is an irreplaceable experience beyond just the financial return. I hope you’ll give it a try.
For more Canva articles:
Canva’s AI Generative Features: Magic Generate, AI Image & Video Generation, and More
Canva’s AI Image Editing Features: Background Removal, Magic Studio & More