Displaying HP Bars in Bakin
When developing a game in Bakin, you’ll eventually want to display HP bars not just for the player and allies, but for enemies as well.
However, this is an area where the official Wiki isn’t especially clear on implementation, and I suspect many people have struggled with it (I certainly did).
This article explains how to display HP bars for both allies and enemies.
Using the Layout Tool
When you want to change anything related to the on-screen display in Bakin, the first approach to consider is whether it can be accomplished with the “Layout Tool.”
The “Layout Tool” is one of Bakin’s core features, accessible directly from the master menu. It provides detailed control over screen layout-related settings.
Most display-related issues can be resolved with the Layout Tool, though some more complex requirements may still need to be handled through event scripts.
For the HP bars covered in this article, a small amount of event script assistance is needed, but the majority is achievable with the Layout Tool alone.
Configuring the Player’s HP Bar
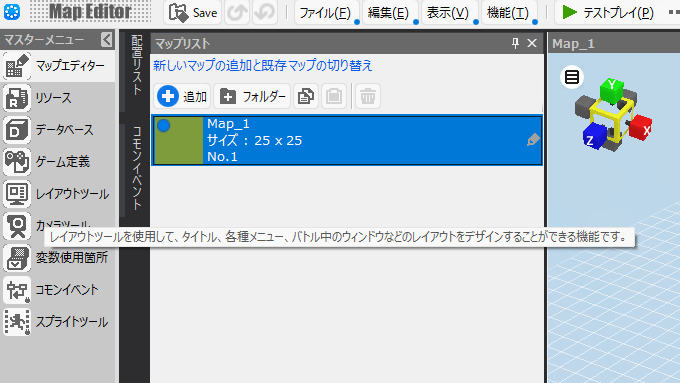
Let’s start by setting up the HP bar for the player. First, open the “Layout Tool” from Bakin’s master menu.
You should see a screen showing the various default layout configurations used in-game, like the one below.
You’ll customize layouts here to suit your needs, but the default layouts are locked and cannot be edited directly.
To modify a layout, copy and paste the original to create a duplicate, then modify the copy.
For example, to change the menu display, select the “Menu” layout category, copy and paste the “MainMenu” default layout, and edit the copy.
For the HP bar, you’ll need to decide which screen to display it on, but there’s also a general-purpose layout option separate from those screen-specific layouts.
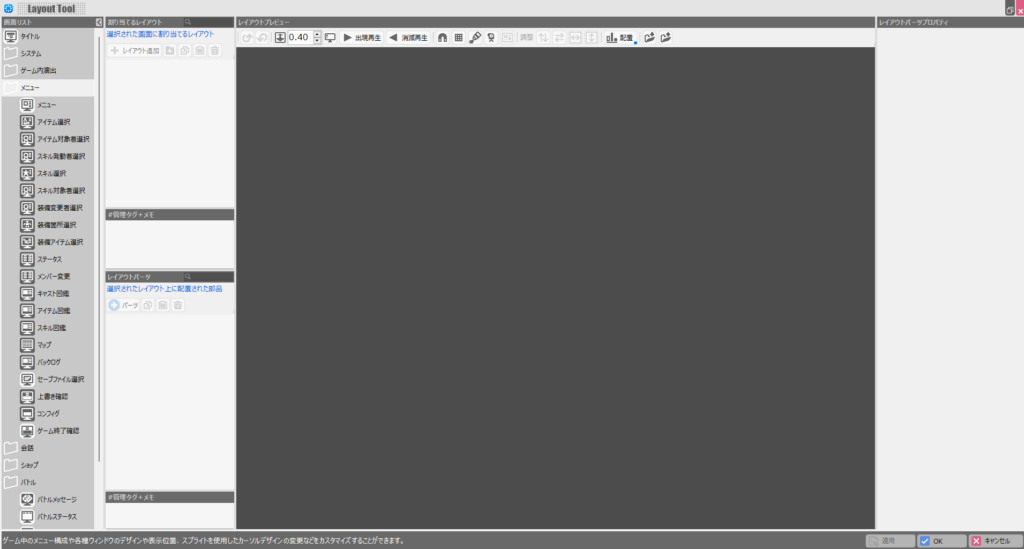
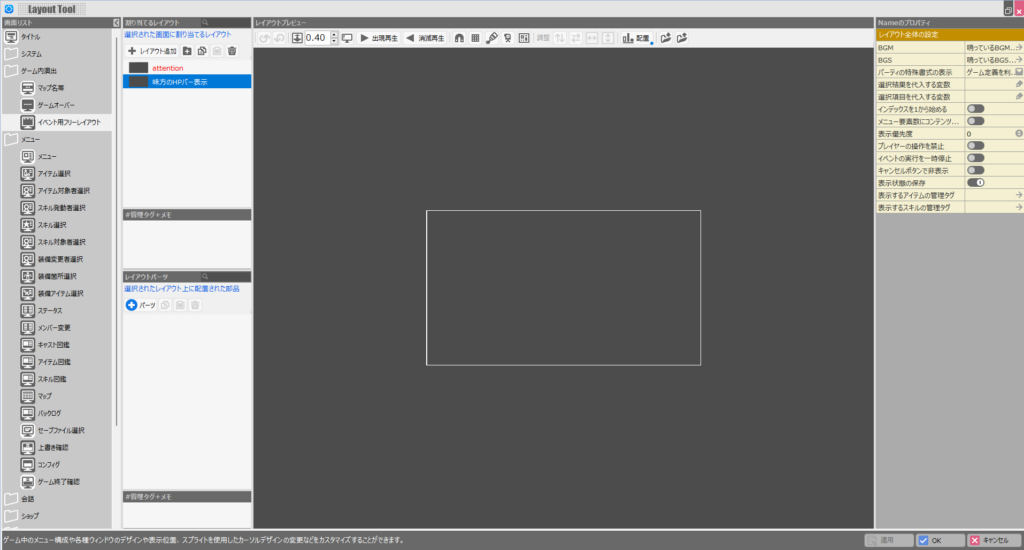
That layout is the “Event Free Layout” found under “In-Game Presentation.”
The “Event Free Layout” can be called freely from event scripts, which means it requires a bit of event-side work to invoke, but it’s the most flexible layout type available.
For the ally and enemy HP bars covered in this article, I’ll use the “Event Free Layout” to create a versatile, reusable solution.
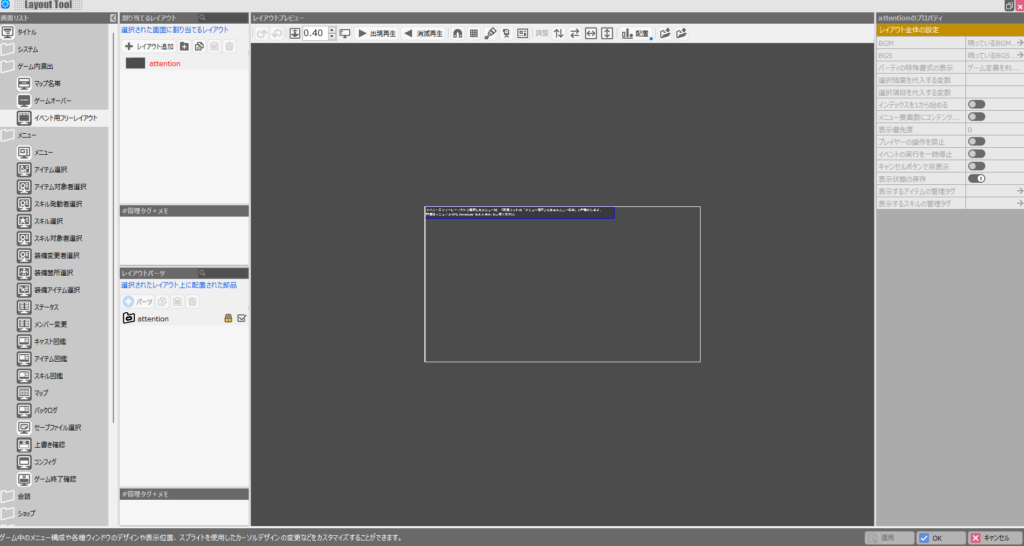
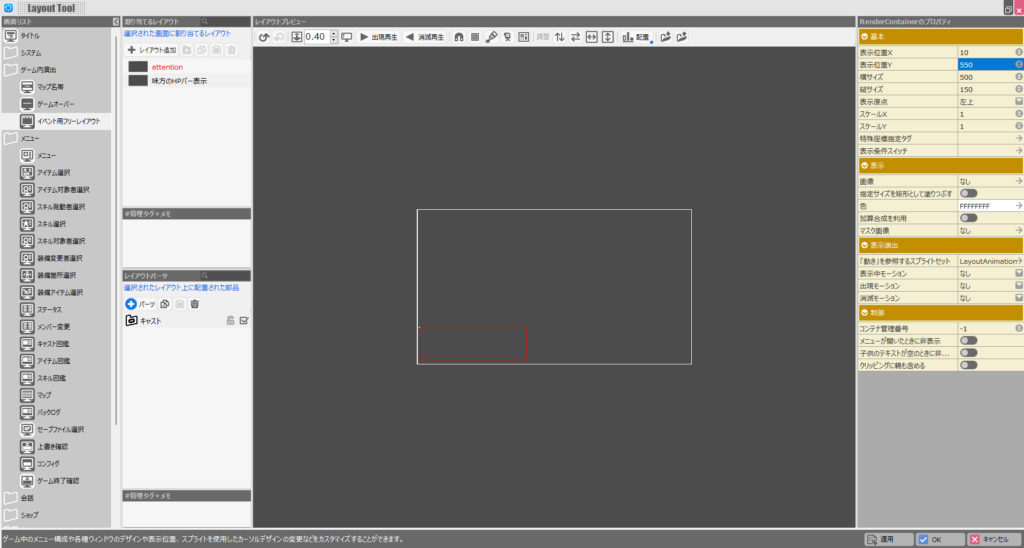
With “Event Free Layout” selected, click the “Add Layout” button that appears in the “Assign Layout” section. Give the new layout a descriptive name—I’ll use “Ally HP Bar Display” here.
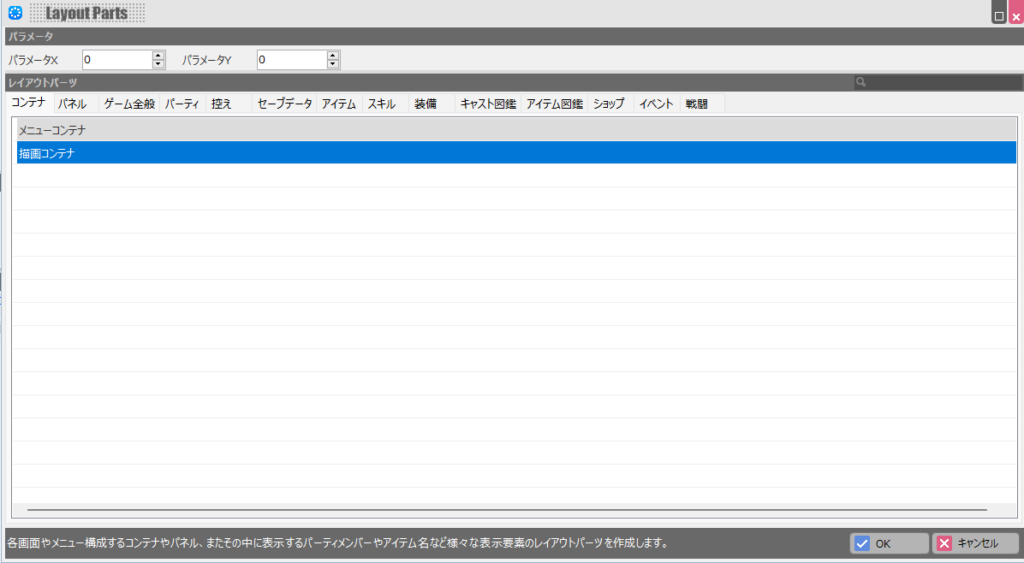
With the new layout selected, click the “Parts” button under “Layout Parts.”
A part selection screen will appear. Select “Draw Container” and click “OK.”
The added layout part will now appear in the preview area. The purple region is the “Draw Container”—this is where HP bars and other elements will be added.
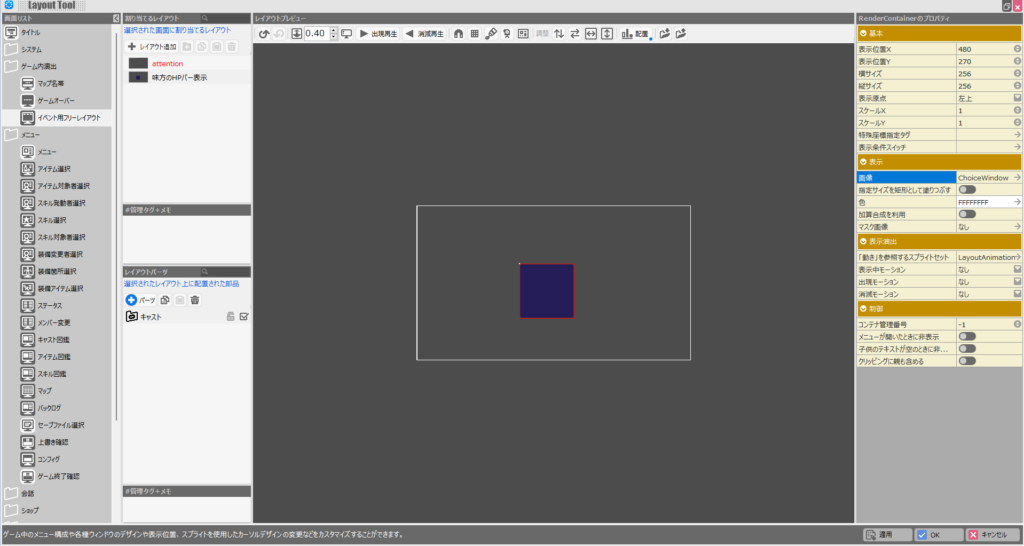
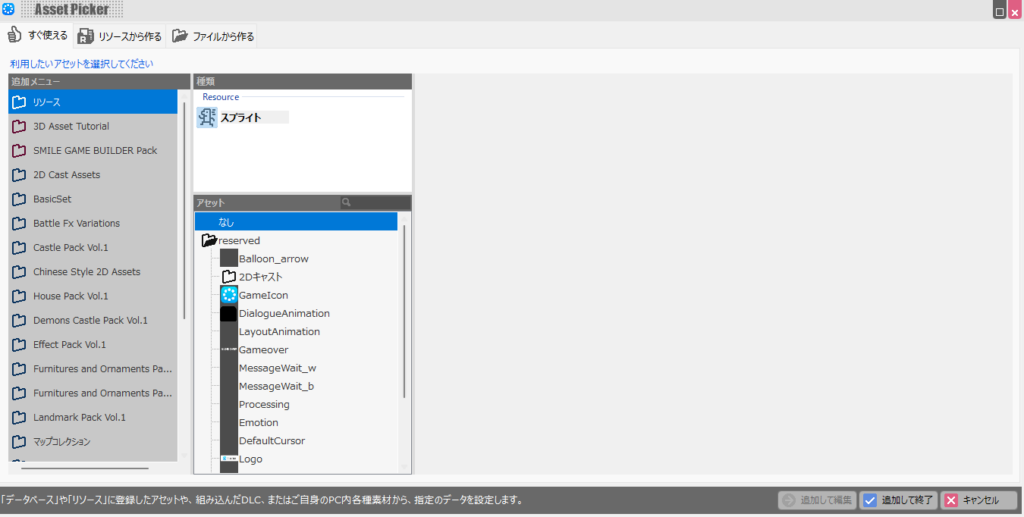
The purple background isn’t needed for this purpose, so click the “Image” field in the right column and change it to “None.”
The unnecessary image display has been removed. Also, update “Display Position X,” “Display Position Y,” “Width,” and “Height” to position the HP bar in the lower-left of the screen.
Feel free to adjust these values to match your preferences.
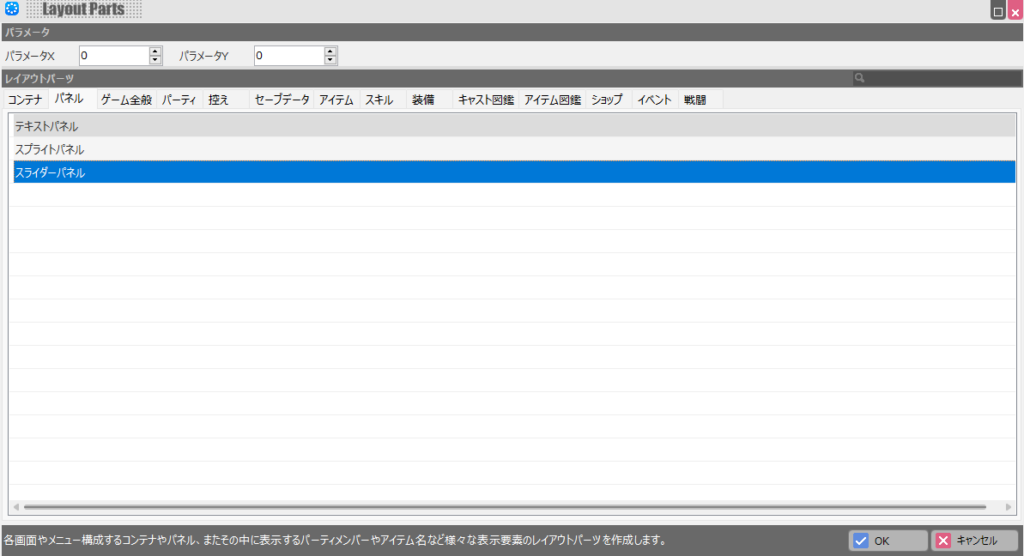
Now click the “Parts” button again to add an element inside the container. Select “Slider Panel” from the list and click “OK.”
The “Slider Panel” is the layout part that displays a gauge based on a numeric value—perfect for HP bars.
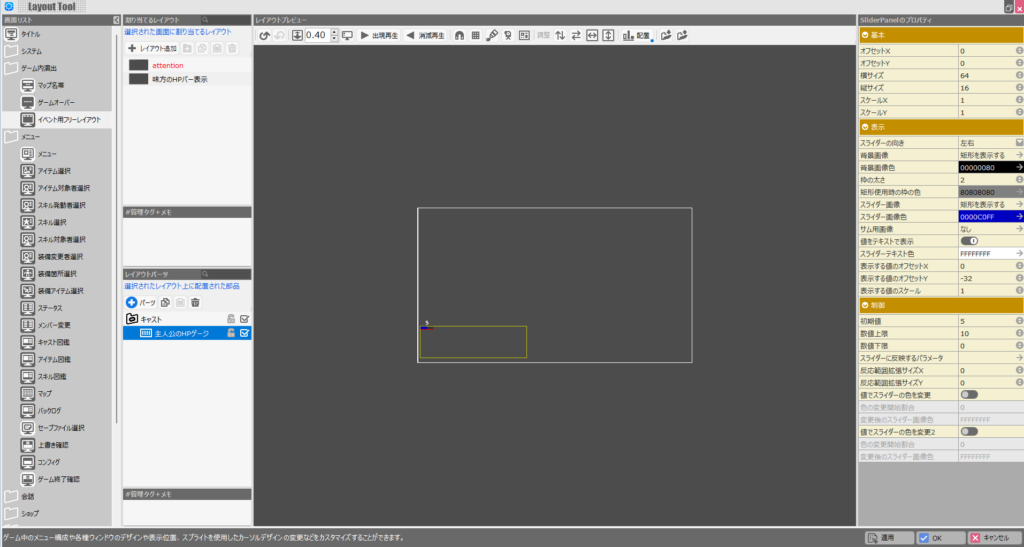
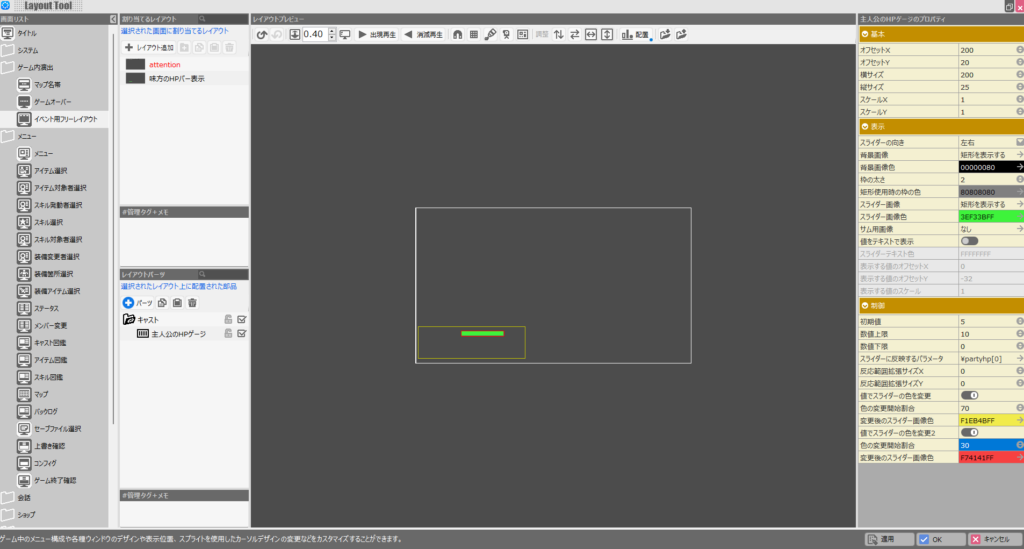
The HP bar slider panel has now been added. Give it a descriptive name and drag and drop it into the draw container you created earlier.
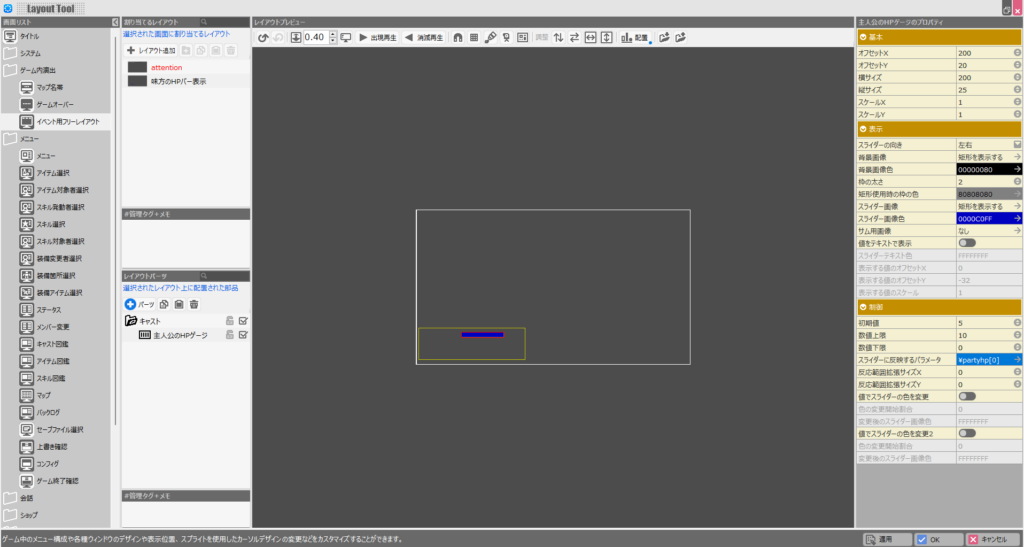
To use this slider panel as an HP bar, you need to set the player’s HP in the “Parameter to Reflect in Slider” field on the right.
Click “Parameter to Reflect in Slider” to bring up the parameter selection screen, then click “partyhp[x].”
The “Parameter” field at the top will now show “partyhp[0].” This refers to the HP of party member index 0—the player character.
Note: in event scripts, the player is treated as party member 1, but in the Layout Tool it’s party member 0. Keep this difference in mind (it’s a bit inconsistent, I know).
In practice, the value stored here is likely a percentage (0–100) rather than the raw HP number, but that doesn’t matter for this purpose.
Confirm that “partyhp[0]” is shown in the Parameter field, then click “OK.”

The slider panel is now configured to display the player’s HP. The default size is too small, so adjust “Offset X,” “Offset Y,” “Width,” and “Height” to get the size and position you want.
To change the color of the HP bar, click the “Slider Image Color” field in the right column. There’s also a very useful option called “Change Slider Color by Value” further down.
This feature lets you change the HP bar color dynamically—green when HP is high, yellow when it drops, red when it’s critical.
For example, setting “Color Change Start Ratio” to “70” with yellow means the bar turns yellow when HP falls below 70%. Setting another color change to “30” with red makes the bar turn red below 30%.
That completes the HP bar layout configuration. Adding a player portrait or other elements in the remaining space on the left would make the HUD even clearer—try adding those once you’re comfortable with the basics.
Next, let’s look at how to actually display this HP bar on-screen.
Displaying the HP Bar On-Screen
To display the “Event Free Layout” HP bar you just created, it needs to be called from an event. This means calling it from a Common Event or from an individual cast event.
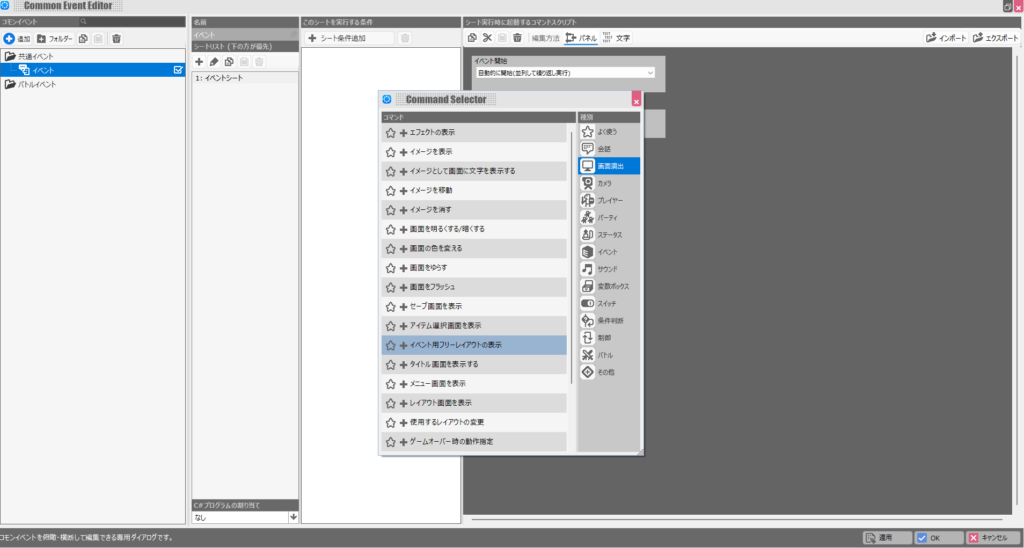
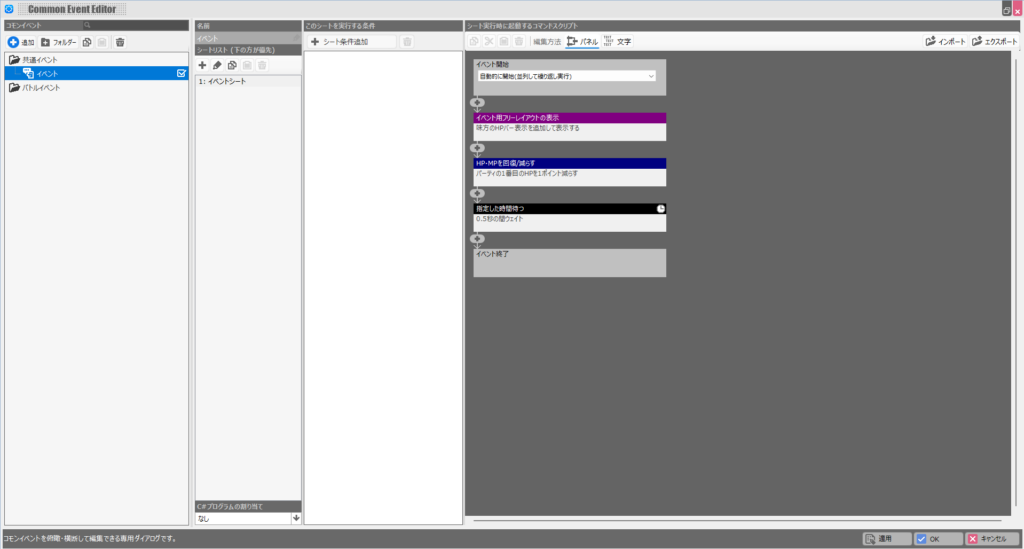
For this example, I’ll call it from a Common Event. Open “Common Events” from the master menu. Click the ”+” button to add an event, then under “Screen Presentation” select “Show Event Free Layout.”
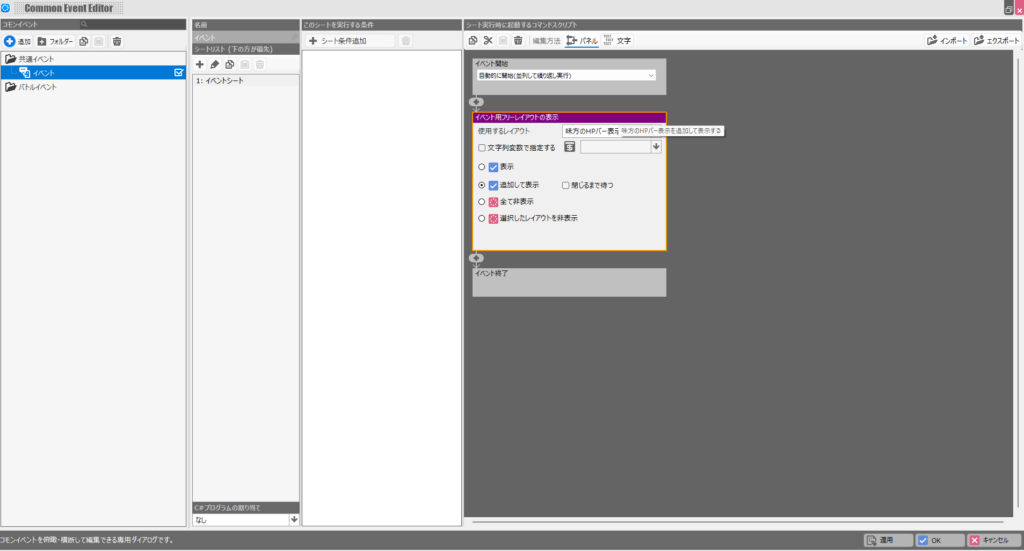
Set “Event Start” to “Start Automatically (Repeat in Parallel).”
In the layout settings, select the HP bar display layout you created. For the display method, choose “Add and Show.” Using “Show” alone would overwrite any other layouts you want to display at the same time.
To hide the layout later, use “Hide Selected Layout.”
The layout will now appear on-screen, but let’s also verify that the HP bar actually decreases. Add a script to the Common Event that reduces the player’s HP by 1 at regular intervals.
As mentioned in the layout section, in events the player is party member 1, so make sure you’re targeting the correct index.
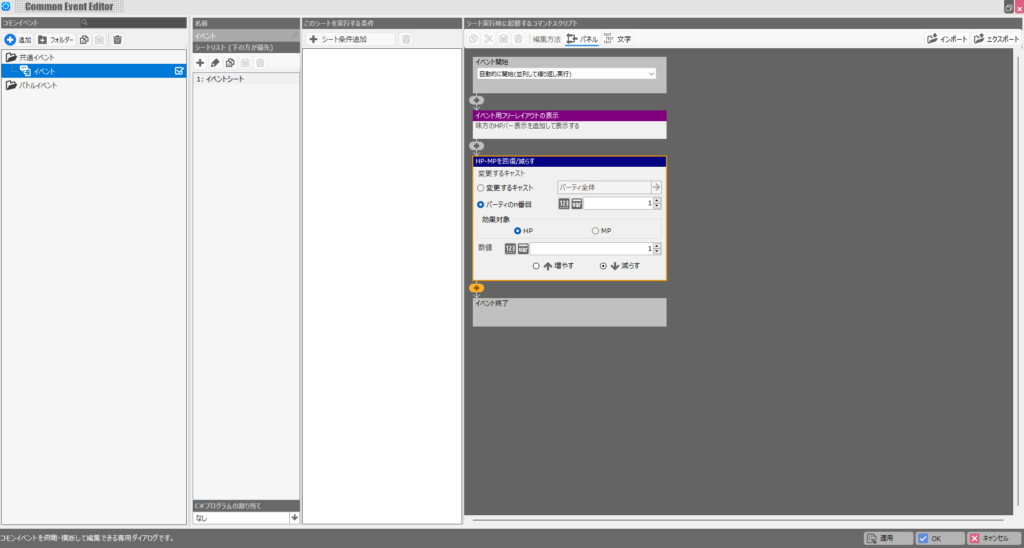
Finally, add a “Wait for Specified Time” script at the end. Without it, HP will drop instantly, making it impossible to observe the animation. Temporarily boosting the player’s max HP also helps with testing.
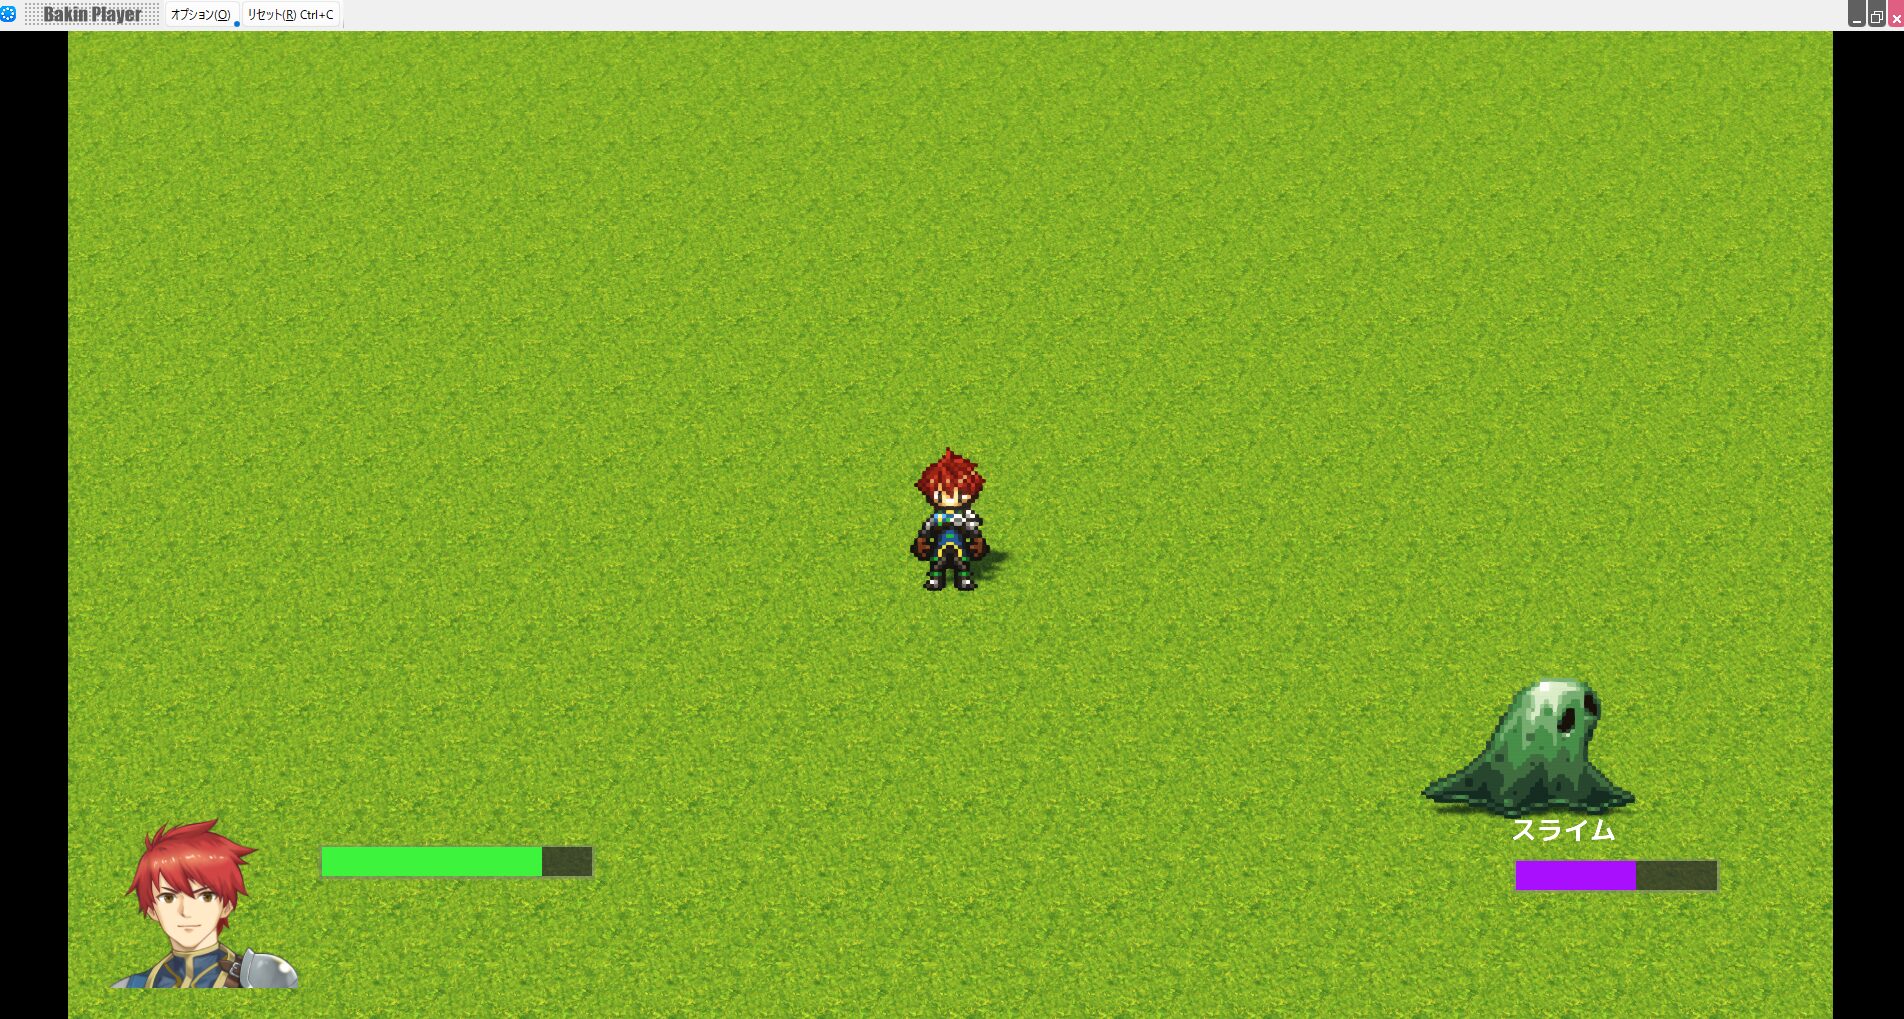
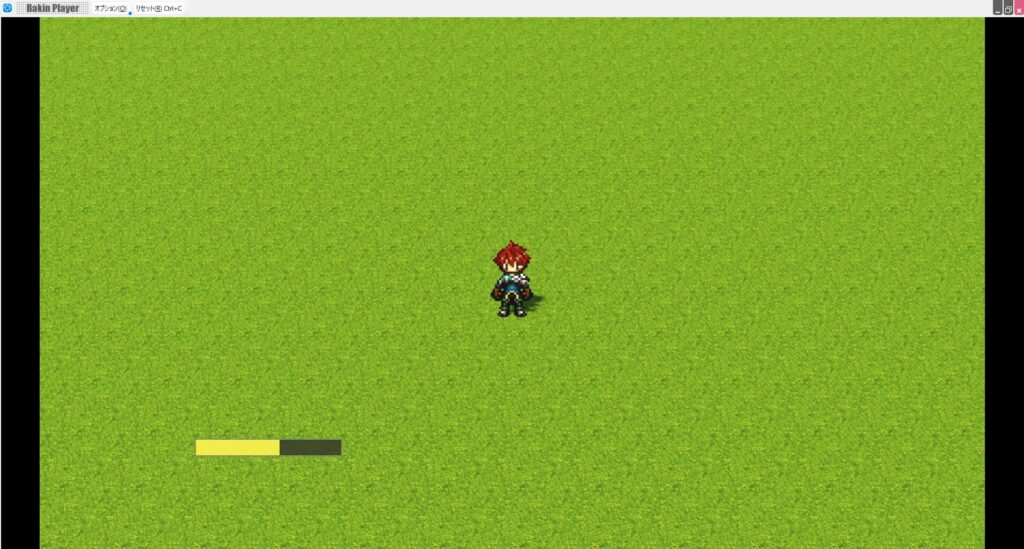
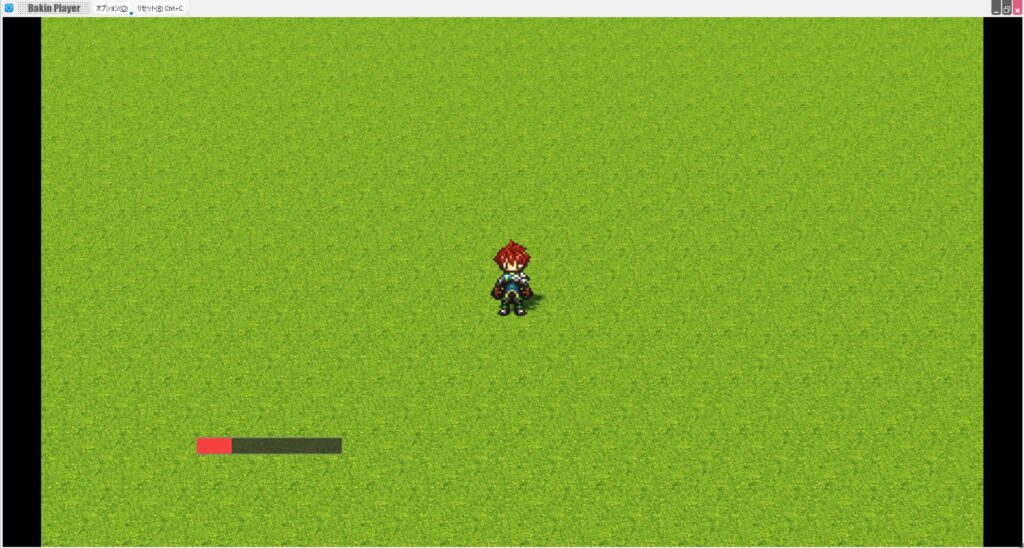
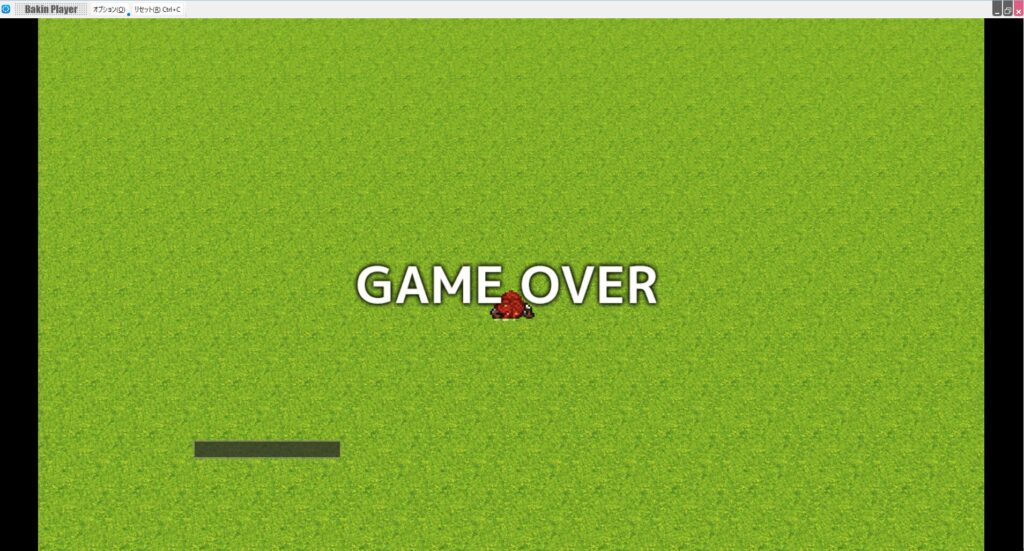
Running the game, the HP bar gradually decreases, changing from green to yellow to red, and finally triggers a game over when HP reaches zero—as shown in the screenshots below.
The Layout Tool’s Slider Panel makes it easy to display the player’s HP bar, and the same approach works for MP bars and other gauges. Ally HP bars for other party members can also be set up the same way by changing the index number.

Displaying Enemy HP Bars
The approach above covers ally HP bars, but enemy HP bars can’t be set up the same way because there’s no built-in display parameter for them.
However, the Slider Panel in the Layout Tool supports “Variables,” so you can manage enemy HP changes through a variable and display it as a gauge.
Specifically: in the enemy’s cast event, store the “Current HP (%)” value into a “Normal Variable,” then display that variable using a Slider Panel.
This may sound complicated, but the actual steps are straightforward. Here’s how to do it.
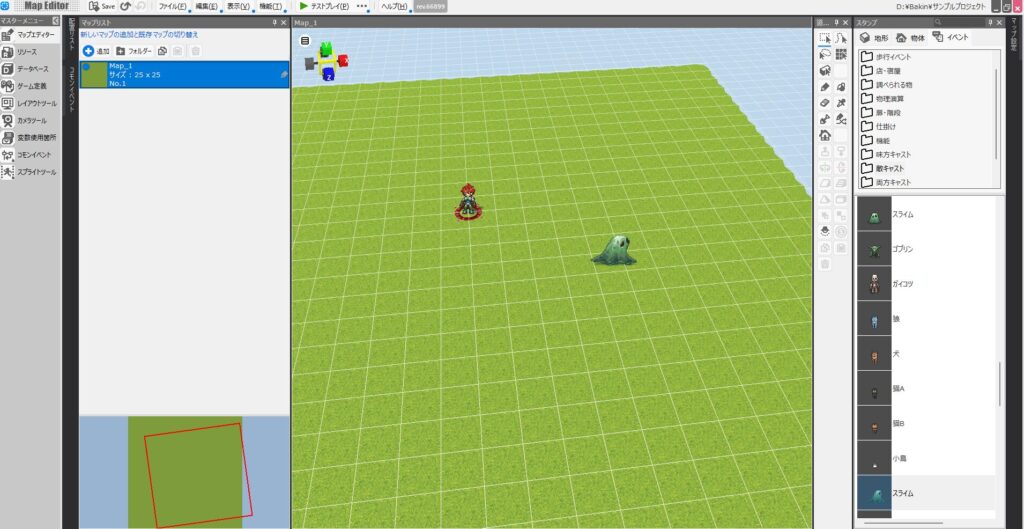
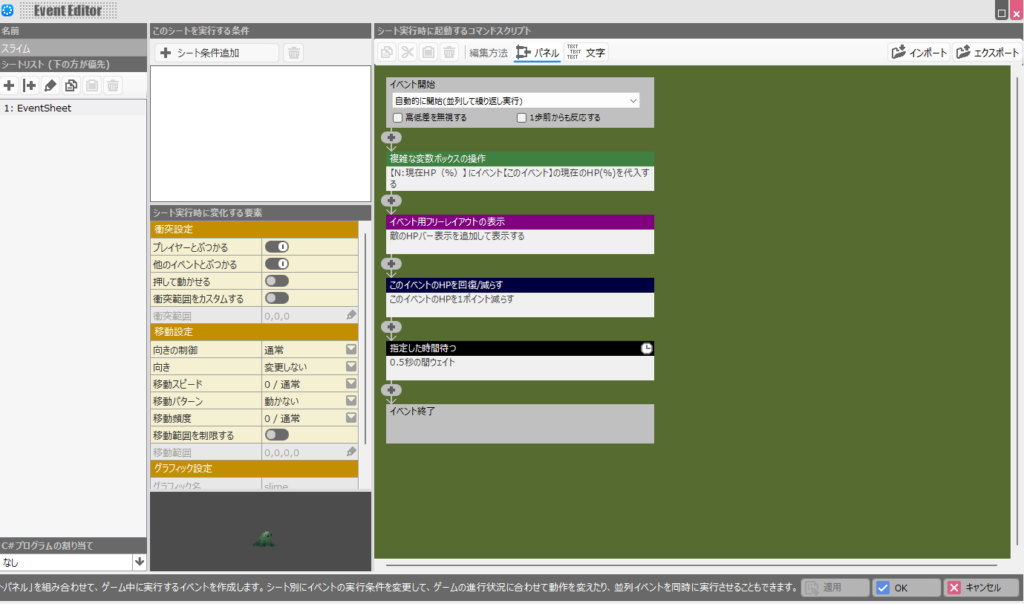
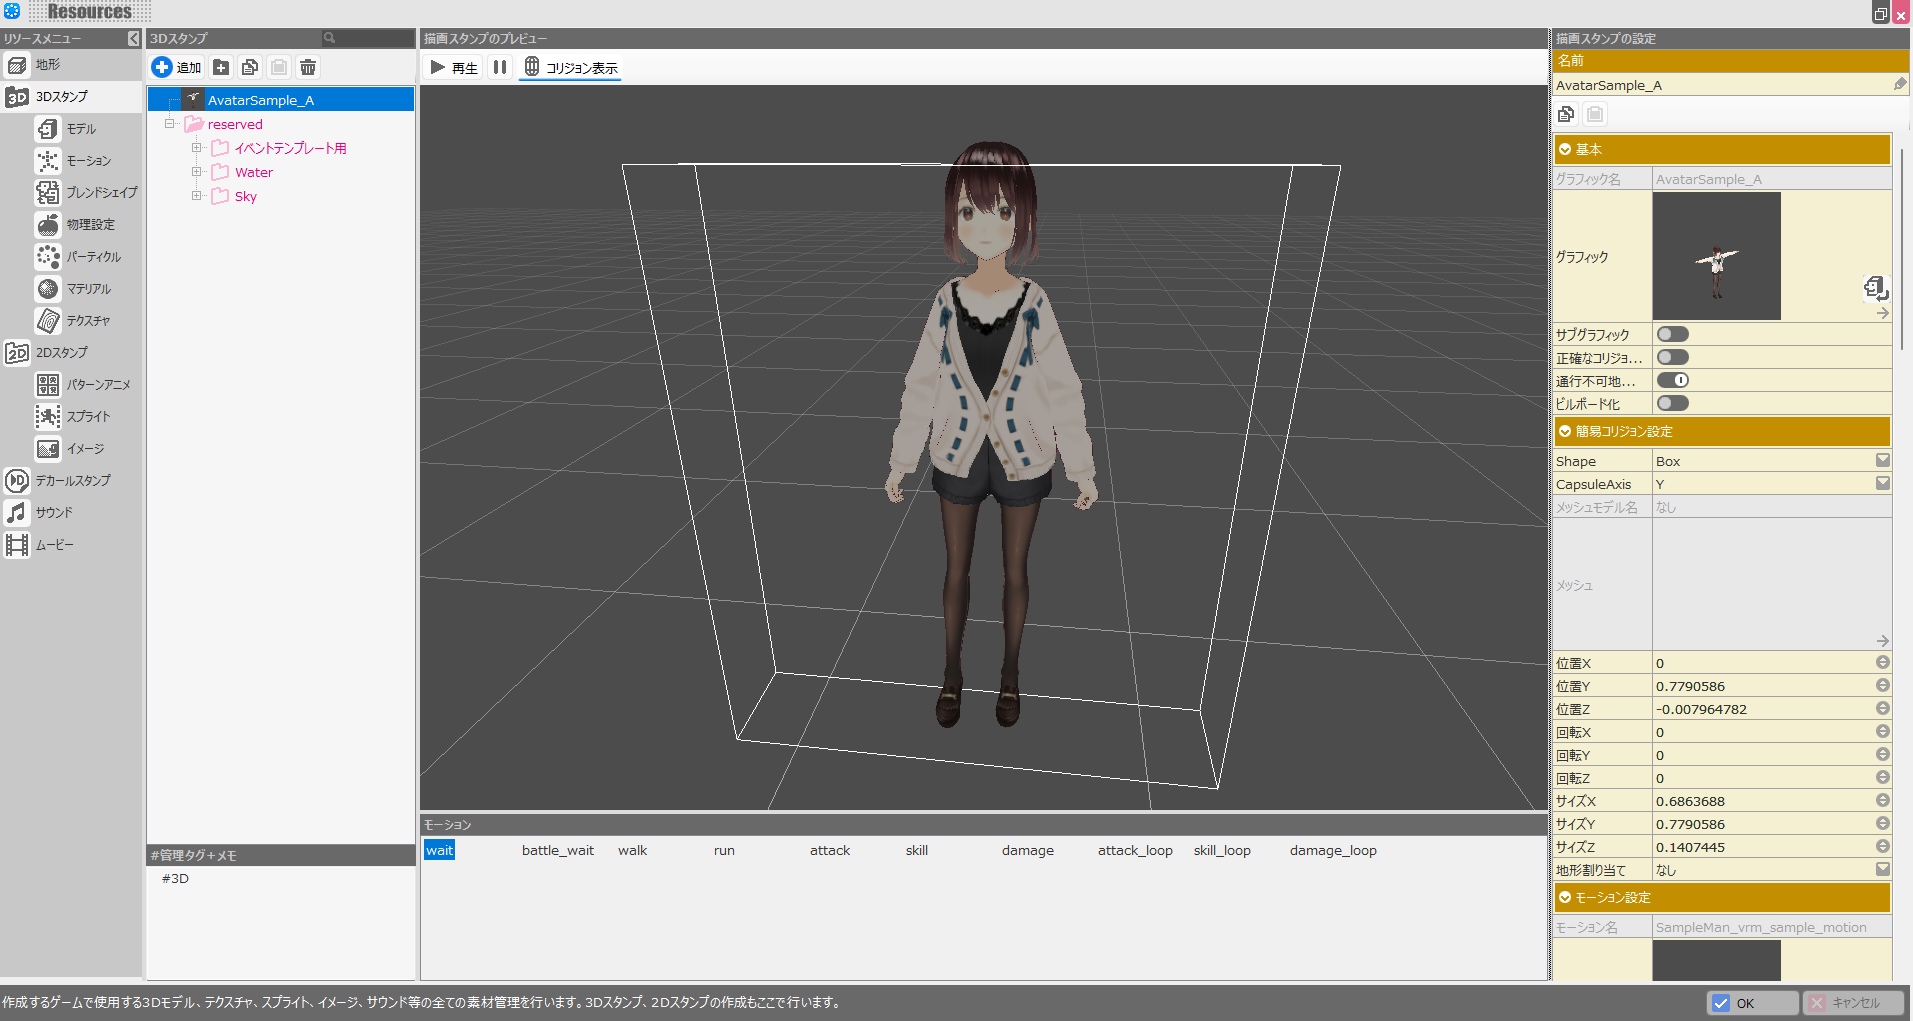
First, set up the enemy cast you want to work with. For this example, I’ll use the “Slime” cast included in the default “Normal” asset set.
Select the cast in “Database” from the master menu and click “Cast Event Settings.”
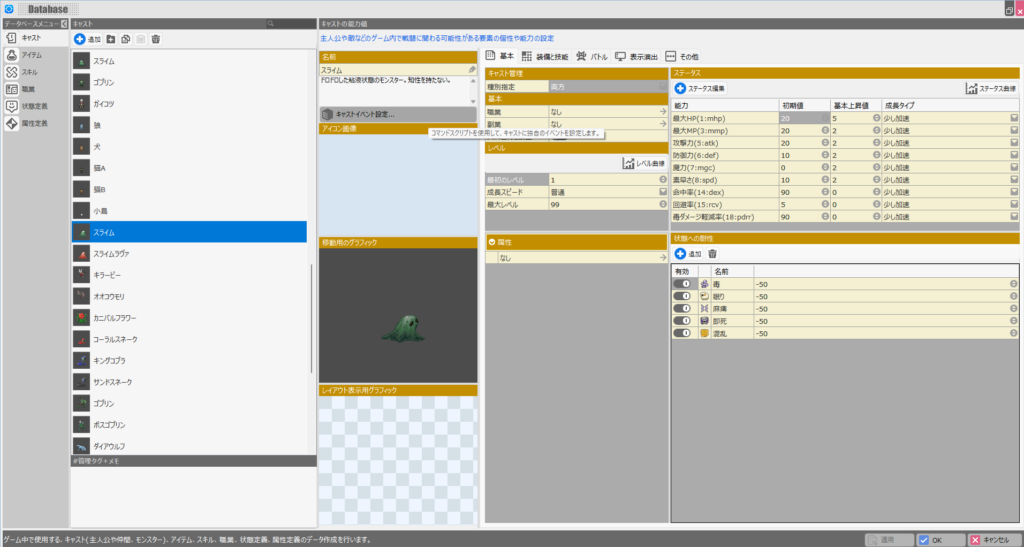
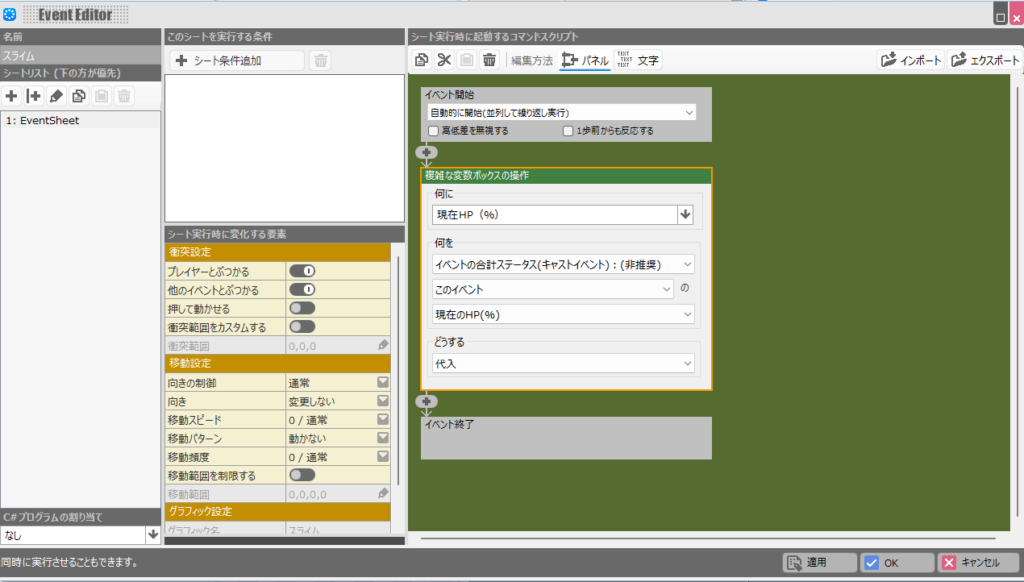
In the cast event, create a “Normal Variable” called “Current HP (%)” and use the “Set Event Total Status” command to store “Current HP (%)” into it.
Note: variables have types—“Normal” and “Local” among others. Slider Panels do not support “Local” variables, so be sure to create this variable as “Normal.”
Also set “Event Start” to “Start Automatically (Repeat in Parallel)” so the variable stays updated continuously.
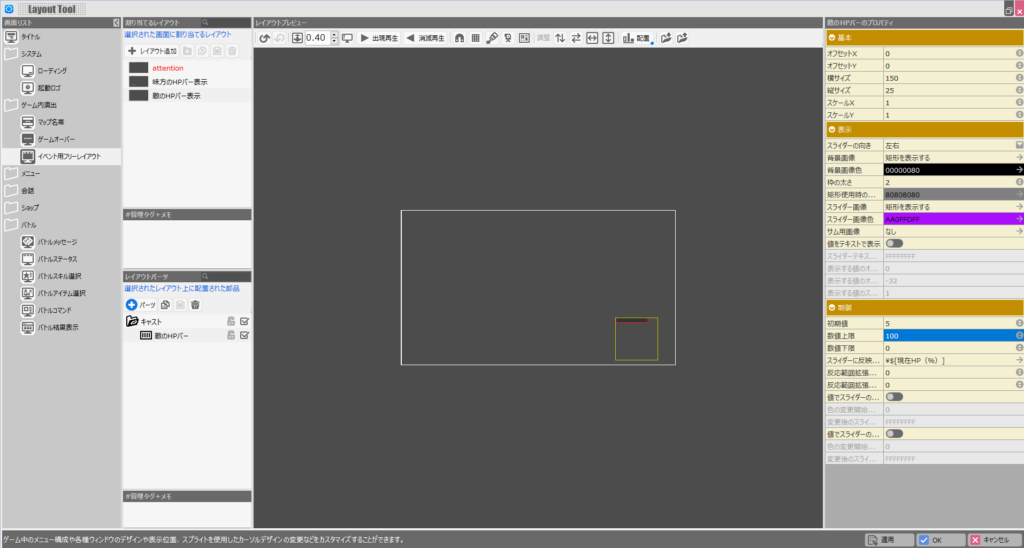
Once the cast event is configured, create a new layout in the Layout Tool—just as you did for the player’s HP bar—and add a Slider Panel. Set the color and size as desired.
For this example, I’ll display a purple HP bar in the lower-right corner. Once adjustments are done, click “Parameter to Reflect in Slider.”
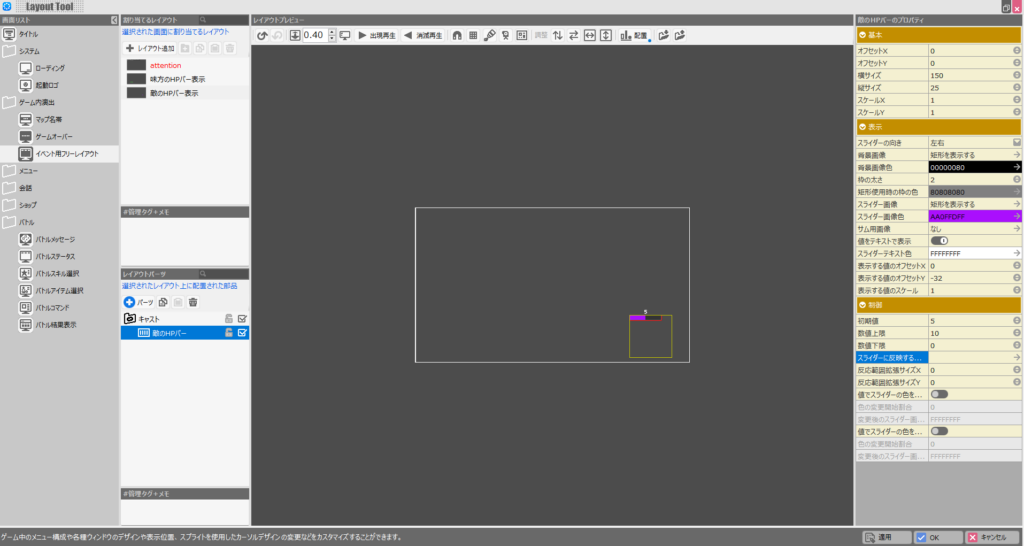
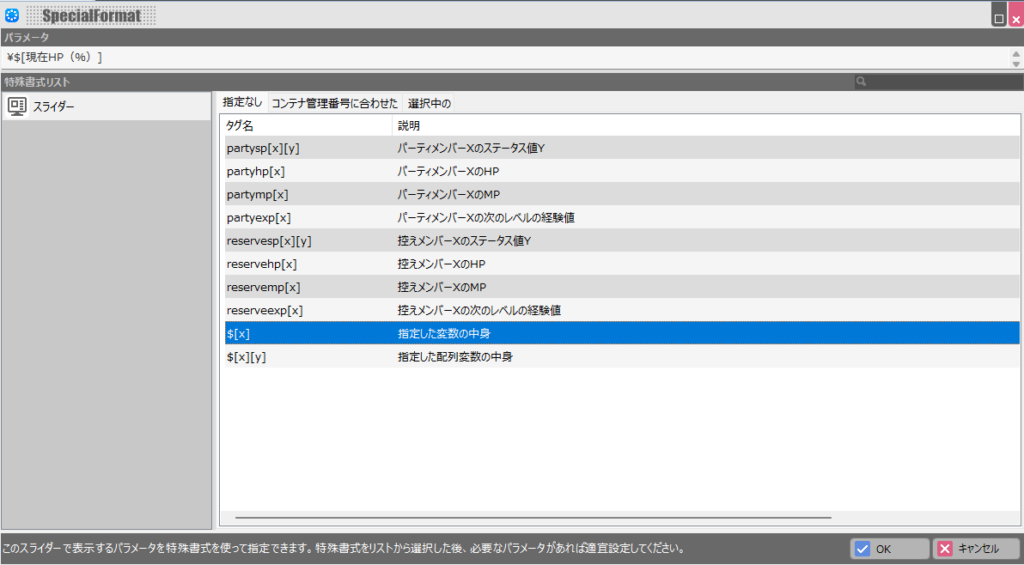
This time, the value to set is the variable configured in the cast event. Select “Contents of Specified Variable” as shown below, then choose the “Current HP (%)” variable.
The Parameter field will update to reflect your selection. Click “OK.”
Finally, change “Maximum Value” on the right side of the layout to “100.”
Since the variable stores HP as a percentage (0–100), the slider’s maximum must be set to 100 for the gauge to display correctly. (Why the player HP slider doesn’t require this is unclear to me.)
To test the layout, add similar HP-reducing test scripts to the Slime’s cast event.
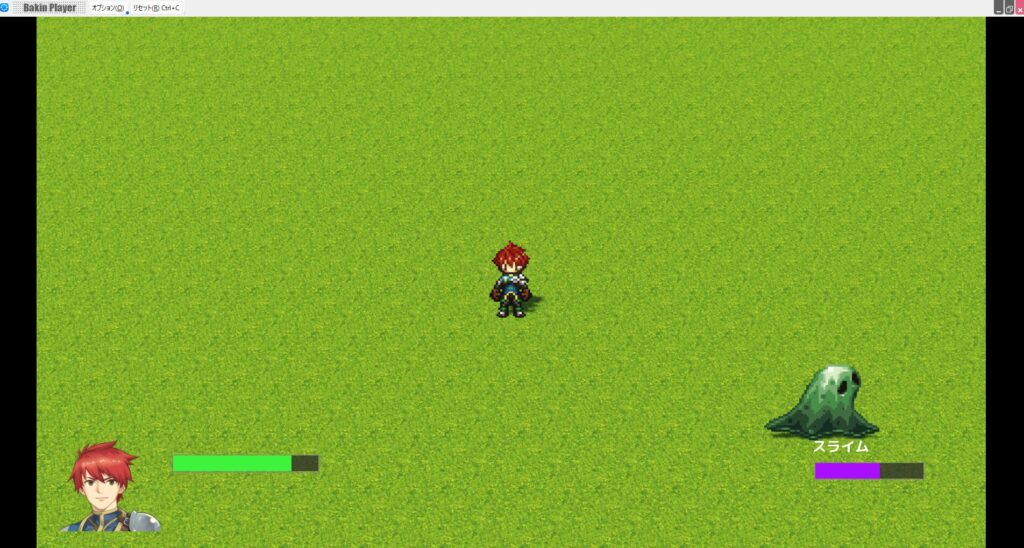
Running the game shows both the player HP and enemy HP displayed on-screen. To make it less plain, I also added the player’s portrait image and the enemy’s name as text panels in the Layout Tool.
This HP bar implementation makes managing multiple enemies on screen simultaneously somewhat tricky, but it can be worked around.
For example, you could pre-create five such variables, and overwrite them in priority order as enemies take hits—allowing up to five enemies to have their HP displayed at once.
This article presents one way to implement HP bars. There’s plenty of room to adapt and extend the approach to suit your specific game design.
Summary
In this article I covered how to display HP bars for both the player and enemy characters on-screen in Bakin.
The Slider Panel is a highly useful feature for displaying any kind of gauge, and the technique covered here can be applied to stamina bars, ultimate gauges, and more.
Bakin has many convenient features like this, but how to implement them isn’t always clear from the official documentation, which is why I’ve written this up. I hope it serves as a useful reference for someone.
I’ll continue covering how to build games in Bakin going forward—check back if you’re interested.
📚 Series: RPG Maker Bakin: Game Development Guide (10/17)