How to Register for Steamworks
This article explains how independent game developers (or small indie teams) can join the Steamworks Distribution Program. For an overview of the full process of selling a game on Steam, see the article below.
Note: these steps are based on my own registration experience in September 2025. Valve may update the process, so treat these as approximate guidance.
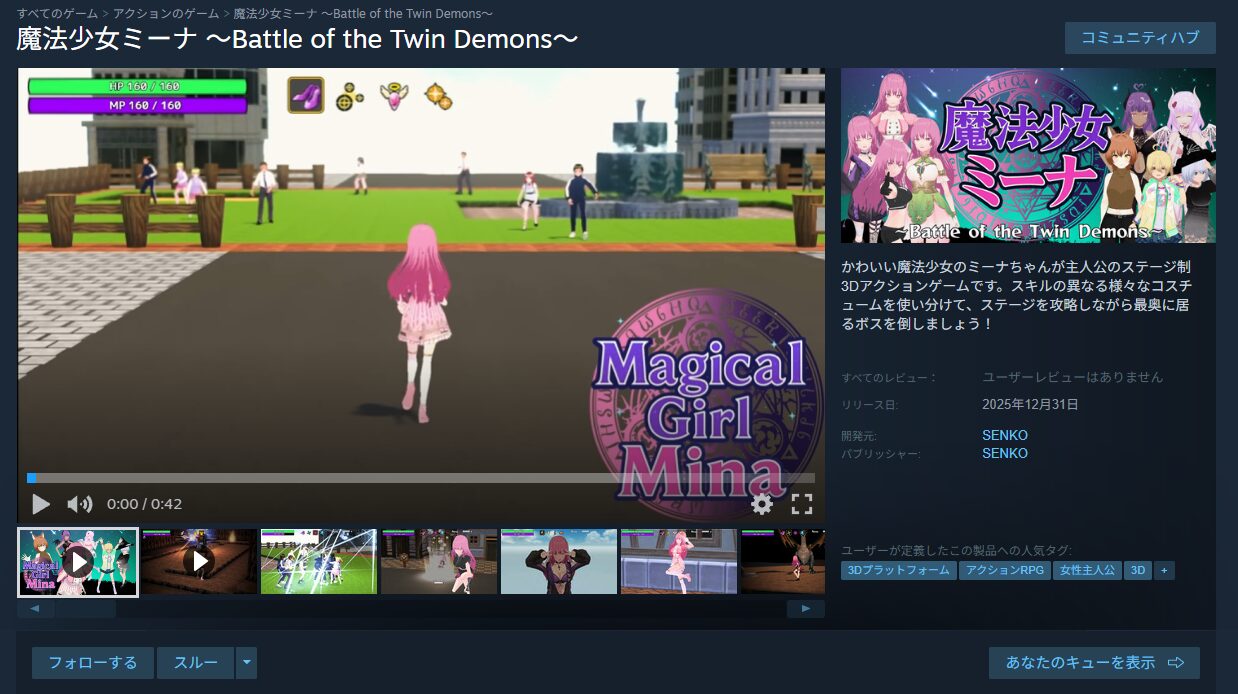
For reference, here is the game I submitted to Steam:
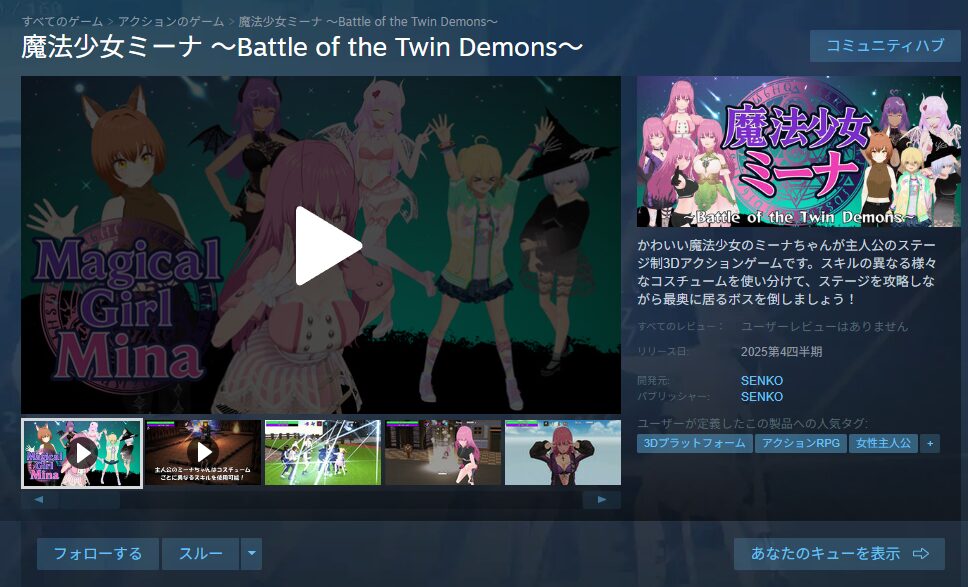
https://twitter.com/FoxEngineer777/status/1974287906367050068
Steamworks Registration Steps
Anyone who wants to sell a game on Steam—whether as a solo developer or small indie studio—must register for Steamworks.
As mentioned in the overview article, Steamworks registration requires a $100 deposit (~¥15,000 as of September 2025) and a 30-day waiting period.
This is not a process to begin casually. That said, if you’re genuinely committed to selling on Steam, registering early—even before your game is finished—is smart so the waiting period doesn’t delay your launch later.
Here are the registration steps.
Creating a Steam Account
First, navigate to the official Steamworks page:
Steamworks Official Page: https://partner.steamgames.com/
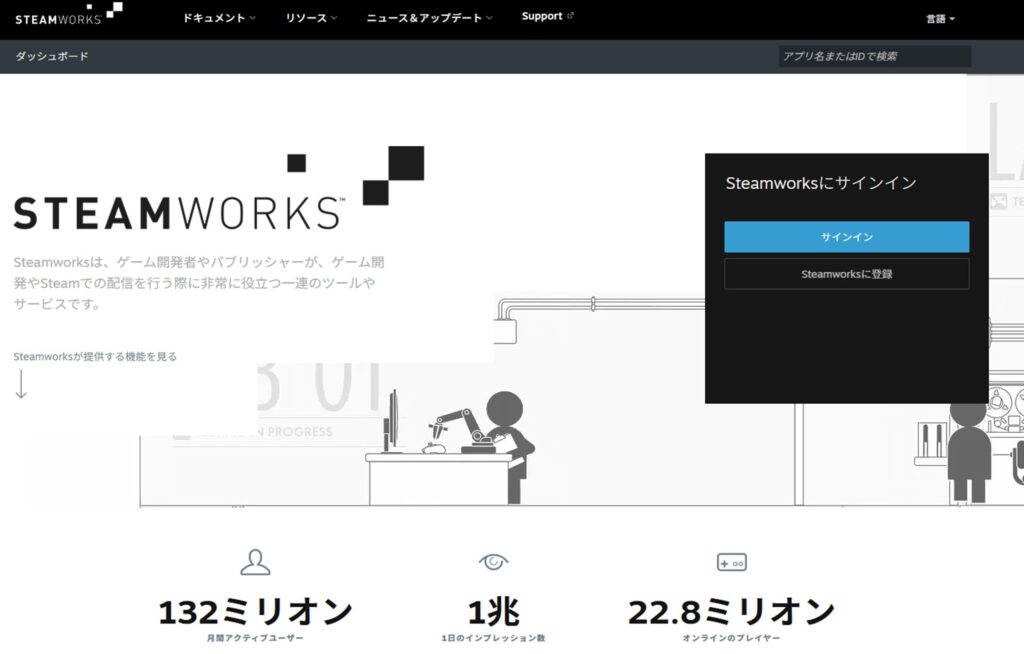
Click “Create a Steam Account” to set up the account you’ll use for Steamworks.
You may already have a Steam account for playing games. While some people use a single account for both, it’s generally recommended to keep a separate account for selling.
This guide covers creating a new dedicated seller account.
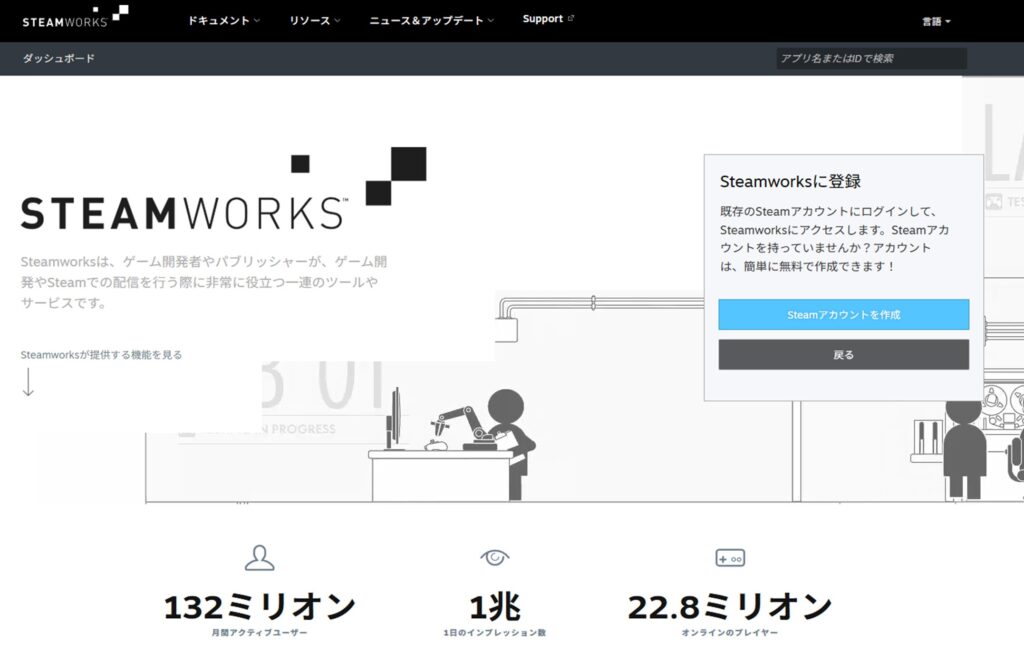
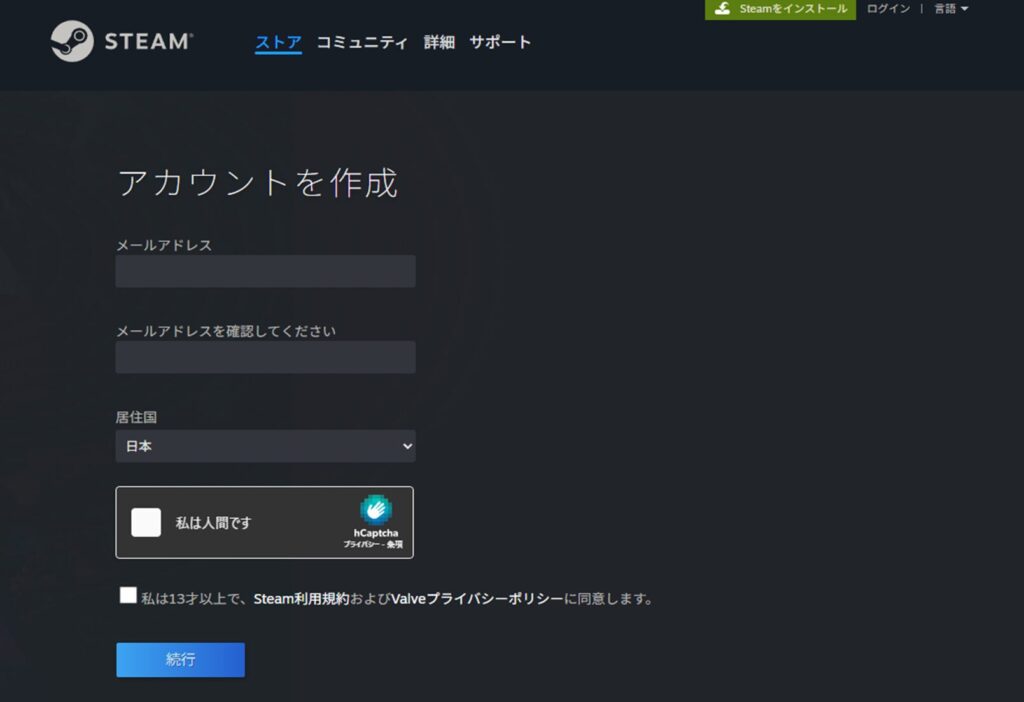
After clicking “Create a Steam Account,” enter the email address and country of residence you want to use for your seller account, complete the verification, and click “Continue.”
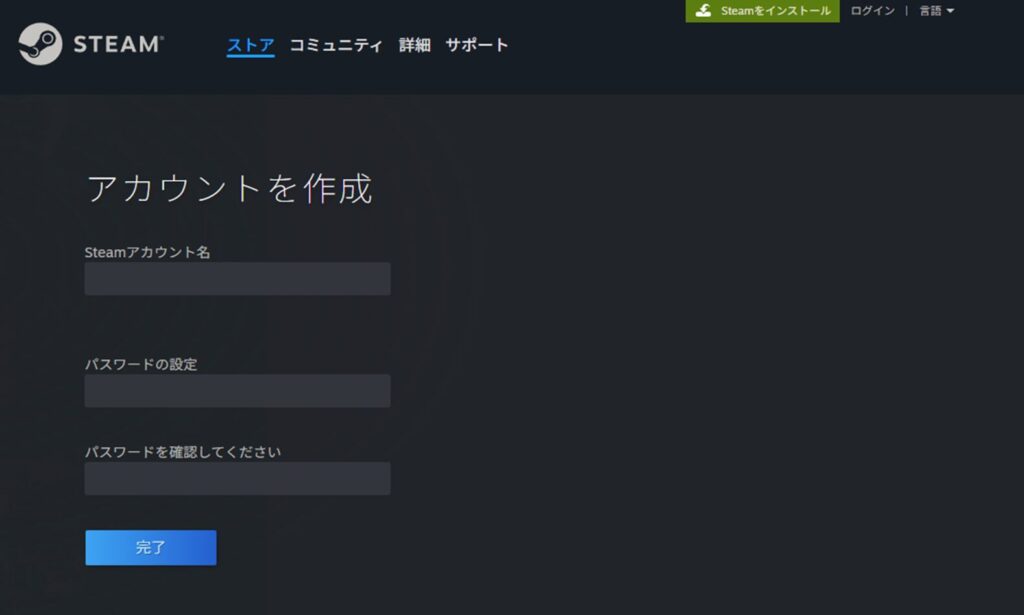
Next, enter your preferred Steam account name and a password, then click “Done.”
These credentials will also be used to log into Steamworks going forward, so choose a strong password and store it somewhere safe.
Registering for Steamworks (Joining the Distribution Program)
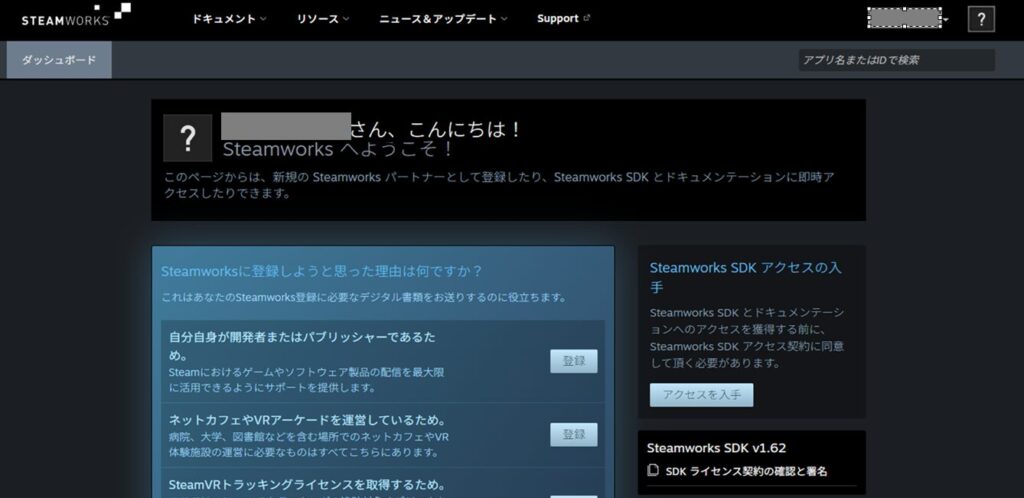
After creating your Steam account, return to the official Steamworks page and this time click “Sign In.”
You’ll arrive at the Steamworks dashboard. From here, proceed with the registration input.
First, answer “Why do you want to register for Steamworks?” and select the option that fits your situation, then click “Register.” Most people reading this will fall under “I am a developer or publisher.”
Note: in subsequent screenshots, personal account information and other sensitive areas have been obscured with gray boxes.
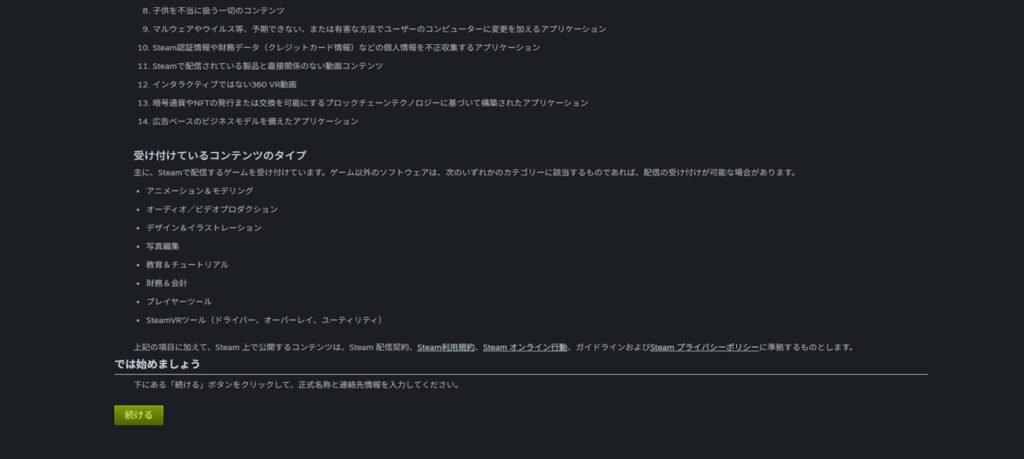
A page explaining the steps to join the distribution program will appear. Skim through it—it covers the upfront $100 fee, the requirement for banking and tax information, and the 1–5 business day review period for store pages and builds.
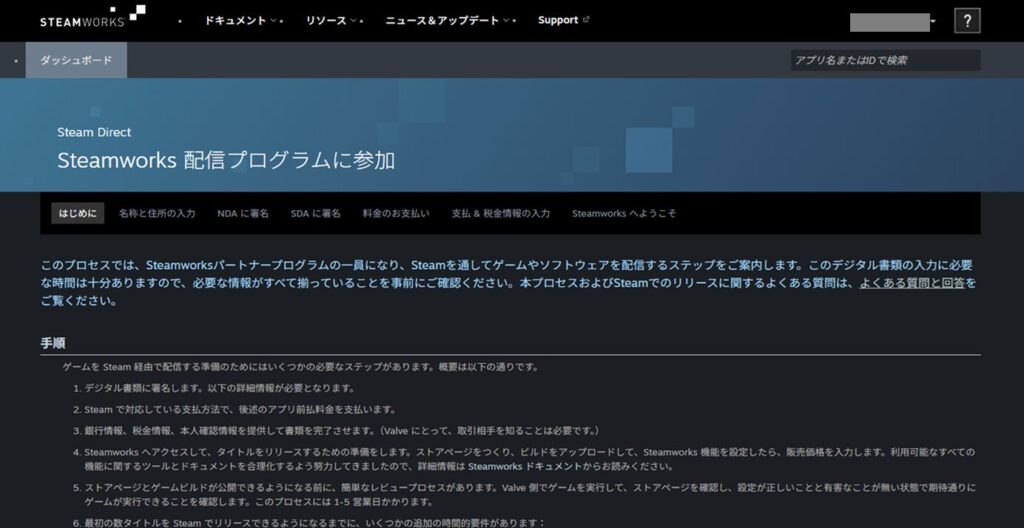
Once you’ve read through everything, click “Continue” at the bottom to proceed.
Entering Name and Address
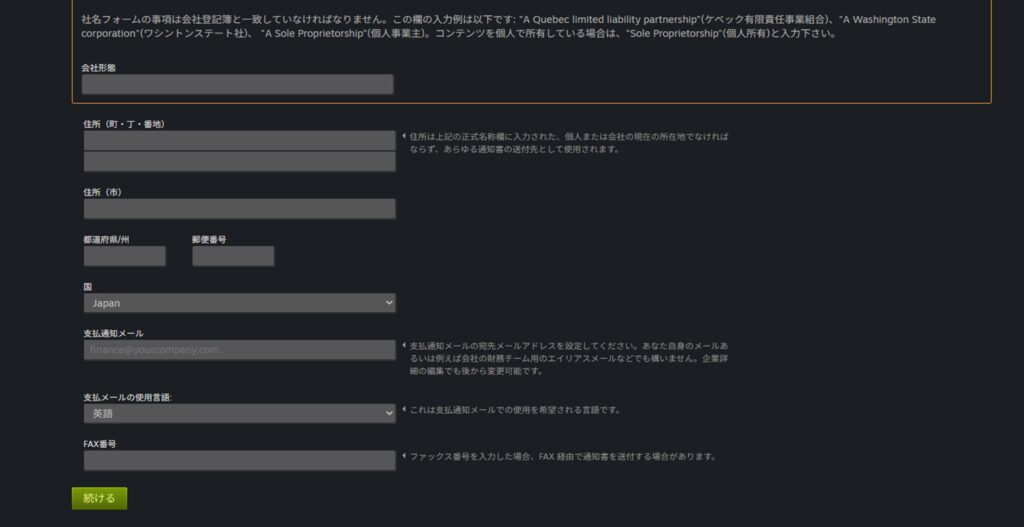
Next, you’ll need to enter the legal name, entity type, and address of the person selling the game (yourself, in this case).
The legal name must match the name registered with the bank account where Steam will deposit your earnings (bank account entry comes later).
For entity type, as shown in the examples: use “A Sole Proprietorship” if you’re a sole proprietor, or “Sole Proprietorship” for a straightforward individual registration.
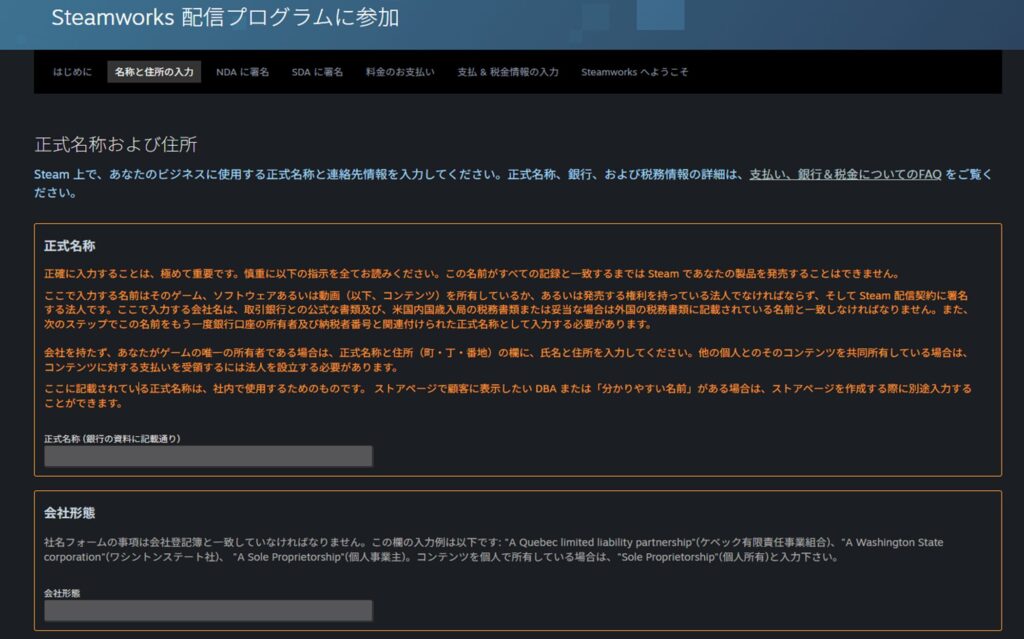
The address must also match what’s registered with your bank, and it must be entered in English.
Most people aren’t familiar with the English format of their Japanese address—using an address-to-English conversion tool is recommended.
For the notification email, you may want to set up a separate business email rather than a personal one, though that’s up to you. The fax number field is optional and can be left blank.
When all fields are filled in, click “Continue.” If an error appears, correct the flagged field and try again.
Signing the NDA (Non-Disclosure Agreement)
Next, you’ll be asked to agree to the Non-Disclosure Agreement. The content is fairly standard legal language—skim through it.
(You won’t be able to use the service if you don’t agree, so there’s really only one option here.)
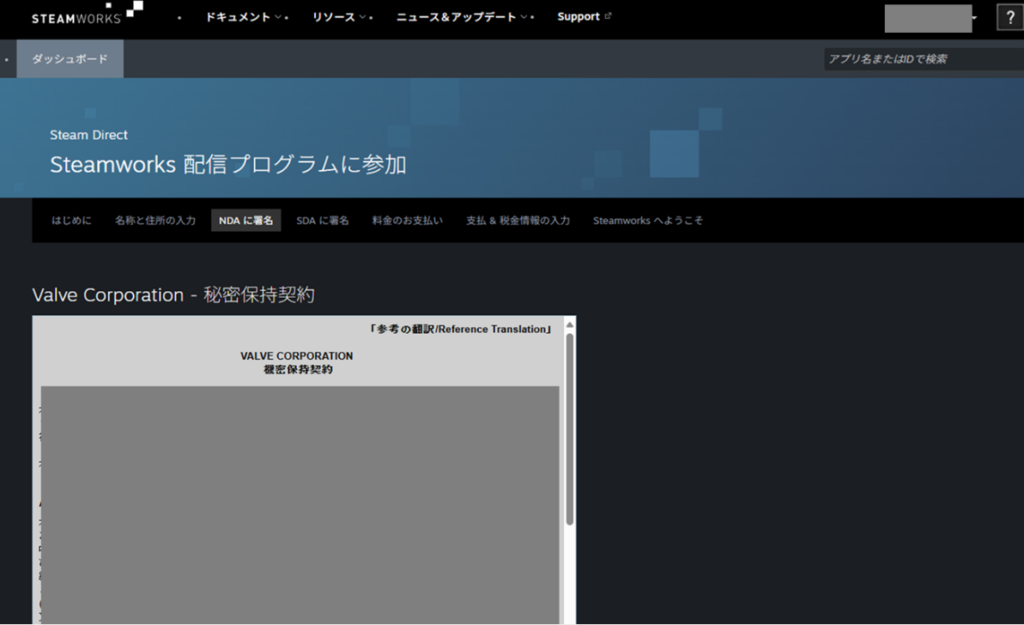
If you accept the terms, check the box at the bottom and click “Continue.”
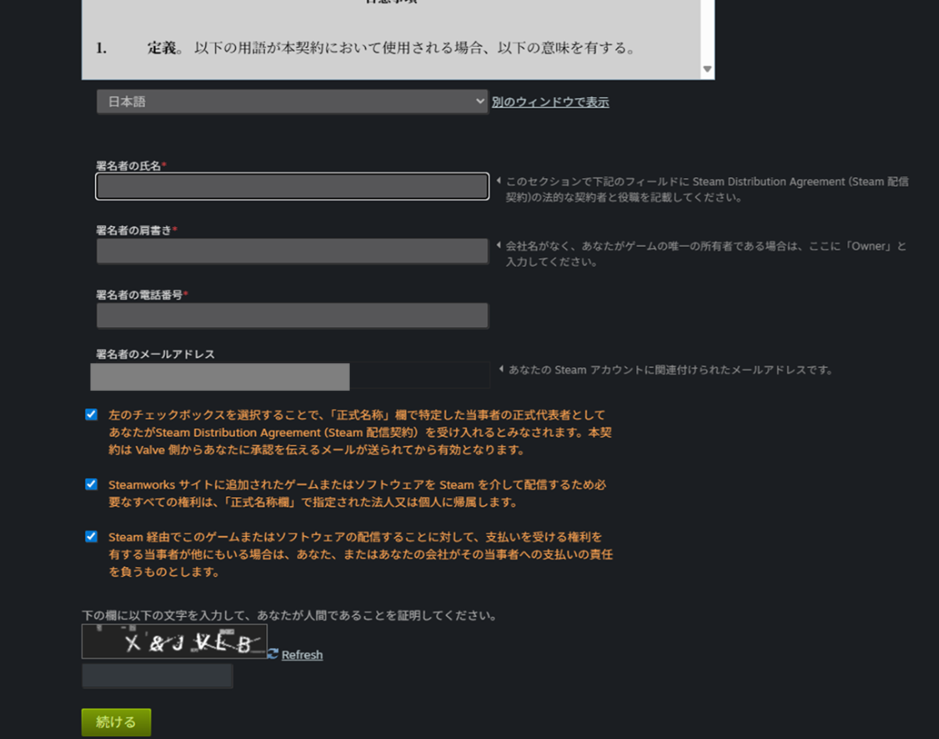
Signing the SDA (Steam Distribution Agreement)
Similarly, you’ll be asked to agree to the Steam Distribution Agreement. Read through it briefly.
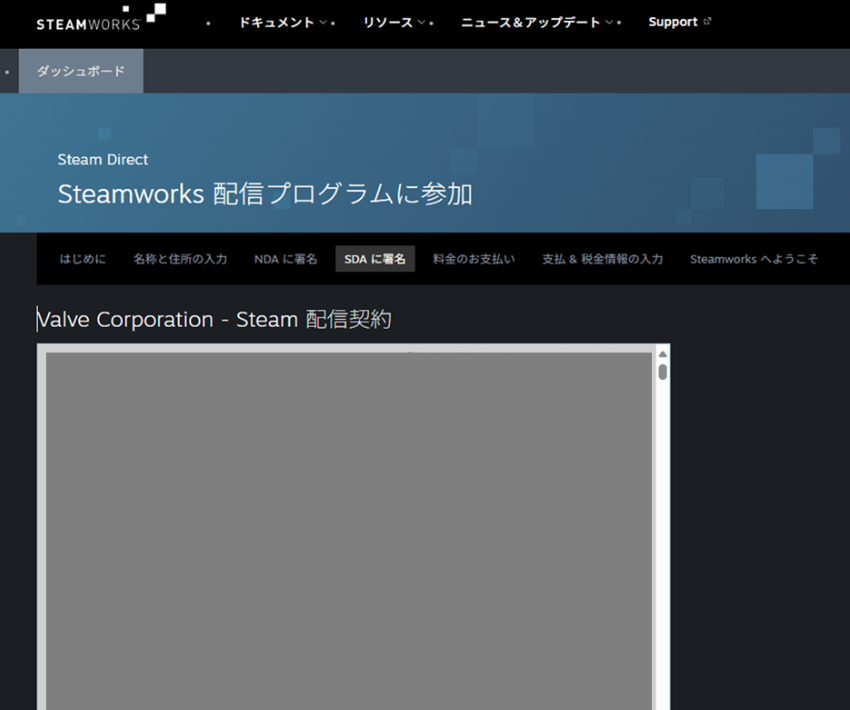
After reading, enter your name in English in the signature field at the bottom. For the title, “Owner” is appropriate for individual game developers.
Fill in your phone number, check the checkboxes, complete the verification, and click “Continue.”
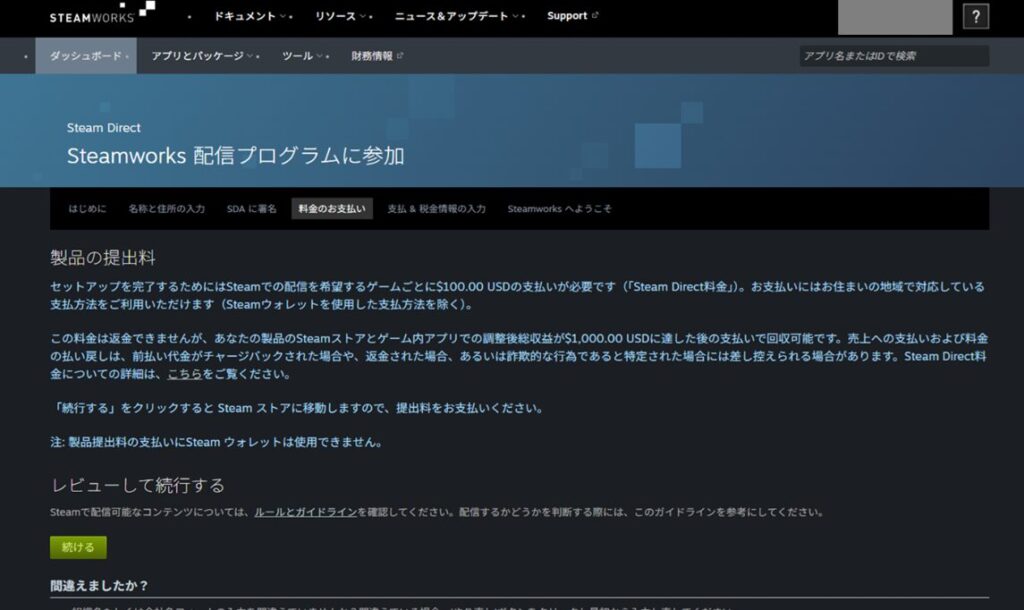
Payment
This is one of the most important steps: the $100 deposit.
The page confirms that the $100 is non-refundable, but that it will effectively be recouped once your game’s sales exceed $1,000.
After reviewing, click “Continue.”
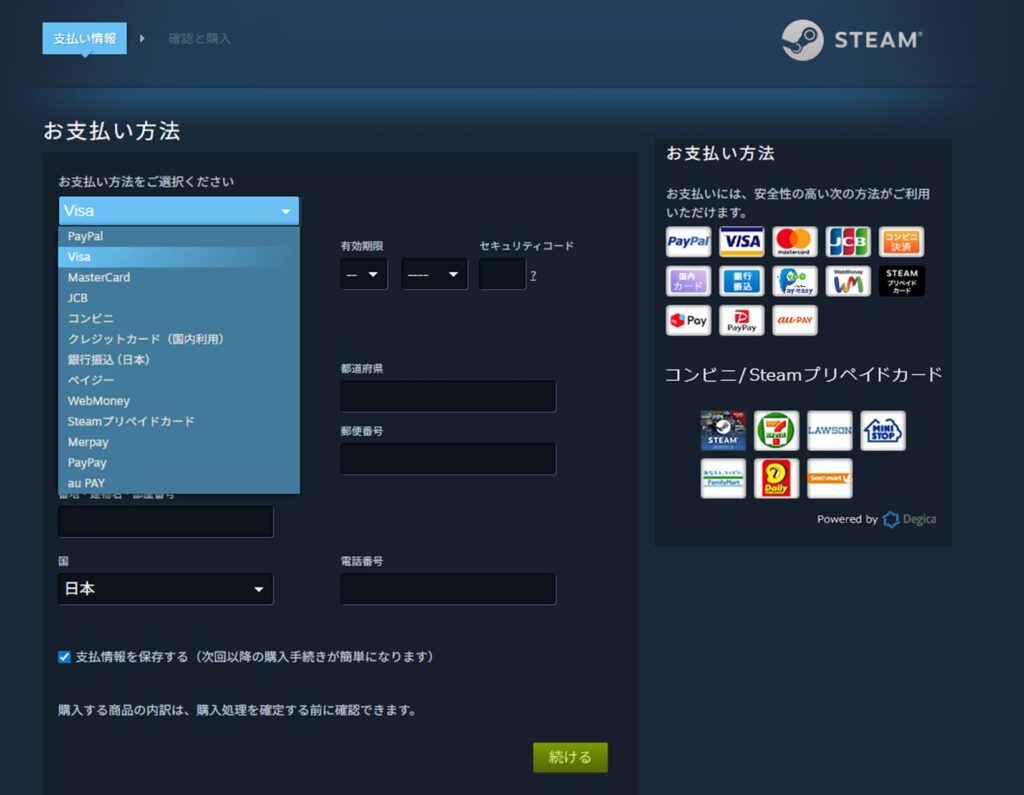
Next, choose a payment method. There are many options—most people can use Visa, but convenience store payment and bank transfer are also available if needed.
Fill in the fields in English and click “Continue.”
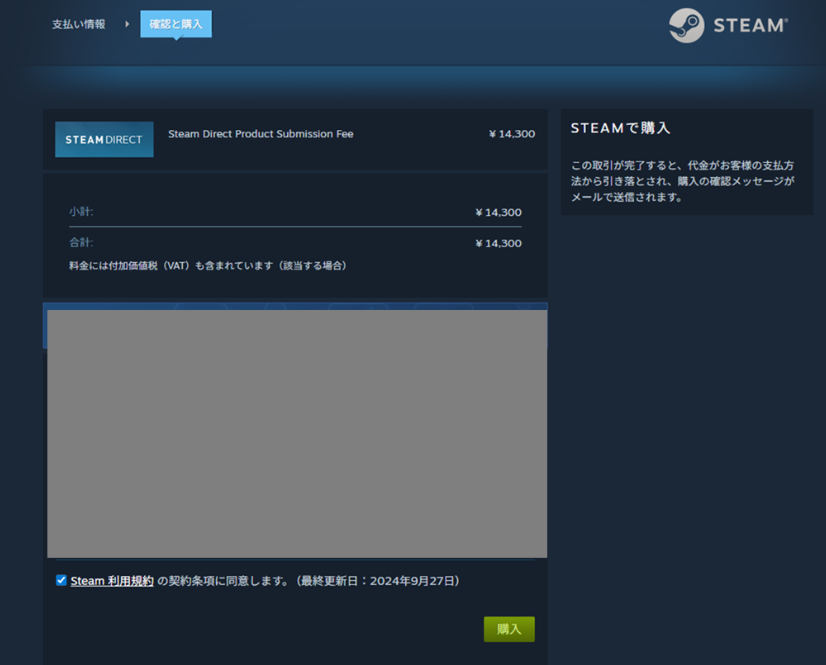
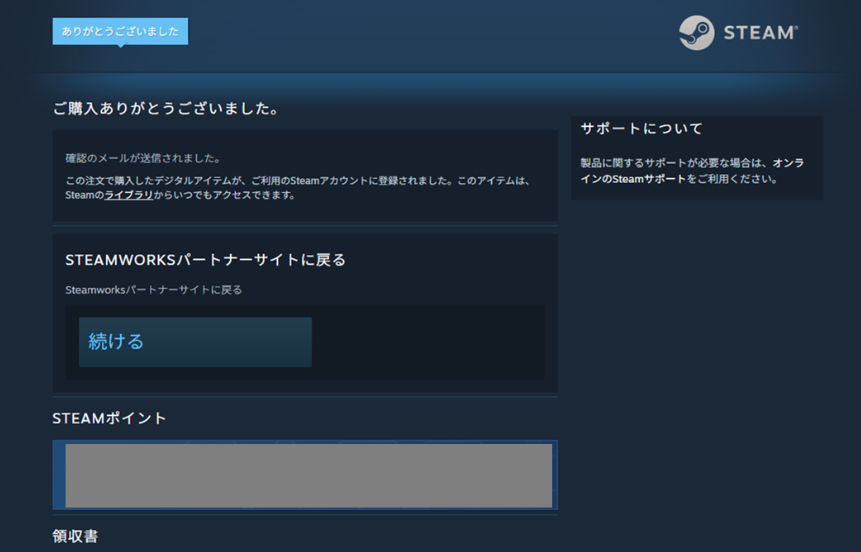
You’ll be taken to a purchase confirmation showing the $100 amount converted to JPY. In my case it was ¥14,300, though this varies with exchange rates.
Click “Purchase” to confirm.
The purchase confirmation screen will appear. Click “Continue” under “Return to Steamworks Partner Site.”
In my case, the page redirected to the regular Steam store instead. I navigated back to the Steamworks official page and resumed via “Continue Registration Process” on the dashboard. (This may not happen to everyone.)
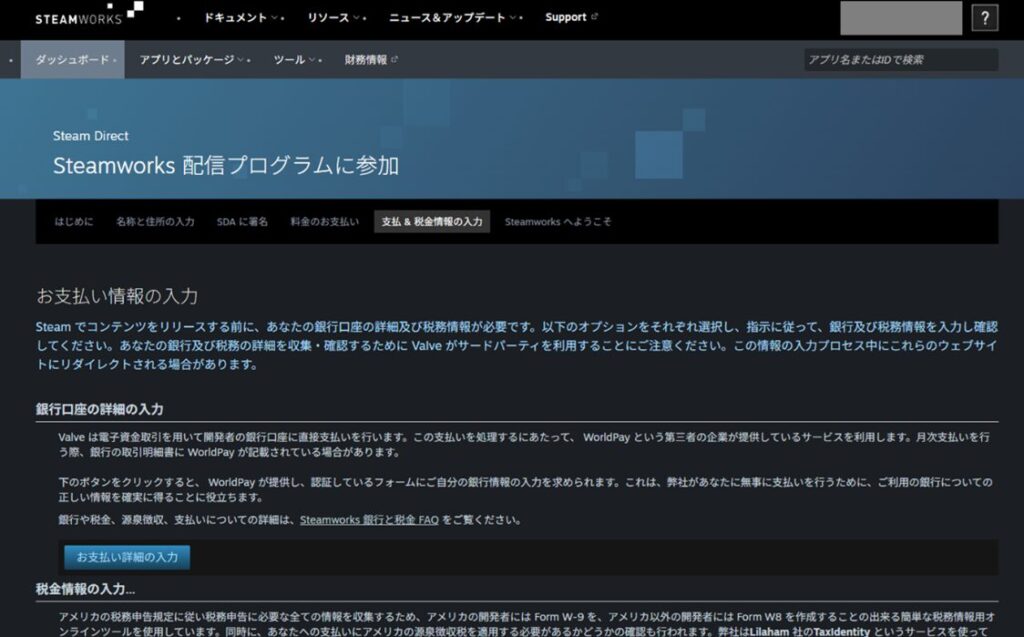
Entering Payment & Tax Information
This is the final and most demanding part of the Steamworks registration: entering your payment and tax information.
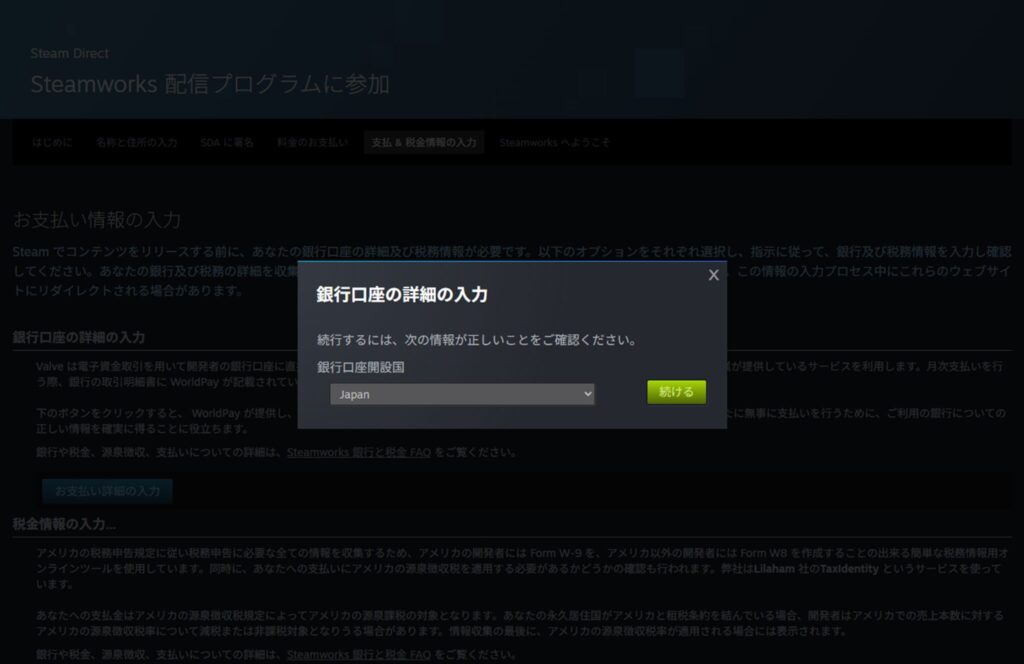
First, set the bank account where Steam should deposit your game earnings. Under “Enter Bank Account Details,” click “Enter Payment Details.”
A popup will appear asking for your bank’s country. Most readers will select “Japan.” Click “Continue.”
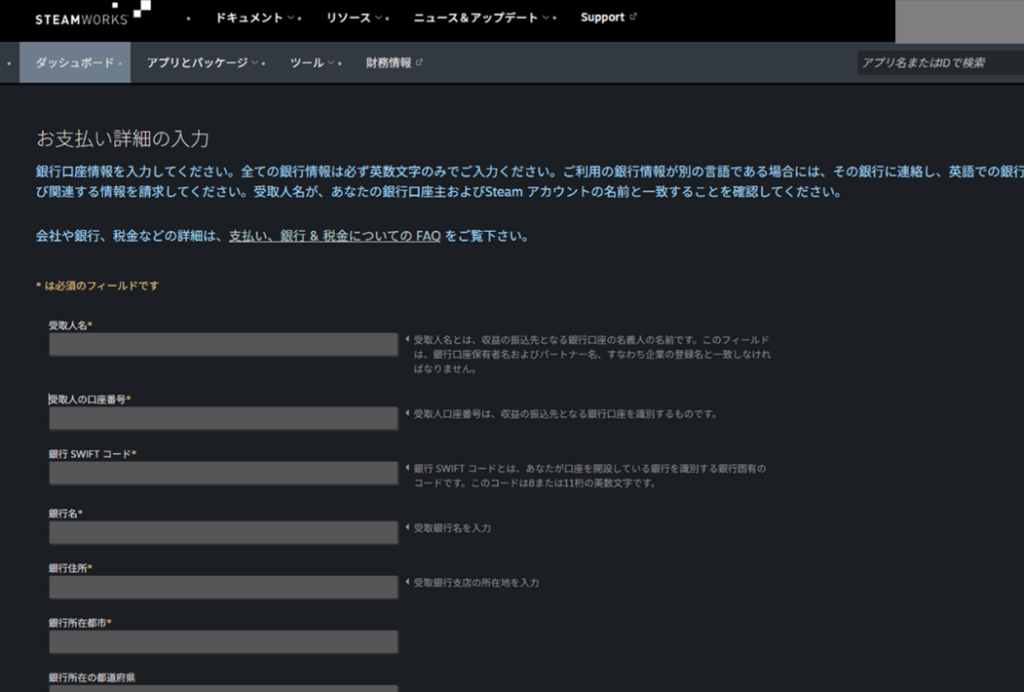
The payment details input screen appears next. Enter the bank account information for the account where you want Steam earnings deposited. All fields must be filled in English—including the account holder name, bank name, and bank address.
If you don’t know your bank’s SWIFT code or English name and address, search for “[bank name] SWIFT code” or “[bank name] English” online. Results are usually available for major banks. (Local regional banks may be harder to find—using a major bank is safer.)
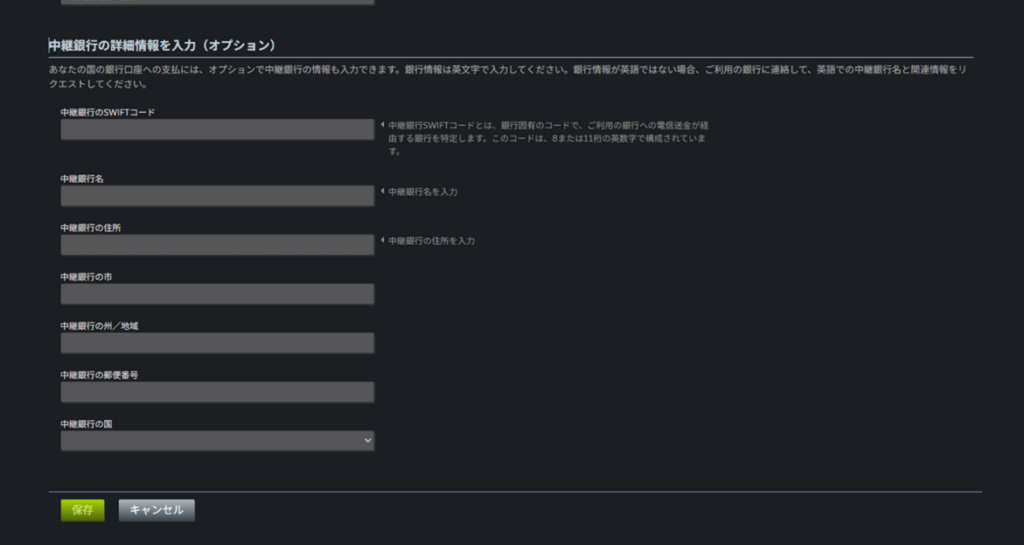
After entering your bank details, a “Correspondent Bank Details” section may appear. For major Japanese banks, this section is typically not required (it wasn’t for me).
Once all bank details are confirmed, click “Save” at the bottom.
Back on the main screen, click “Enter Tax Information.”
A tax interview begins. Skim through the introductory text and click “Continue.”

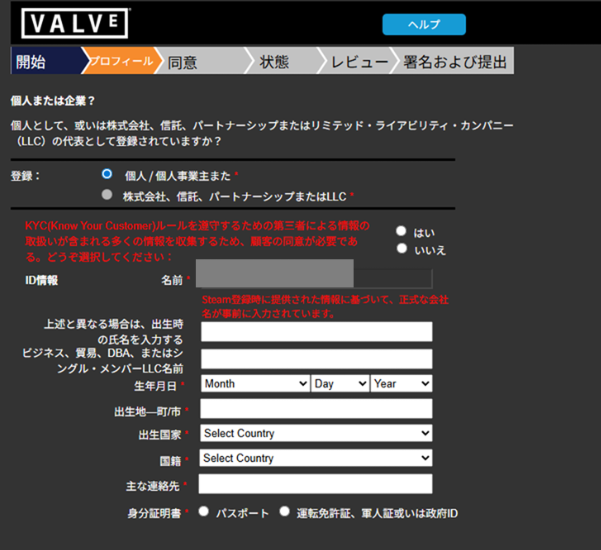
A detailed input form appears. All required fields (marked with a red asterisk) must be filled in.
For registration type, select “Individual/Sole Proprietor.”
Your name may already be pre-filled from earlier entries—just verify it. Enter your date of birth accurately—it will likely be cross-checked against the ID you submit later, so any discrepancy may cause rejection.
For birthplace and other location fields, use the English address you entered earlier. Select your country of birth and nationality. Enter your primary contact number (mobile number works).
For the ID type at the bottom, choose either passport or driver’s license (whichever you have). For a driver’s license, you’ll also need to enter the license number, expiration date, and issuing country.
When complete, click “Continue.”
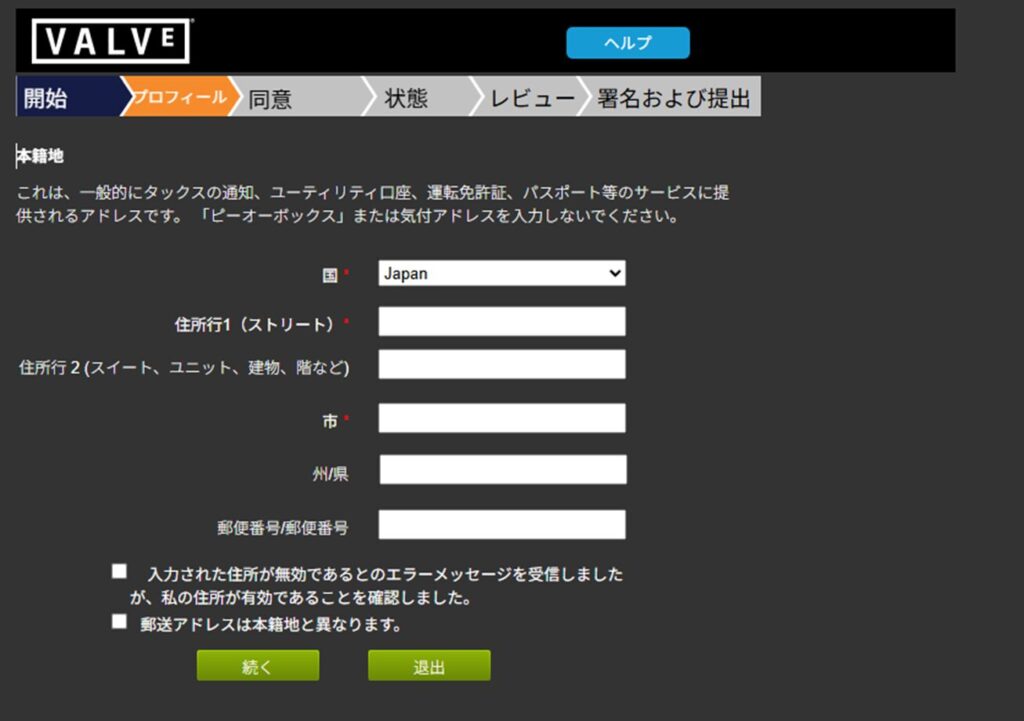
The next screen asks for your permanent address (registered address). This is distinct from the bank-registered address entered earlier.
This address must match what’s on your ID document (driver’s license or passport). Enter it in English and click “Continue.”
Note: Japanese addresses sometimes trigger errors even when entered correctly. If this happens, check the first checkbox as instructed and proceed.
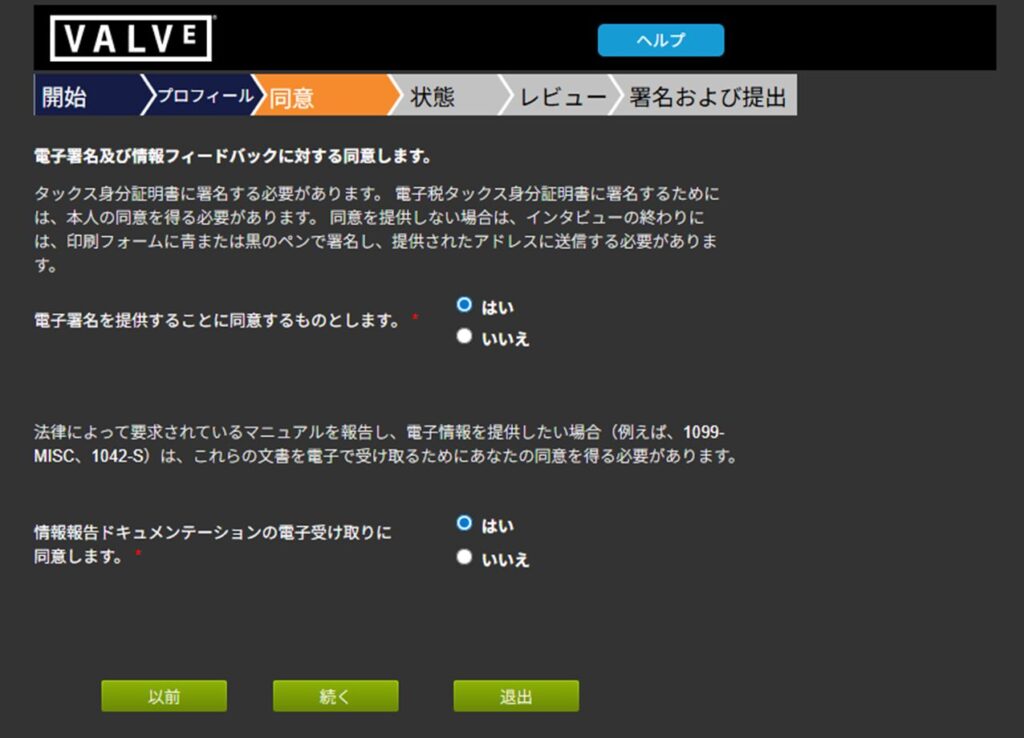
Next, you’ll be asked to agree to the electronic signature. Check both “Yes” options and click “Continue.”
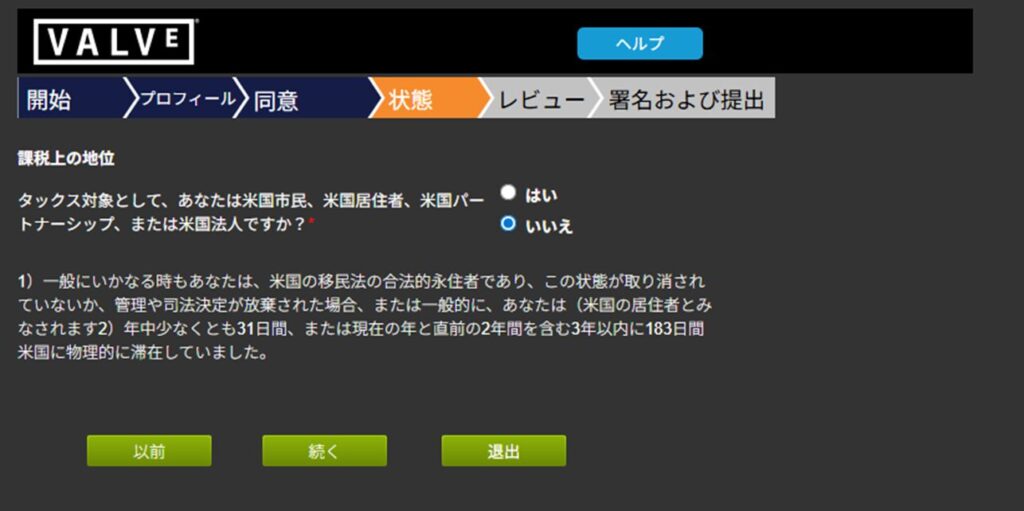
You’ll be asked whether you are a US citizen, resident, or entity. For most readers, the answer is “No.” Check accordingly and click “Continue.”
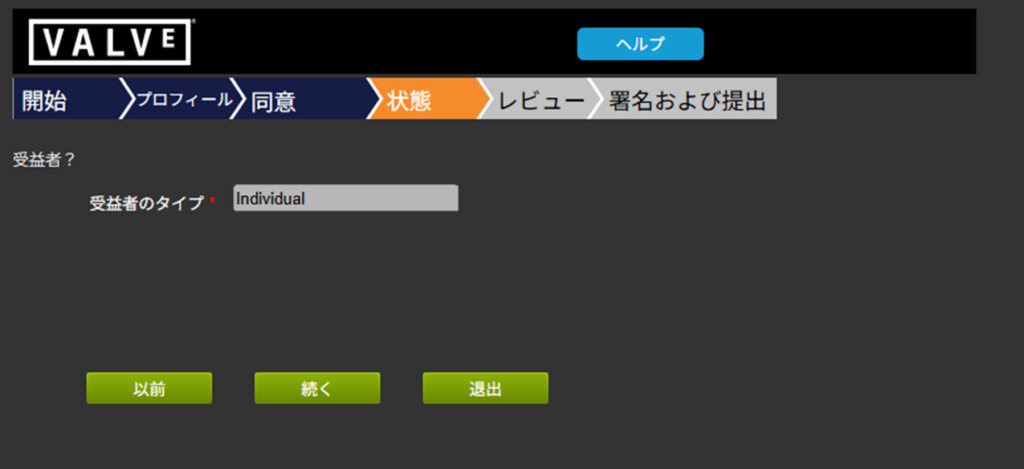
Next, confirm your beneficial owner type. If you’ve been proceeding as an individual or sole proprietor, it should already be set to “Individual.” If so, just click “Continue.”
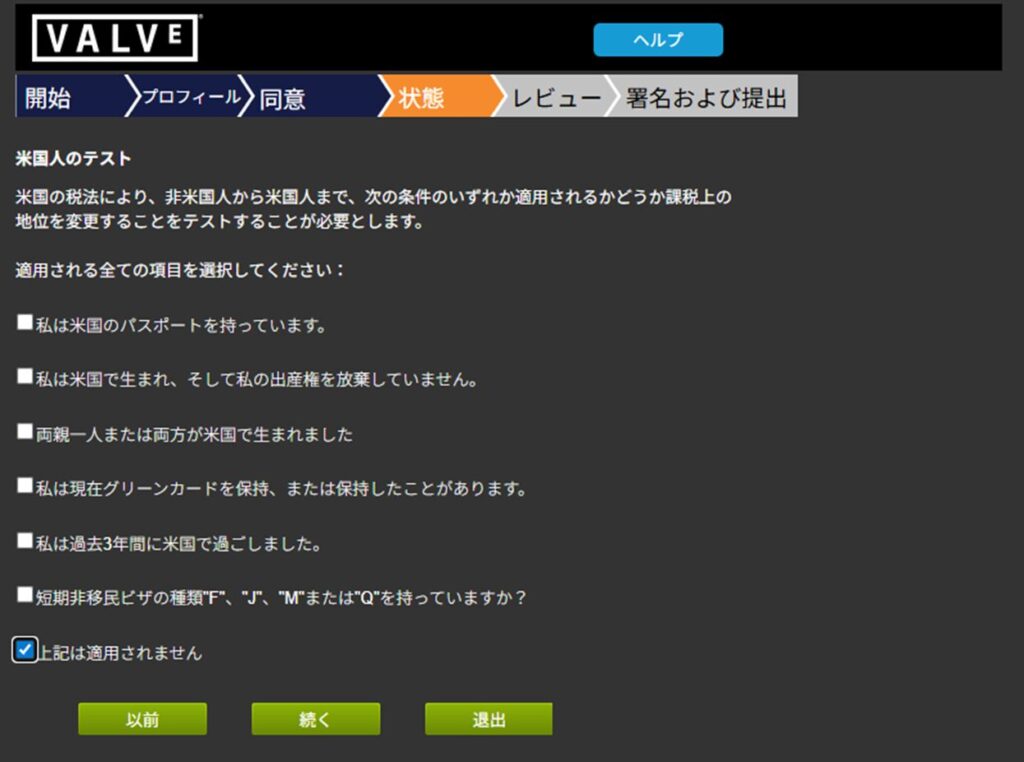
Another US status confirmation follows. If none of the listed conditions apply, check the bottom option and click “Continue.”
Select your country of residence—choose “Japan”—and click “Continue.”
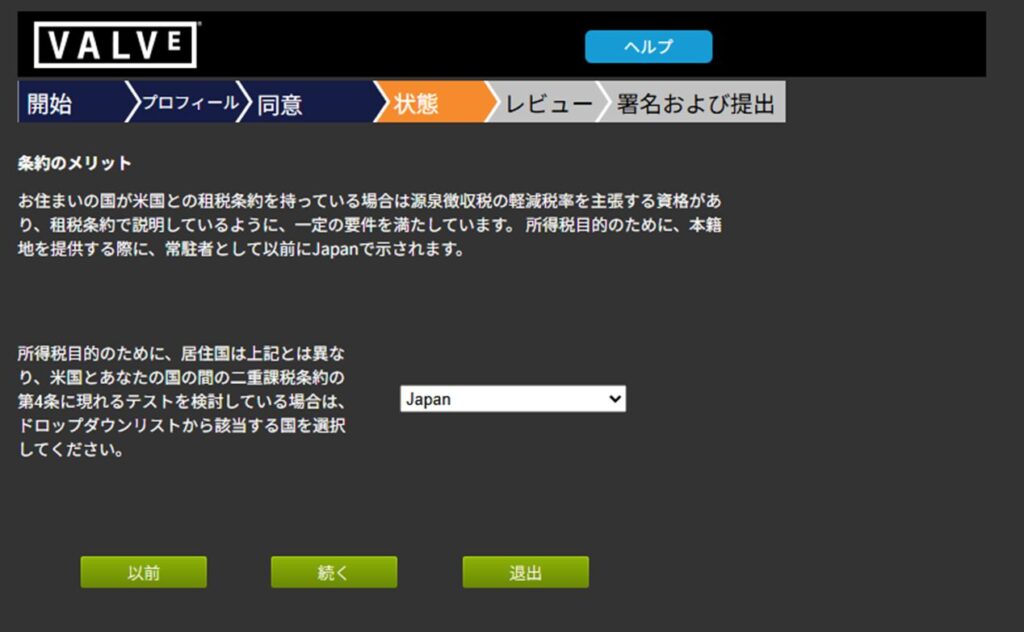
Next, you’ll be asked about your Taxpayer Identification Number (TIN). In Japan, your My Number serves as your TIN.
Select “Yes” for “Do you have a TIN?”, enter your My Number in the “Foreign TIN” field, check the associated checkbox, and click “Continue.”

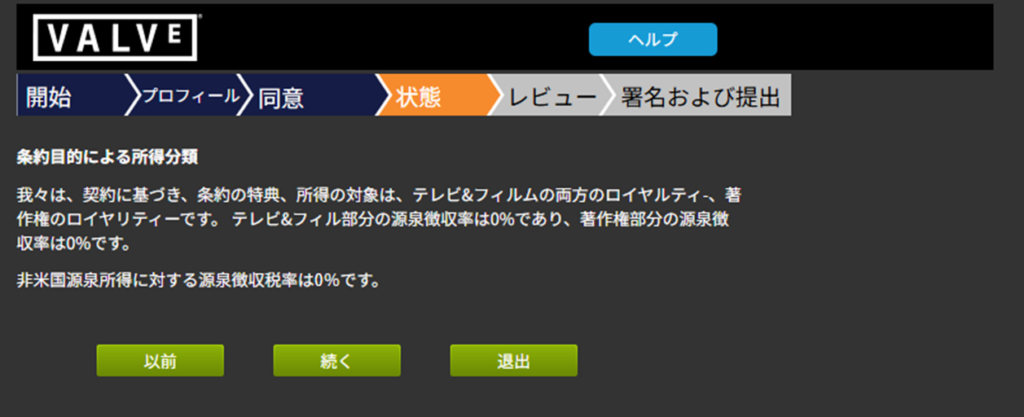
An income classification summary page will appear. If it shows “Withholding tax rate on US-source income: 0%,” everything is correct. Click “Continue.”
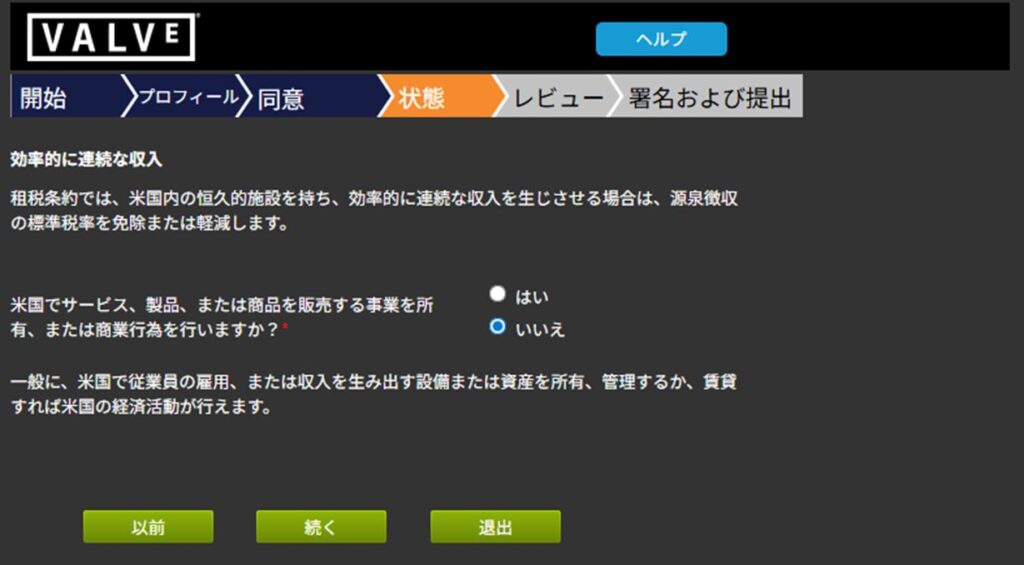
More screens follow—you’re nearly done now. The next screen asks whether you have US assets generating effectively connected income. For the vast majority of readers, the answer is “No.” Select “No” and click “Continue.”
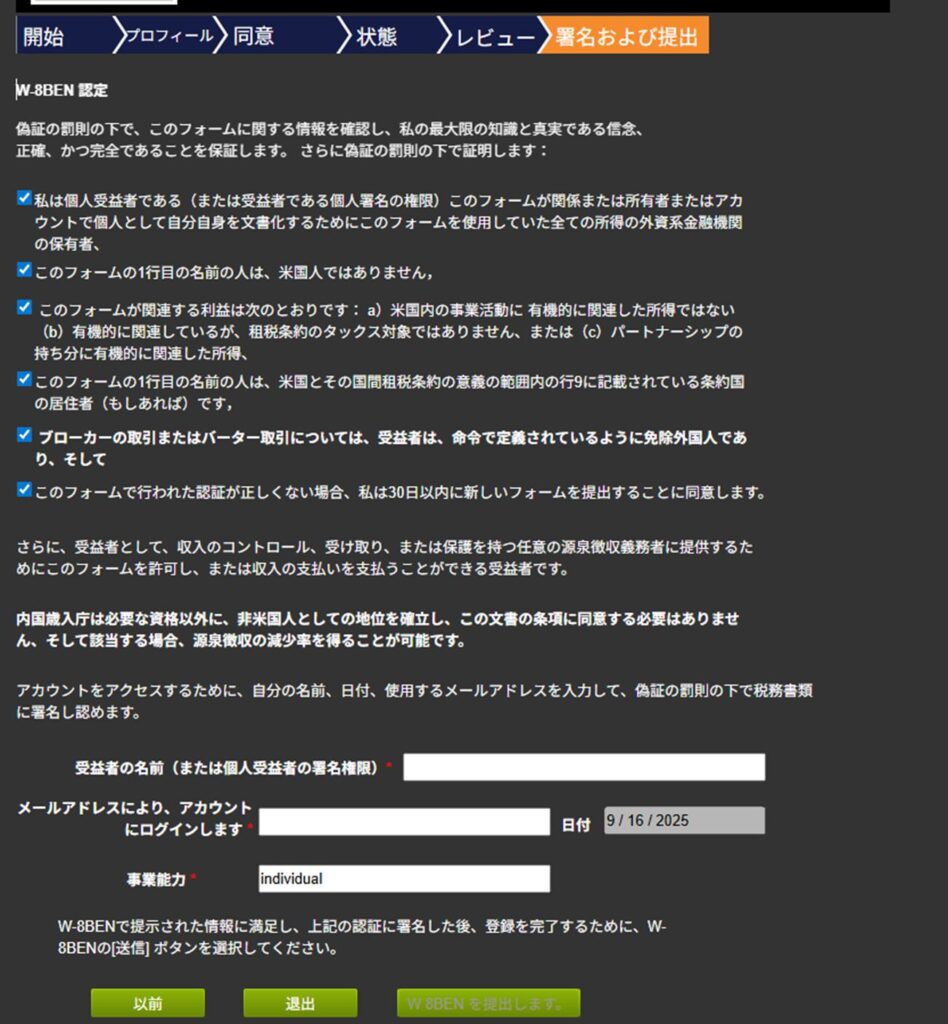
Based on all your answers, a W-8BEN tax certificate will be generated. Most of the content is US tax law terminology that’s difficult to understand, but read through it briefly.
After reviewing, click “Continue” at the bottom. If you have objections to the content, the form can apparently be printed for separate review—but that’s beyond the scope of what I can guide you on.

A small popup appears—it’s just reminding you to read the next page carefully, check the boxes, and sign. Click “Close.”
The final confirmation and signature screen appears. Read through the content, check the boxes, sign in English, and enter the email address you used to create your Steam account.
For business capacity, enter “individual” for solo/indie developers. When everything is filled in, click “Submit W-8BEN.”
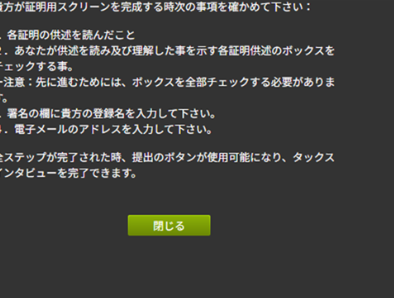
The tax interview is now complete. Click “End Interview” to proceed.
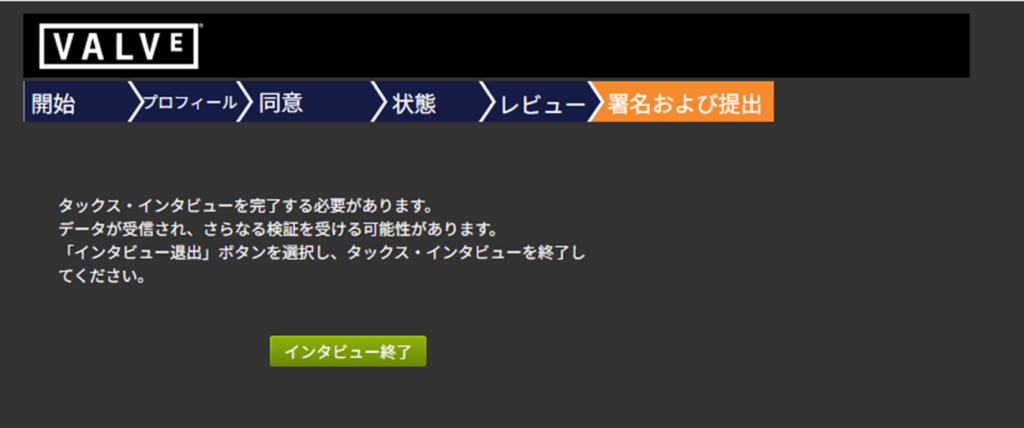
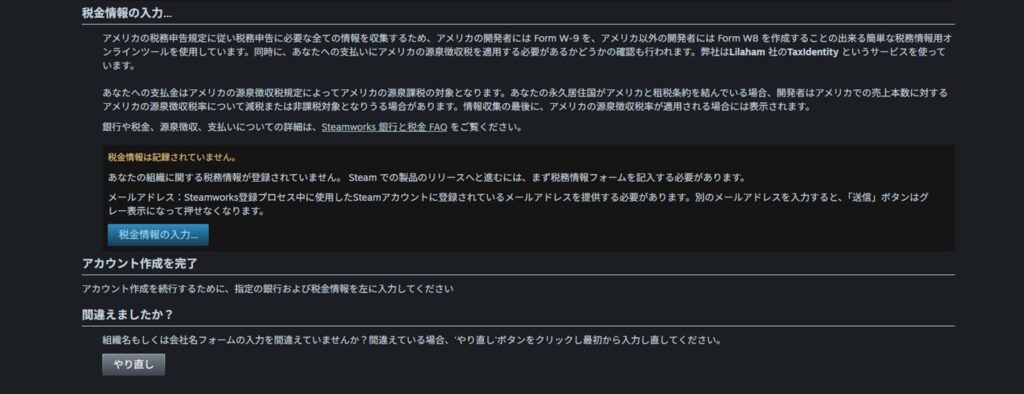
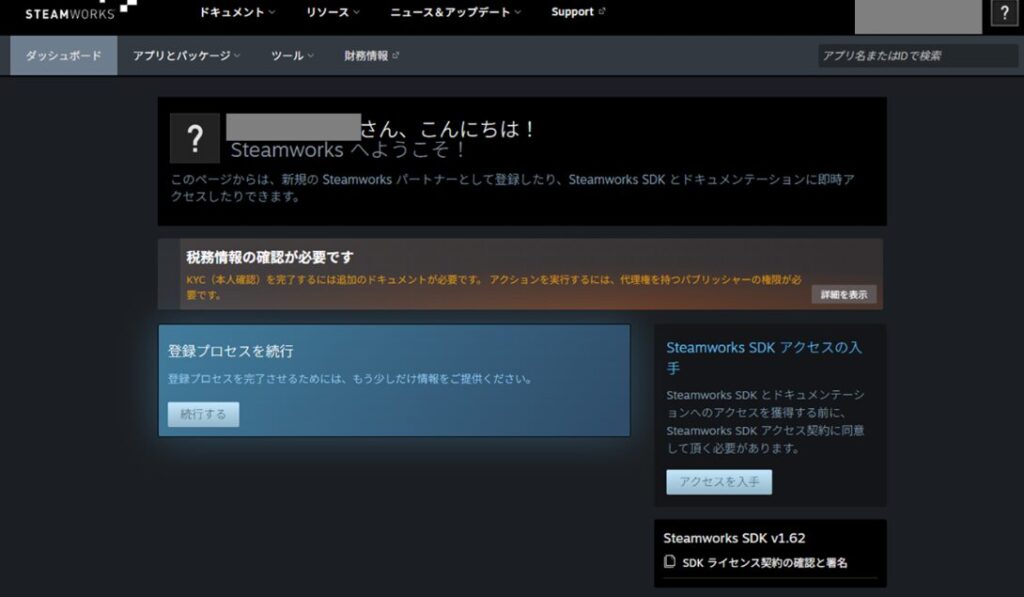
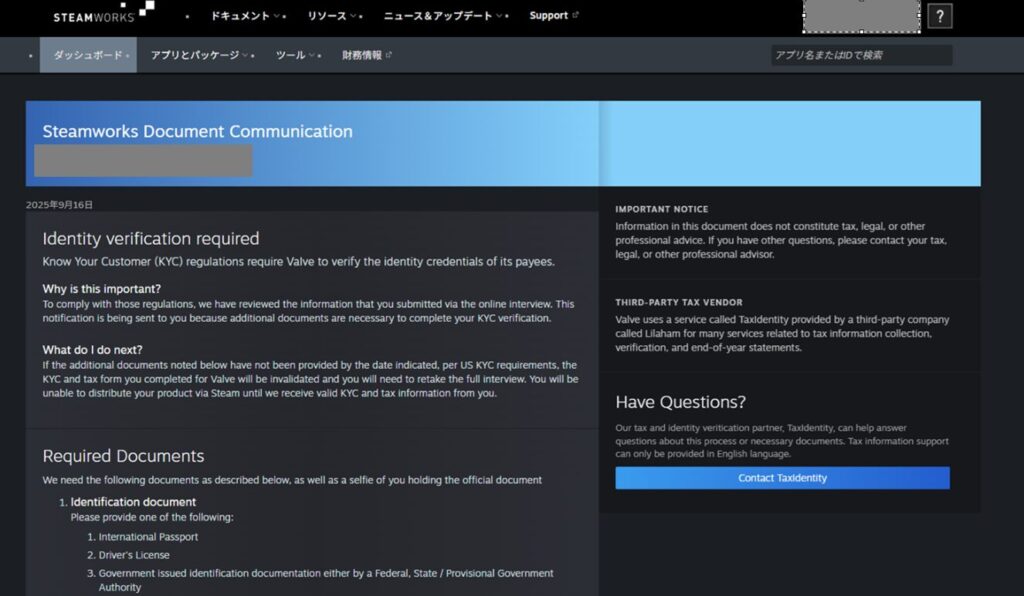
Back on the dashboard, however, you may see a warning: “Tax information confirmation required.” This means the interview is not yet fully complete because you haven’t submitted a photo ID.
This is frustrating, but ID submission is a required step. Importantly, Steam will contact you via email with instructions—you’ll need to wait for that.
In my case, the email arrived within about 2–3 hours.
Submitting Your ID
After completing the steps above, you’ll receive an email similar to the one shown below. Read it and click “GO TO STEAMWORKS.”

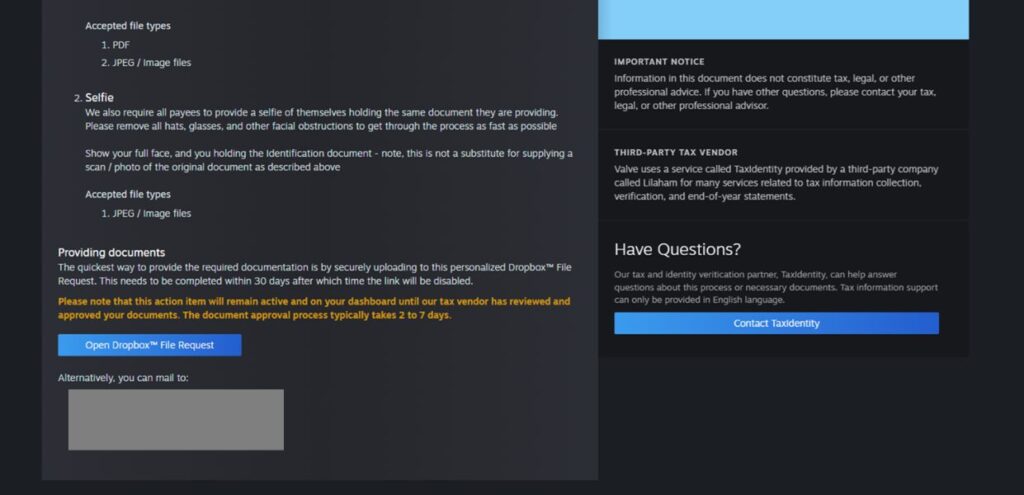
You’ll be taken to a Steamworks screen instructing you to upload your ID documents via Dropbox. You’ll need to prepare the following photos:
- Front and back of your passport or driver’s license
- A selfie holding your ID showing your face clearly
The ID document requirement makes sense, but the selfie requirement does feel uncomfortable. It’s clearly intended to prevent impersonation registrations, but if Steam were ever to suffer a data breach, this would be among the most sensitive information exposed.
That said, if you want to sell on Steam, this cannot be avoided. If you’re unwilling to submit this information, selling on Steam isn’t an option.
If you accept all of these risks and still want to sell on Steam, click “Open Dropbox File Request” at the bottom of the screen and upload your ID photos and selfie to the Dropbox upload page that opens.
As noted on the page, images must be in JPEG or PDF format. Edited or altered images will likely be rejected.
That completes the Steamworks registration process on your end. After uploading to Dropbox, you’ll need to wait for Steam’s review to complete—typically around one week.
If there are issues with your documents, Steam will contact you by email asking for resubmission, so check your email morning and evening.
Registration Complete!
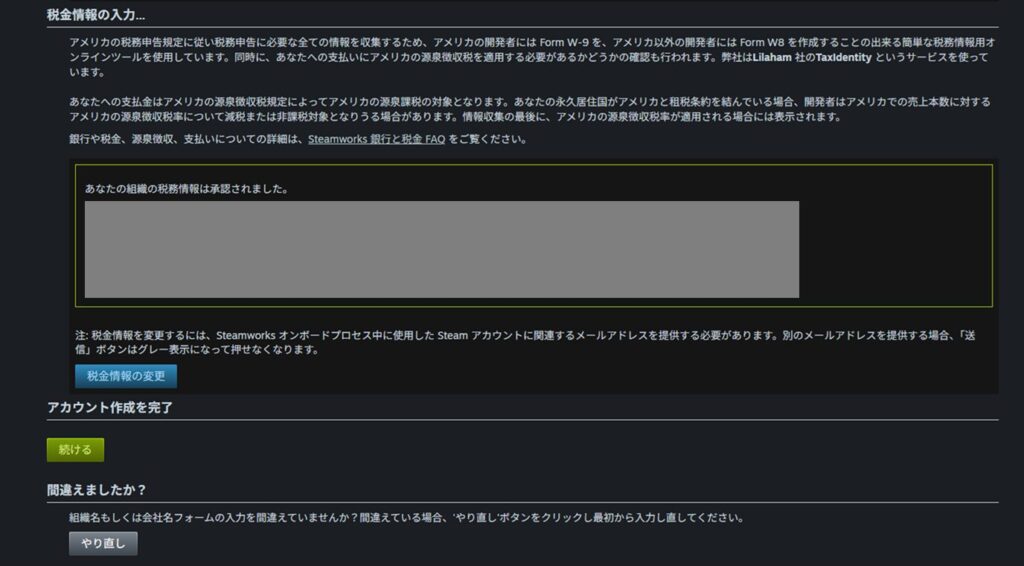
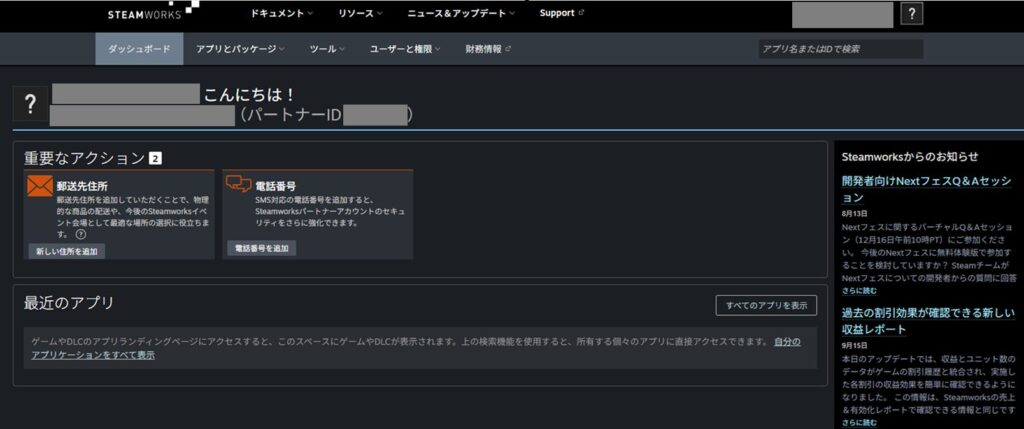
In my case, the day after uploading my ID and selfie, the Steamworks dashboard looked as shown below—the warning message at the top had disappeared.
At that point I still hadn’t received a confirmation email, so I wasn’t sure whether it was safe to proceed.
After waiting one more day with no email, I clicked “Continue” under “Continue Registration Process” and moved forward.

The tax information page appeared, showing “Your organization’s tax information has been approved.” The review was complete.
No completion email ever arrived, at least in my case.
If you’re registering for Steamworks and don’t receive a confirmation email, check your dashboard directly every day rather than waiting for email notification.
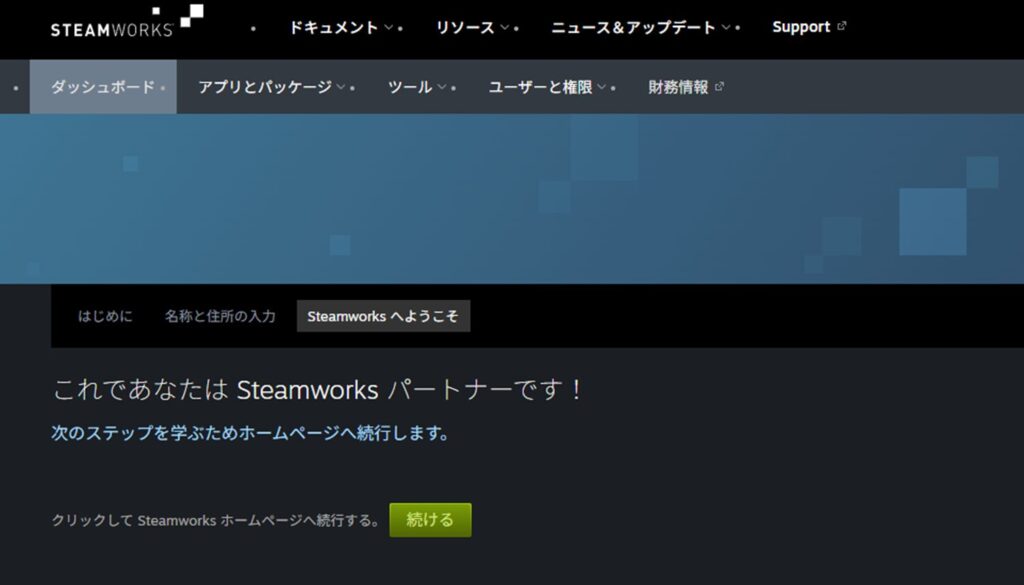
With the review passed, I clicked “Continue” under “Complete Account Setup” at the bottom.
Steamworks registration as a partner is now complete. Given how tedious the registration process is, a significant number of people probably drop out along the way—but completing registration is just the beginning.
From here, the real work begins: preparing the store page, building the game for upload, and everything else needed to actually get the game on sale.
Back on the post-registration dashboard, there may be prompts to add a mailing address and phone number. These are optional—fill them in at your discretion.
The “Recent Apps” section is where your store pages will eventually appear. I’ll continue exploring and documenting as I go.
Summary
This article covered Steamworks registration (joining the distribution program) based on my own experience.
My honest take: the registration process is far too tedious. But given that international financial transactions are involved, the level of rigor required isn’t entirely unreasonable.
That said, Steamworks registration is only the entrance to the path of selling on Steam. The truly demanding work comes after.
For anyone who is determined to publish their game on Steam, the next step is preparing and publishing the store page—that guide is linked below.
This article ends here. Feel free to browse other articles on the site.
To return to the main overview article: https://en.senkohome.com/steam-registration-1/

📚 Series: How to Sell Your Game on Steam (2/7)