How to Create, Review, and Publish a Steam Store Page
This article explains the steps an independent game developer (or small indie team) needs to follow to create and publish a Steam store page. For an overview of the full process of selling a game on Steam, see the article below.
Note: these steps are based on my own registration experience in September 2025. Valve may update the process, so treat these as approximate guidance.
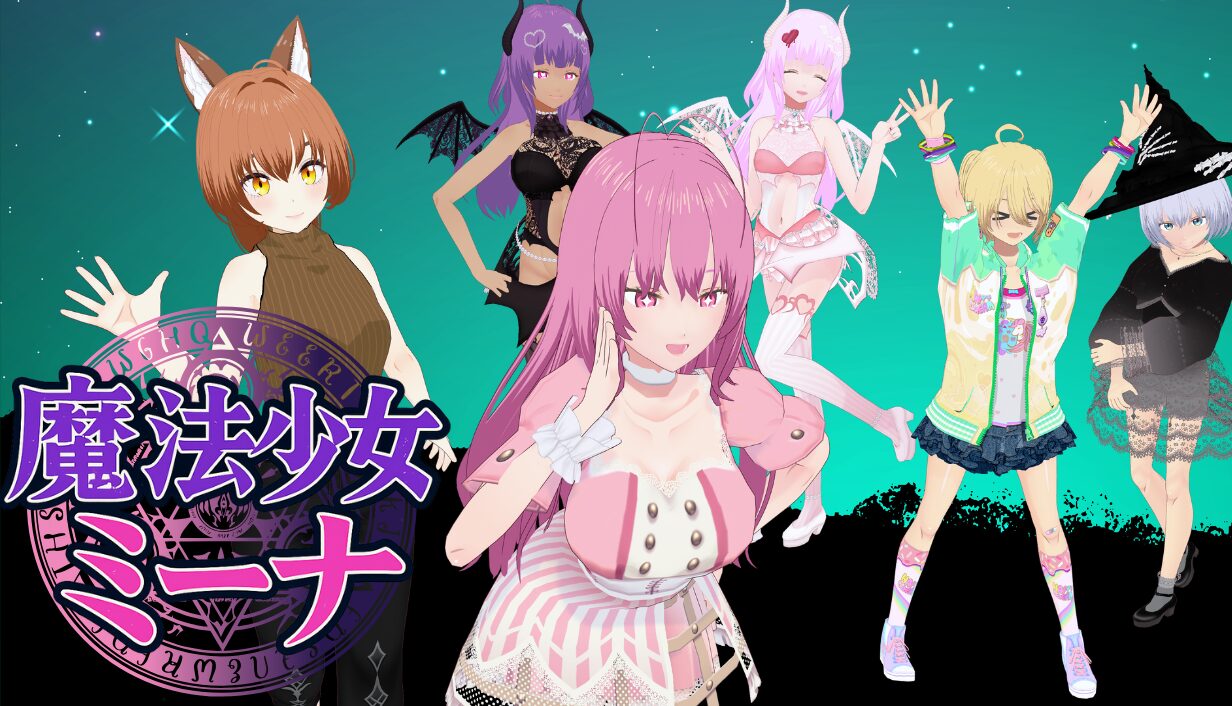
For reference, here is the game I submitted to Steam:
https://twitter.com/FoxEngineer777/status/1974287906367050068
What’s Required to Prepare and Publish a Store Page
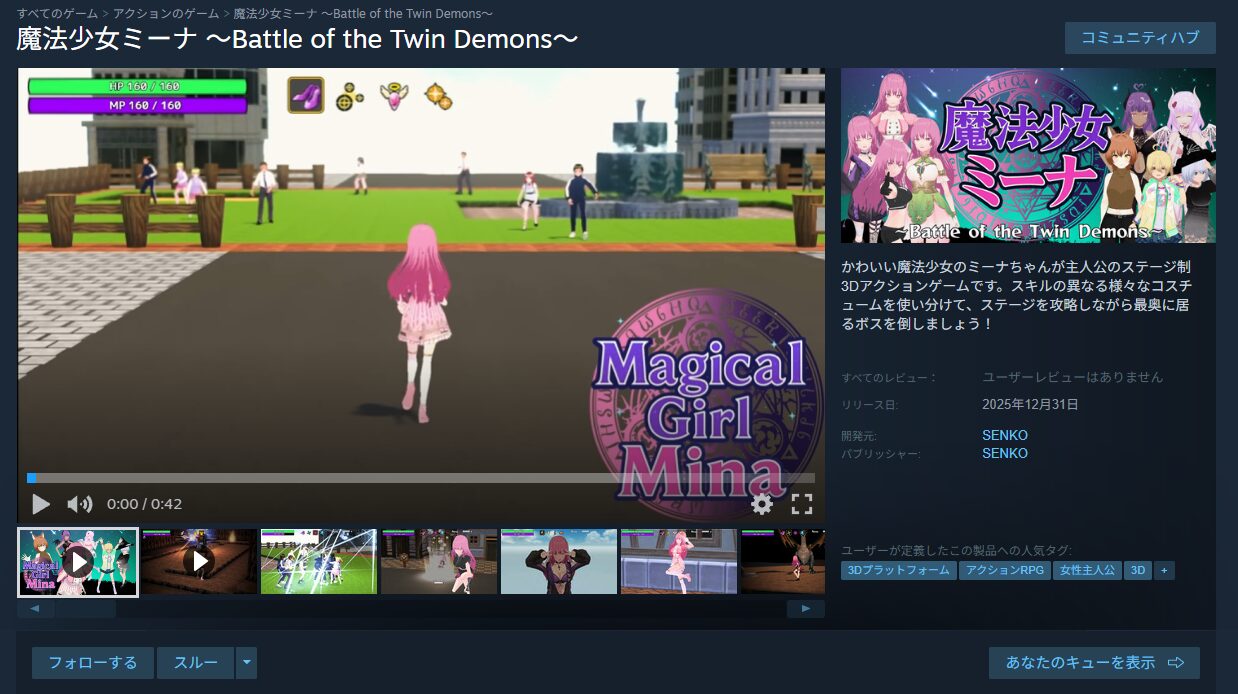
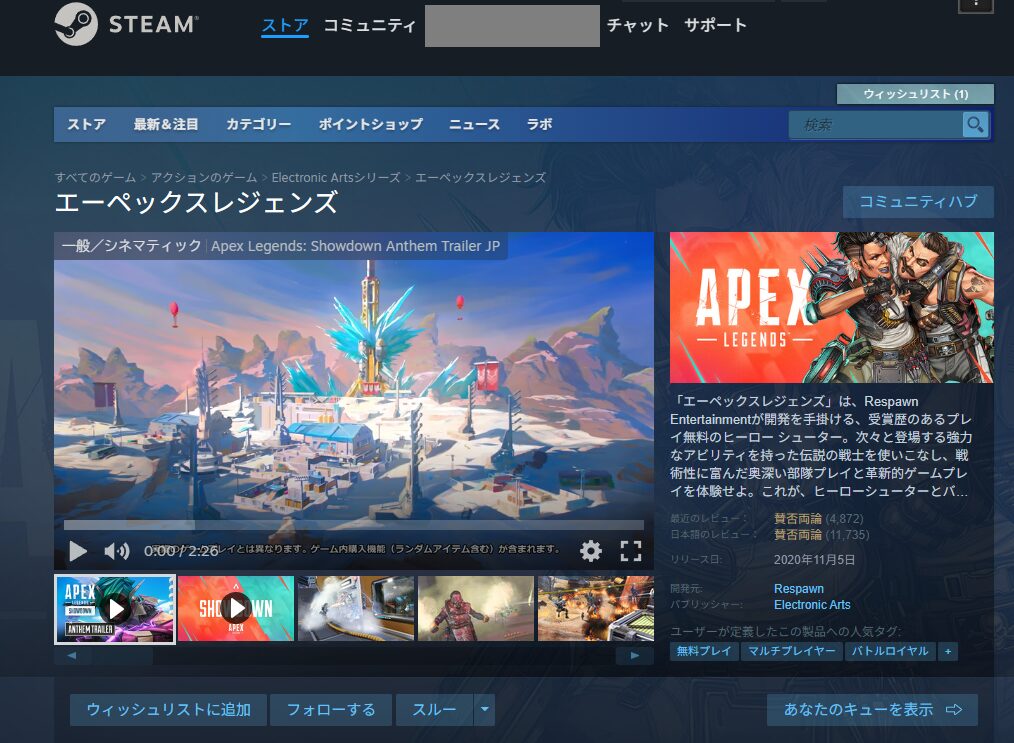
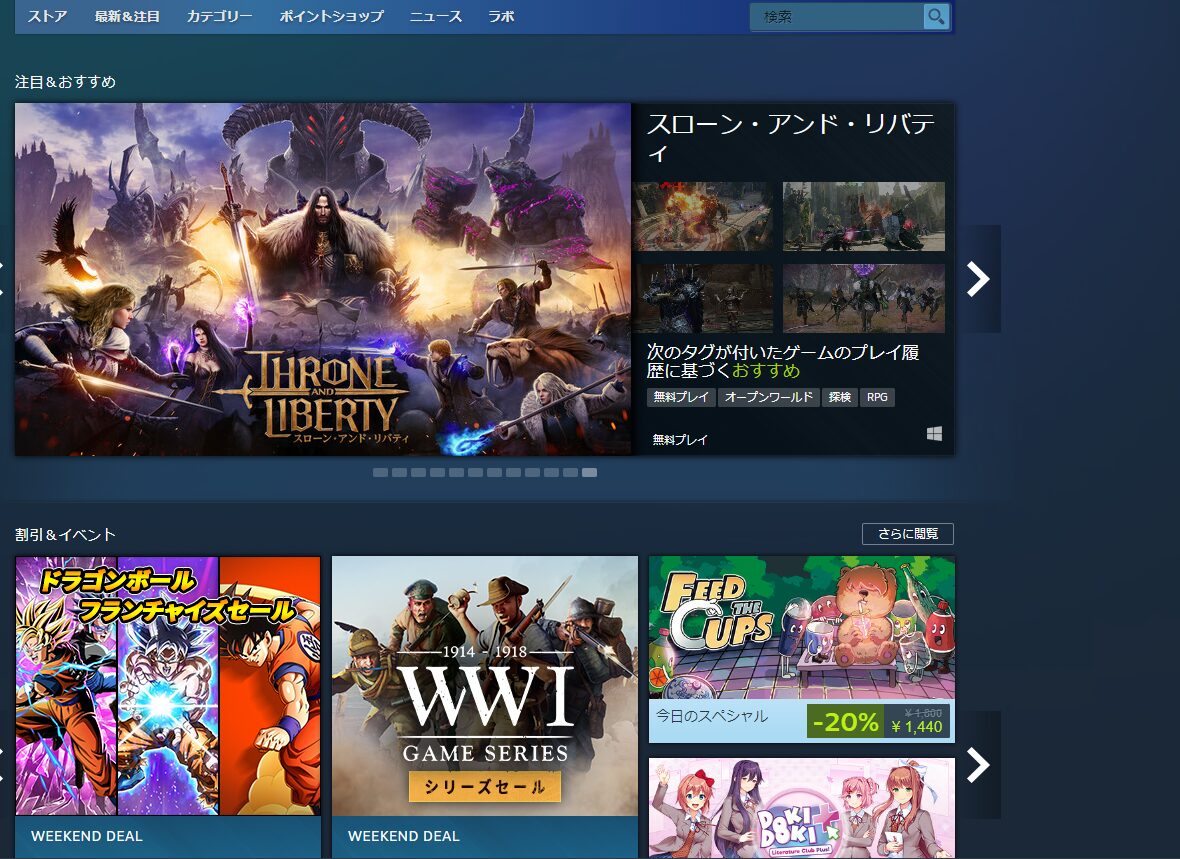
Steam requires a dedicated store page for every game you want to sell. A store page is the individual page for each game—the kind of page shown below.
Store pages are highly customizable, but certain minimum elements are required. Below are the steps I followed when actually preparing and publishing my own store page.
Fair warning: creating a store page is a significant amount of work and takes time. Expect to spend several days completing all the required preparation.
- Create a new game (app) entry
- Prepare the “Basic Info” section
- Prepare the “Description” section
- Prepare the “Ratings” section
- Prepare the “Early Access” section
- Prepare the “Graphic Assets” section
- Prepare the “Trailer” section
- Prepare the “Special Settings” section
- Prepare the “Localization” section
- Prepare the “Publish” section
- Prepare the app icon and shortcut icon
- Submit for review and publish
All of these steps take place within Steamworks. If you haven’t registered for Steamworks yet, see the article below and register first.

Creating a New Game (App) Entry
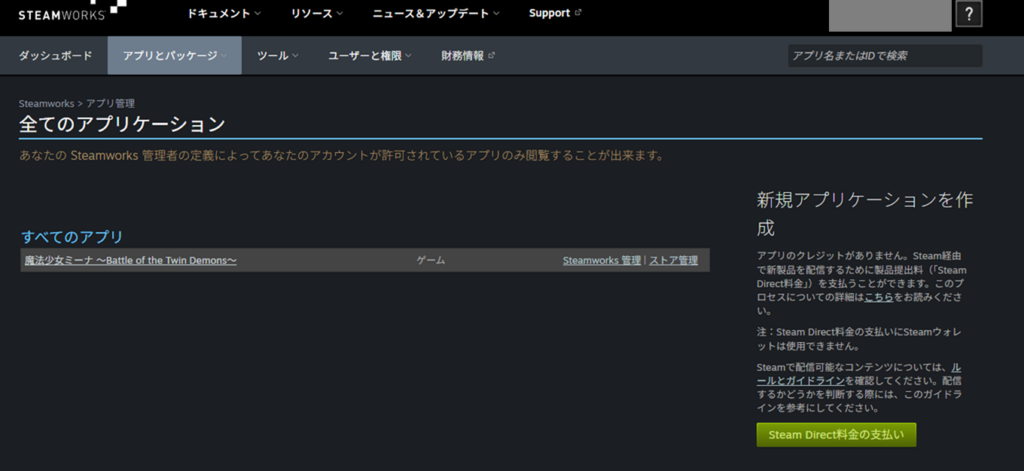
Right after registering for Steamworks, the dashboard will show no apps (games) registered yet. The first step is to register the game you want to sell.
From the “Apps & Packages” tab, select “All Applications.”
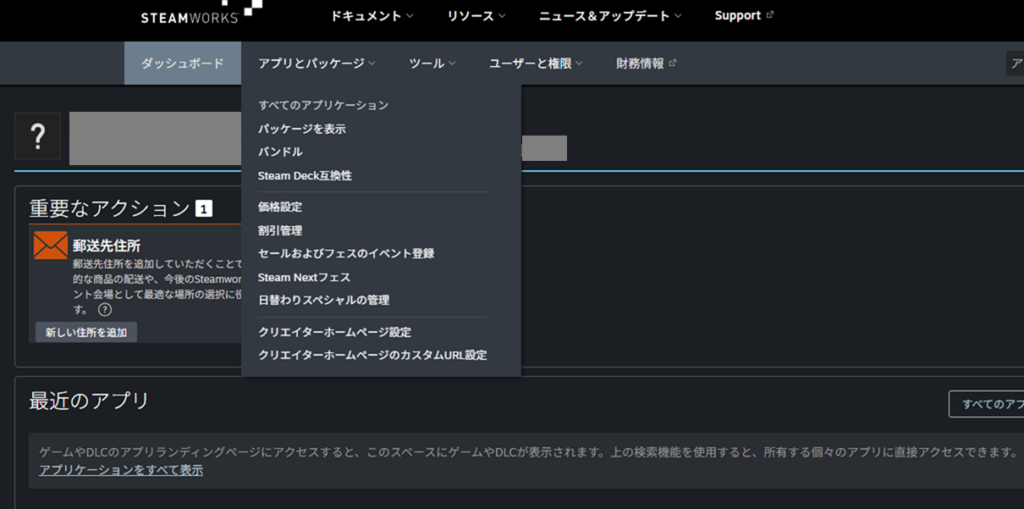
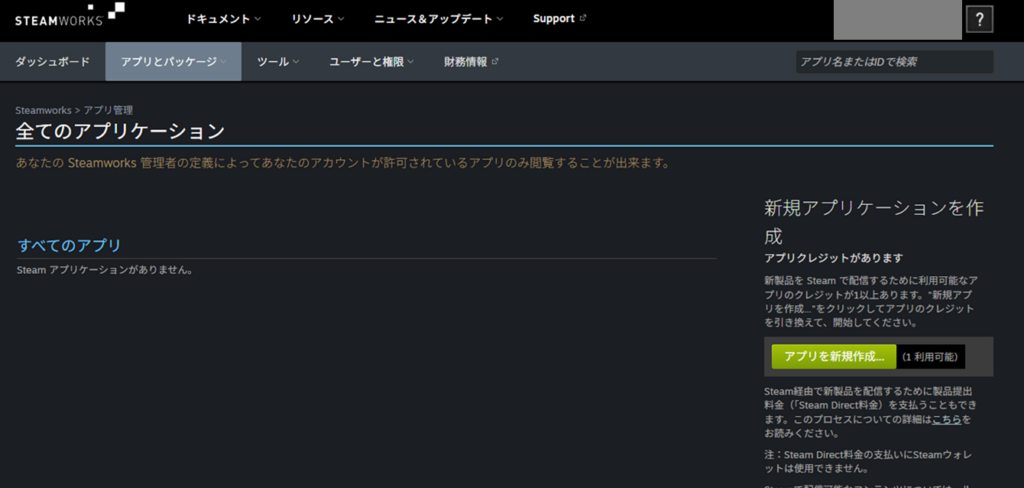
On the right side of the page that opens, you’ll see a “Create New Application” option.
Each game you register consumes one “App Credit.” The deposit you paid at Steamworks registration comes with one credit already included.
For a second or subsequent game, you’ll need to pay another $100 to purchase an additional App Credit. That’s the per-game cost mentioned in the previous article.
For your first game, just click “Create New App.”
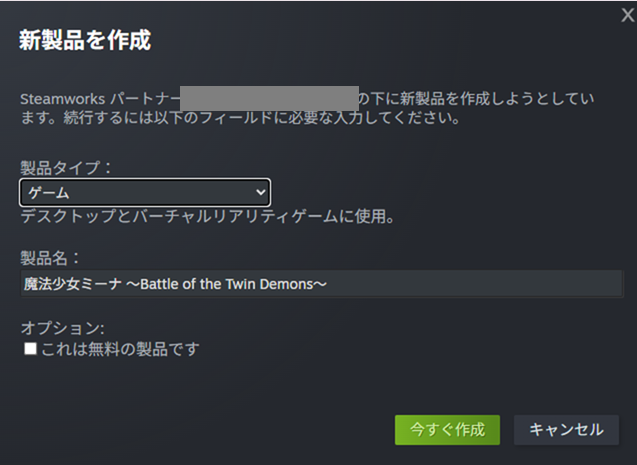
A form appears for entering basic information about the game. Select “Game” as the product type (or “Software” if applicable). Enter your game’s title as the product name.
The title displayed on the store page can be set separately, so this internal name can be whatever is easiest for you to manage.
The options section lets you mark it as a free product. Leave this unchecked if you intend to sell it.
Note: even free products consume an App Credit, so Steam is not a convenient free-game host. Most “free” games on Steam include in-app purchases or paid DLC.
Click “Create Now” when done. This information can be changed later, so don’t overthink it.
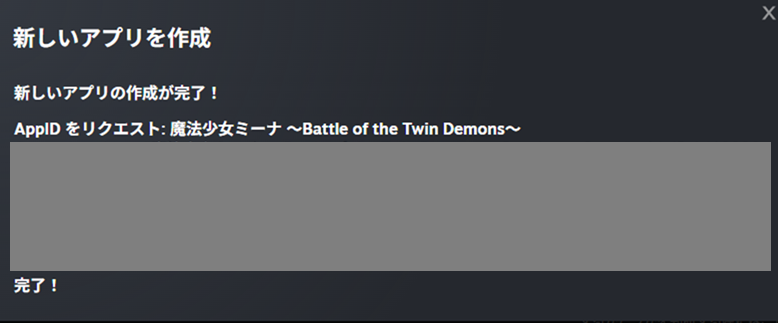
After a moment, a dialog confirms the app was created. Close the dialog.
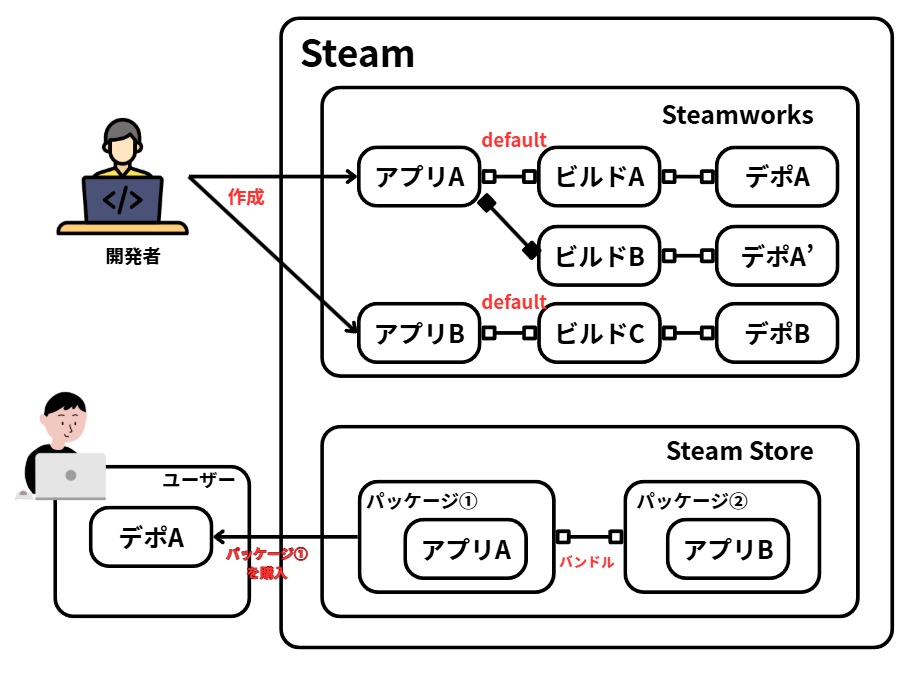
Here’s a quick overview of the various IDs you’ll encounter in Steamworks:
- Partner ID: linked to your Steamworks account (not recommended to share publicly)
- App ID: linked to a specific game; appears in store URLs (publicly visible)
- Depot ID: linked to the game build, demo, DLC, etc. (publicly visible)
- Build ID: linked to a specific uploaded version of the game (publicly visible)
- Package ID: linked to Steam’s internal pricing structure (not recommended to share publicly)
Steamworks shows IDs throughout the interface, and it can get confusing. My articles keep all IDs hidden, but practically speaking, inadvertently exposing a non-recommended ID won’t cause major problems.
Once the app is created, it will appear in your All Applications list. From here you’ll build out the store page for this specific game.
Click the game’s title to open its individual page.
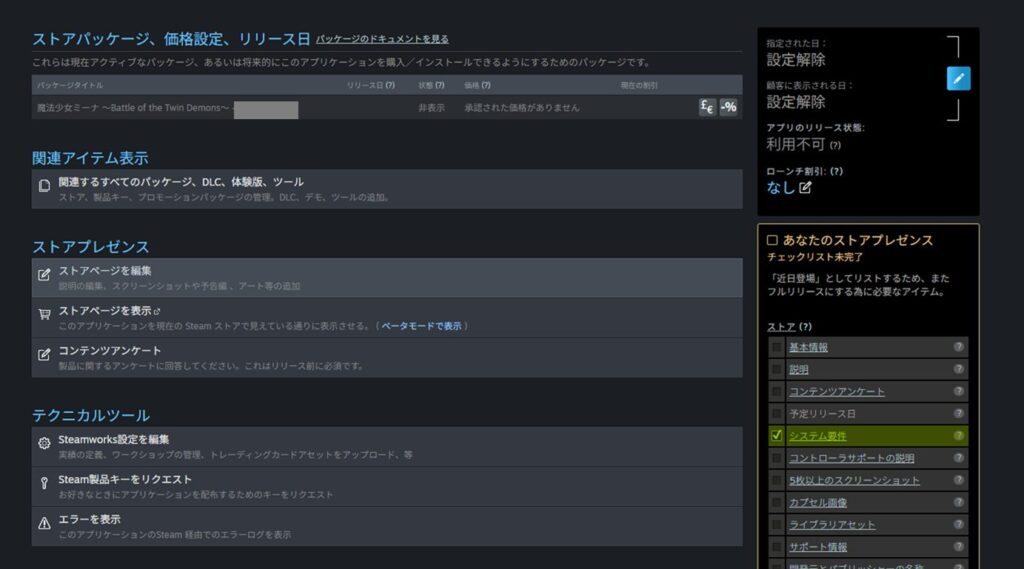
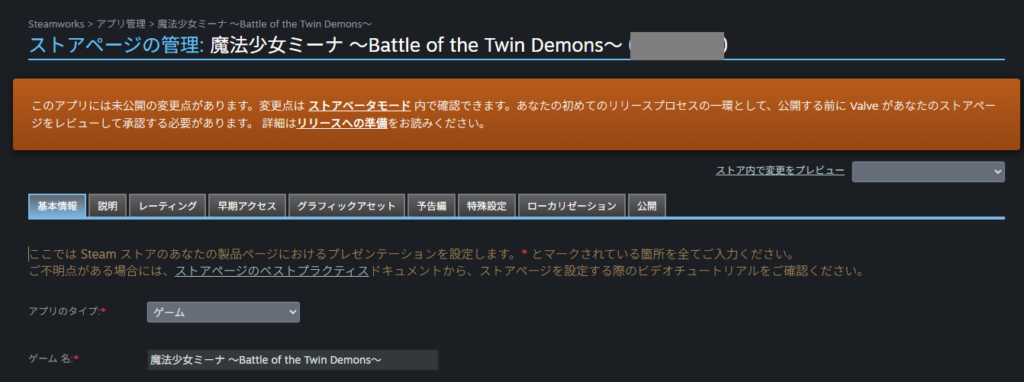
You’ll see sections for Store Presence (the store page), build information, release information, and more. Nothing is configured yet, so each section just shows its setup instructions.
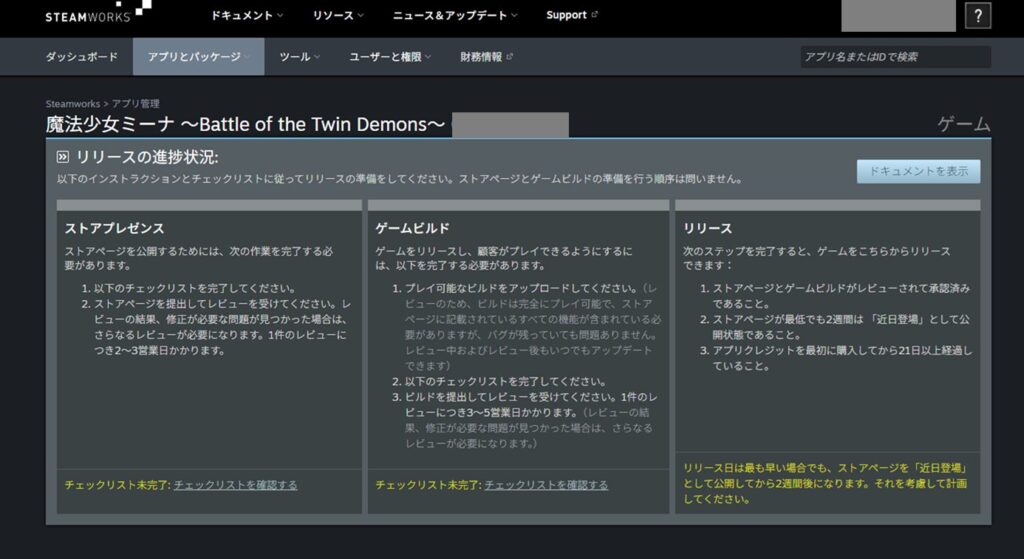
Scroll down to see more items. Everything will eventually need to be filled in, but start with the store page. Click “Edit Store Page” under the “Store Presence” section.
Preparing the “Basic Info” Section
From here I’ll walk through each store page tab. There’s a lot to fill in, so I’ll focus on what I actually entered and why.
Be aware that I’m not entirely certain my choices here were correct in every case—treat this as a reference, not a definitive guide. When in doubt, use the “Store Page Best Practices” link shown on the page.
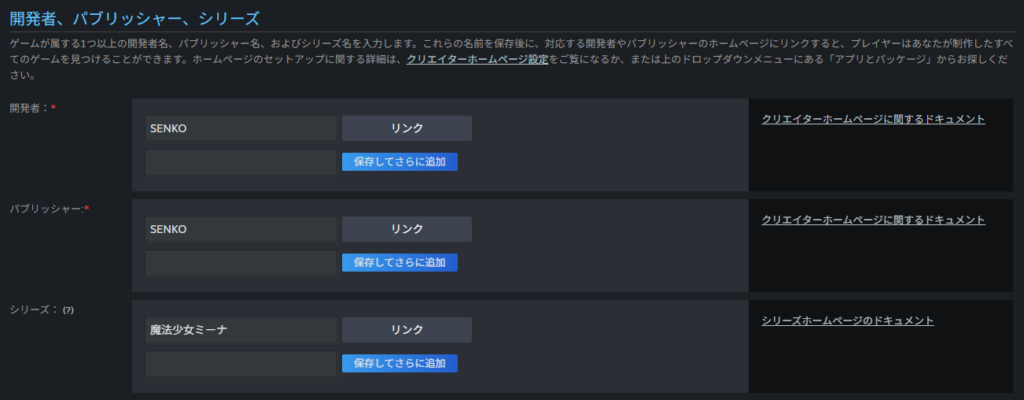
Enter the developer and publisher names as you want them to appear. This is likely the name you’ll use on Steam going forward, so choose something durable (preferably in English).
It can be changed later, so it’s not critical, but consistency matters.
For reference: a “publisher” is a company that supports game sales (marketing, localization, sometimes funding). Over 90% of developers won’t have one, but some indie developers do work with publishers.
The “Series” field is optional—only worth filling in if you’re making a series.
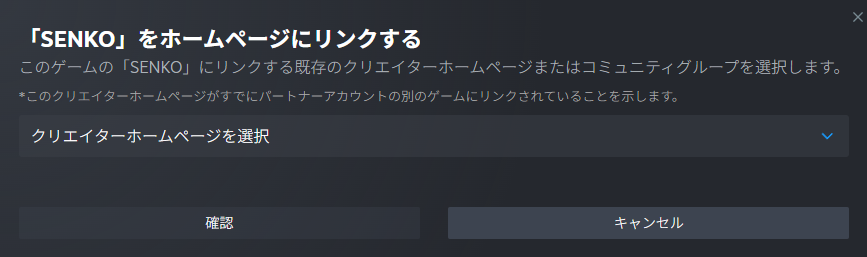
Clicking “Links” shows a screen for connecting a Creator Homepage or Community Group. These require setting up separately in Steam first. Add them later if you create them.
External links can include your game’s website or forum. I entered my game’s website URL here, along with the online manual URL. These are optional.

Steam Deck compatibility can be entered if you’ve gone through Steam’s official verification process. Most indie developers haven’t, so leave this blank.

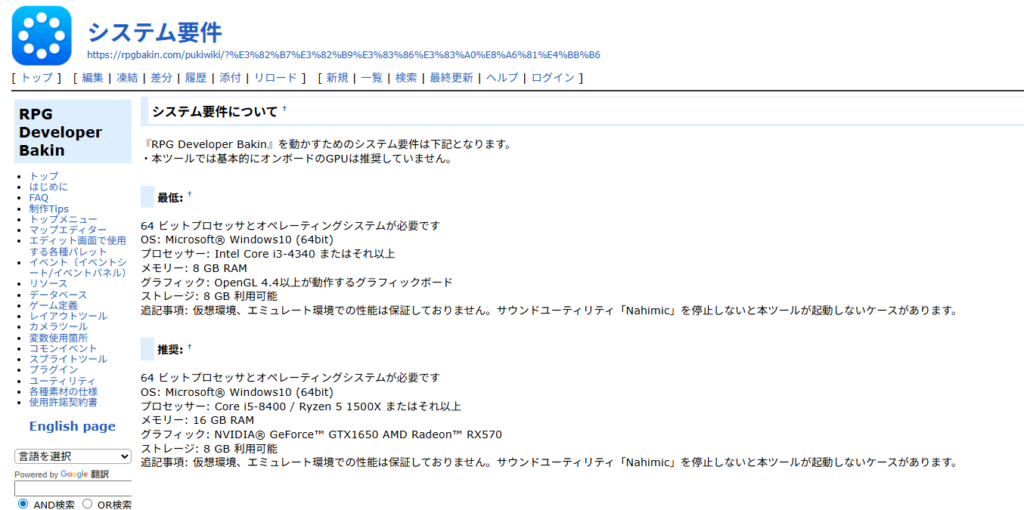
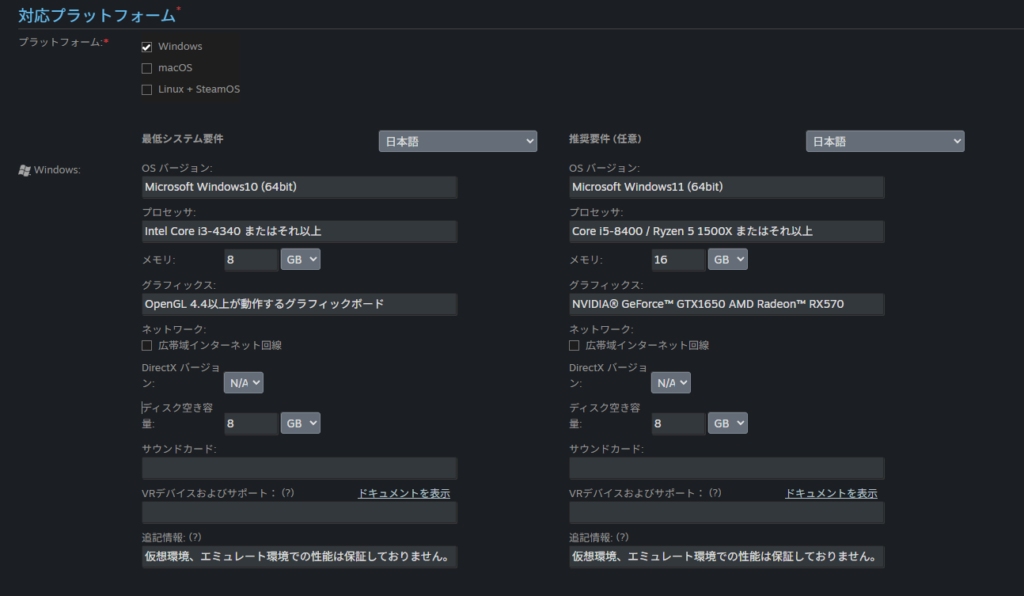
Under Supported Platforms, enter the minimum and recommended system requirements for running your game.
If you haven’t thought about this carefully, entering your own PC’s specs is a safe fallback—though note that if your PC is very high-end, users may assume the game requires high-end hardware.

Since my game is made with Bakin, I used Bakin’s published system requirements. The requirements to run the tool aren’t identical to the requirements to run the game, but if the tool runs, the game should run too.
Note: system requirements need to be entered separately for each supported language. Use the dropdown next to “Minimum System Requirements” to switch languages and fill in the requirements for each.
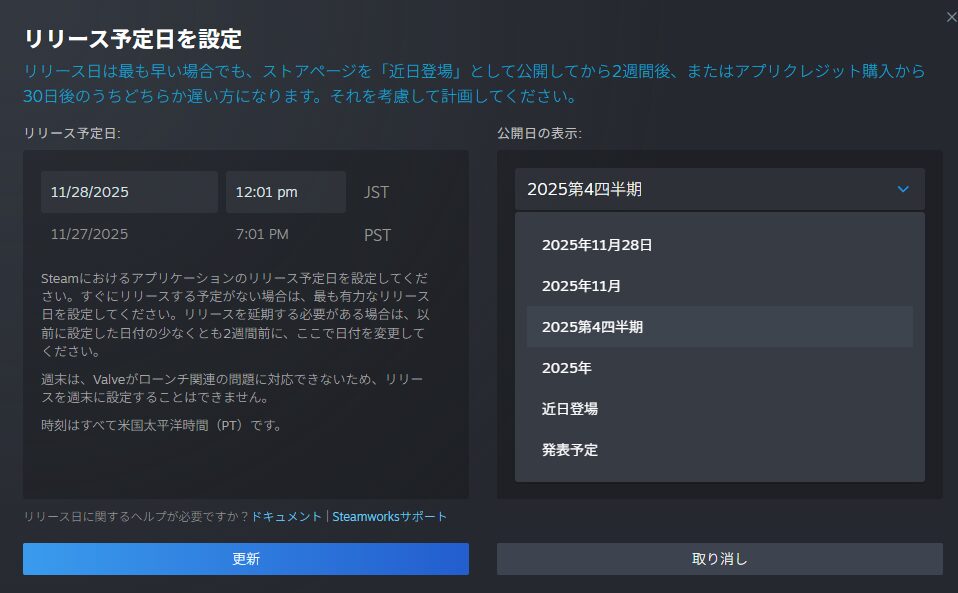
The “Release Date” field shows the configured date and the date displayed to customers. Click the pencil icon to set it.
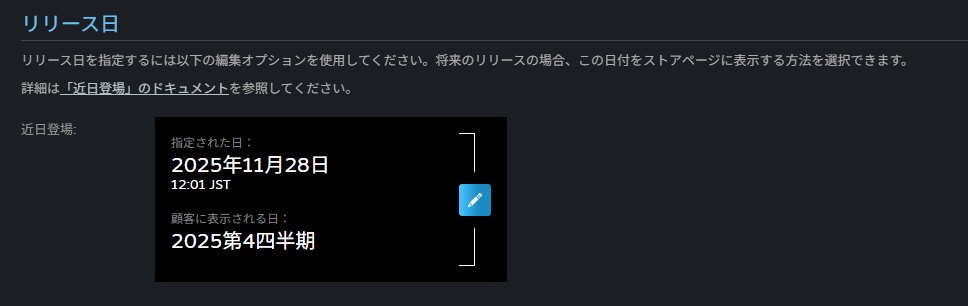
In the release date dialog, enter your planned release date. Note that dates within 2 weeks cannot be changed, so don’t set a release date that’s too imminent.
If your game is complete and the build is ready, a specific announced release date is better from a marketing standpoint.
The “Adult Content” field is covered later in the “Ratings” section—skip it for now.

The “Supported Languages” field is critically important. Adding more languages means more work—more text, more images, and the game itself must actually support each language added.
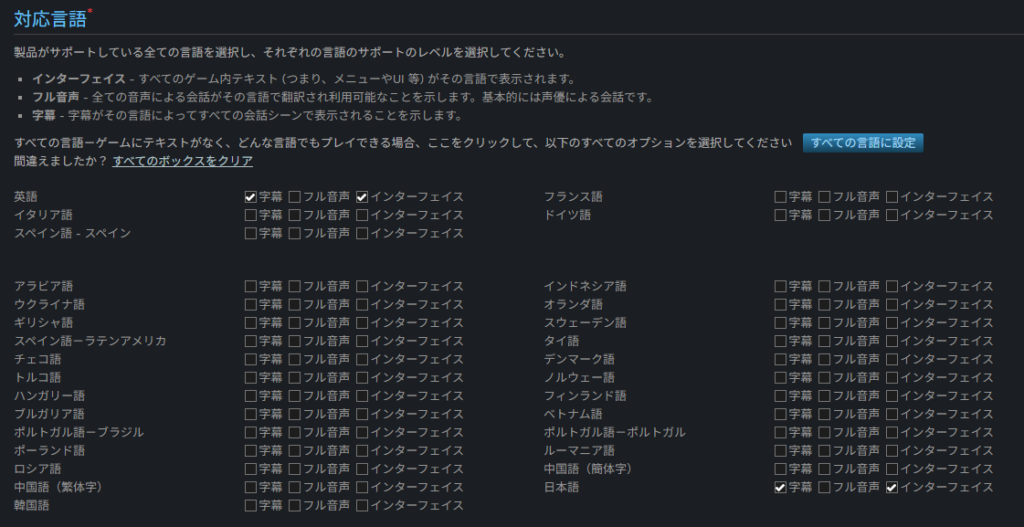
Many solo developers limit support to Japanese only to reduce workload. But that also means missing out on all overseas sales.
As shown in the post below, Japanese users represent a very small fraction of Steam’s user base. English and Chinese users alone account for over 60% of Steam users.
https://twitter.com/FoxEngineer777/status/1970788099442848090
Given this reality, not supporting at least English means giving up a rare opportunity as a small developer.
Of course, whether localizing actually leads to overseas sales depends entirely on the game. If you’re unsure, the article below may help you decide:
Note: supported languages can be added after the store page is published (after review), but adding a title translation after review requires contacting Steam support separately.
It’s strongly recommended to decide on your supported languages and complete all localization settings before submitting for review.
The section below the major languages has options for minor languages—probably not relevant for solo developers.

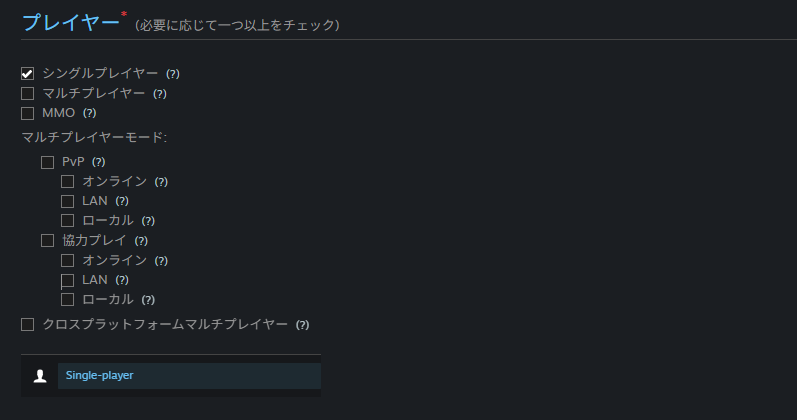
The “Players” section lets you specify whether the game is single-player or multiplayer. Most solo-developed games are single-player, so check “Single-player.” If your game supports multiplayer, check the appropriate options.
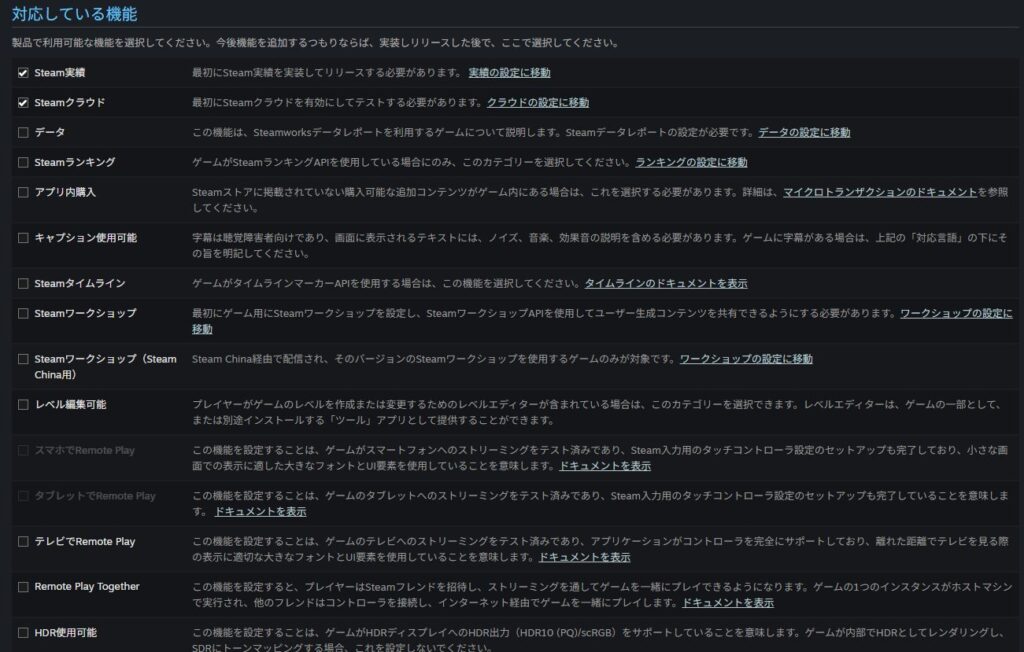
“Supported Features” lists Steam-specific features. Check whatever your game supports. Unless you’ve deliberately implemented a feature, leave it unchecked.
One note: as the checklist will also mention later, “Steam Achievements” and “Steam Cloud” are features Steam recommends implementing. Try to support both if possible.

Next is “Genre.” Select the genre(s) that fit your game. Stick to one primary genre and one or two sub-genres—selecting too many genres confuses users and may actually hurt sales.

Below genres are “Tags.” You can select five or more, and only four or five are visible to users at once, so selecting many isn’t as problematic as with genres.
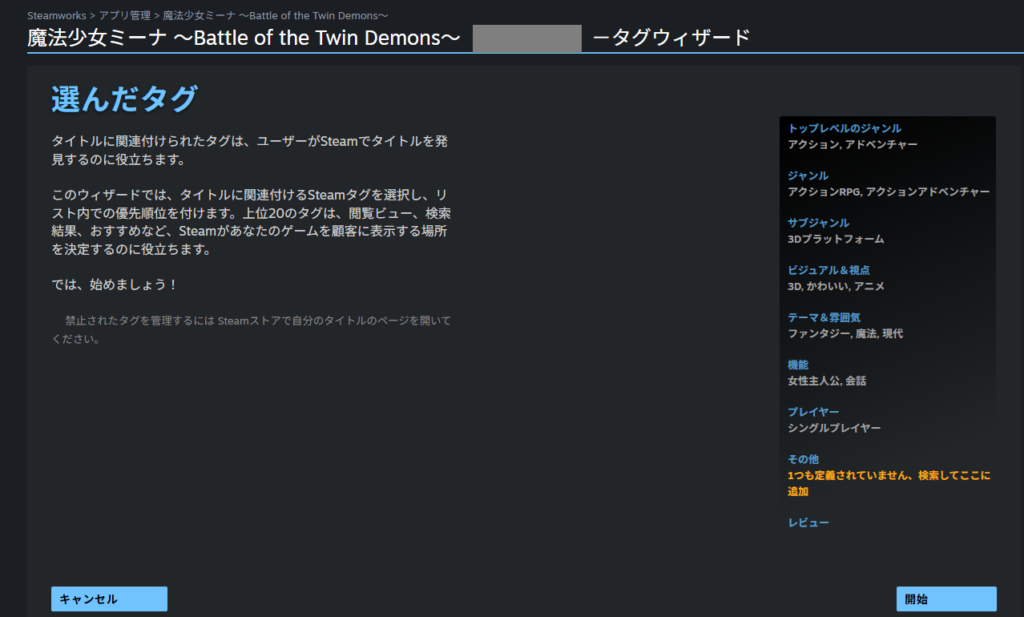
Click “Tag Your Title” to open the dedicated tag selection screen.

On the tag screen, click the blue text on the right to select individual tags. You can also adjust the display priority order—put your most representative tags at the top.
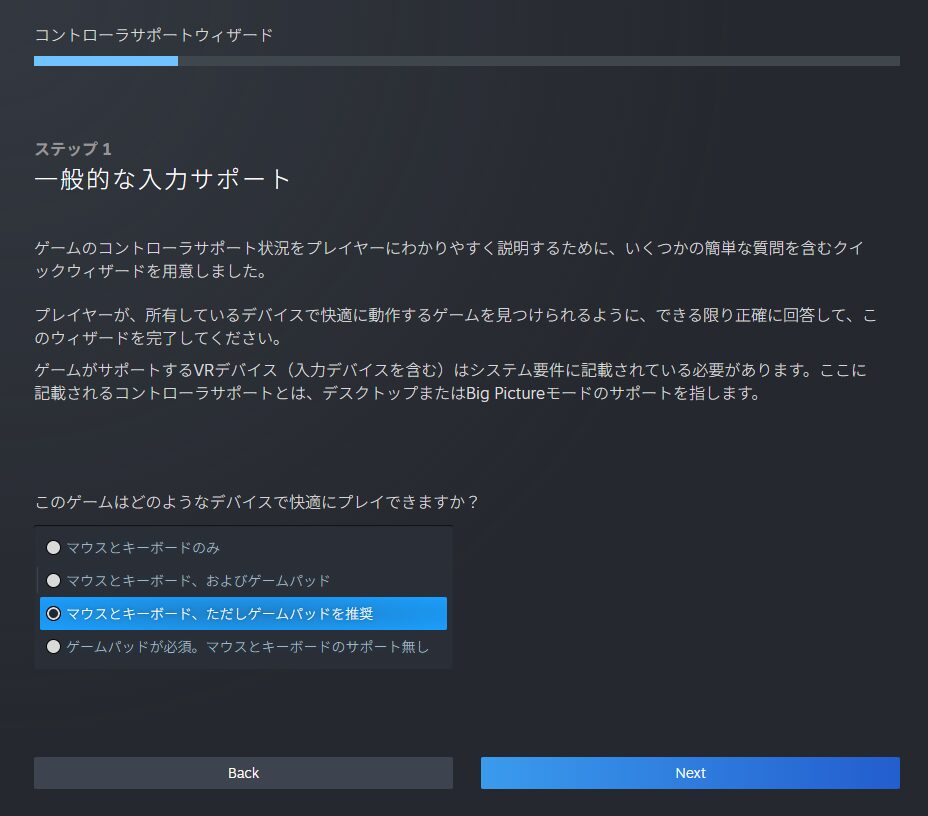
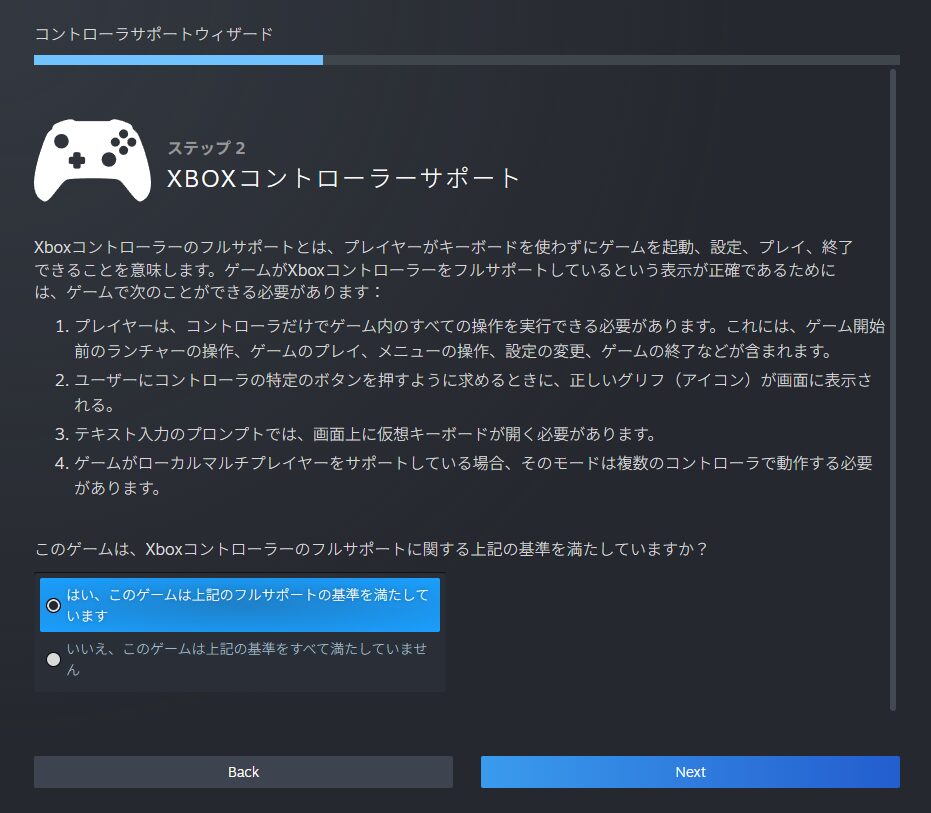
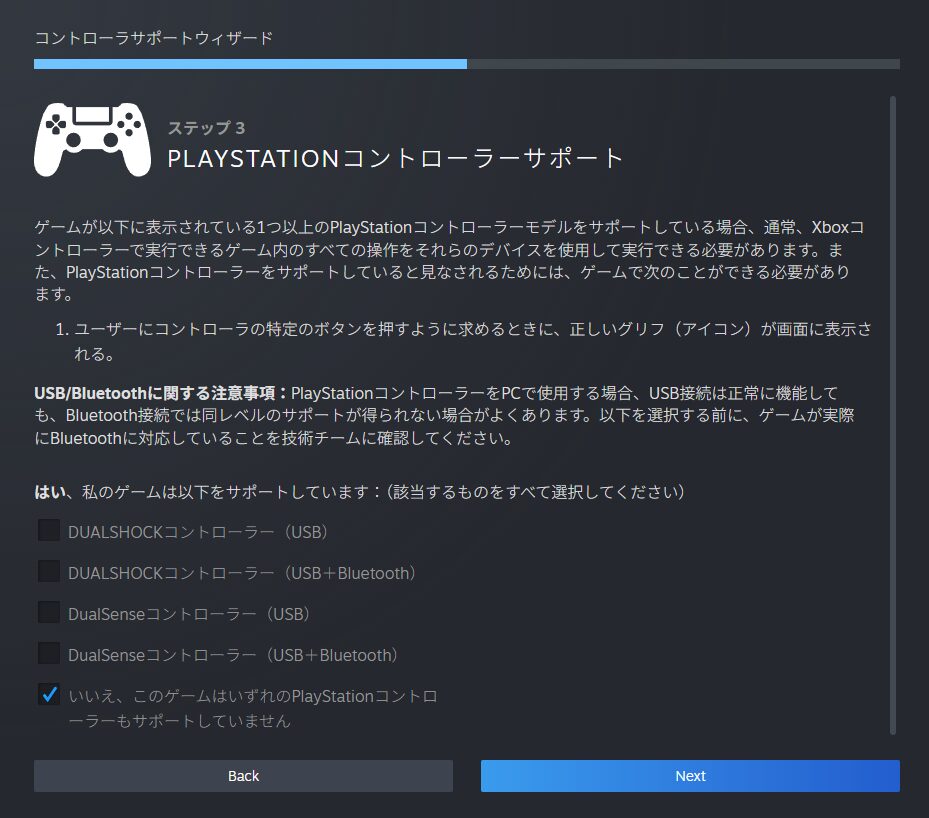
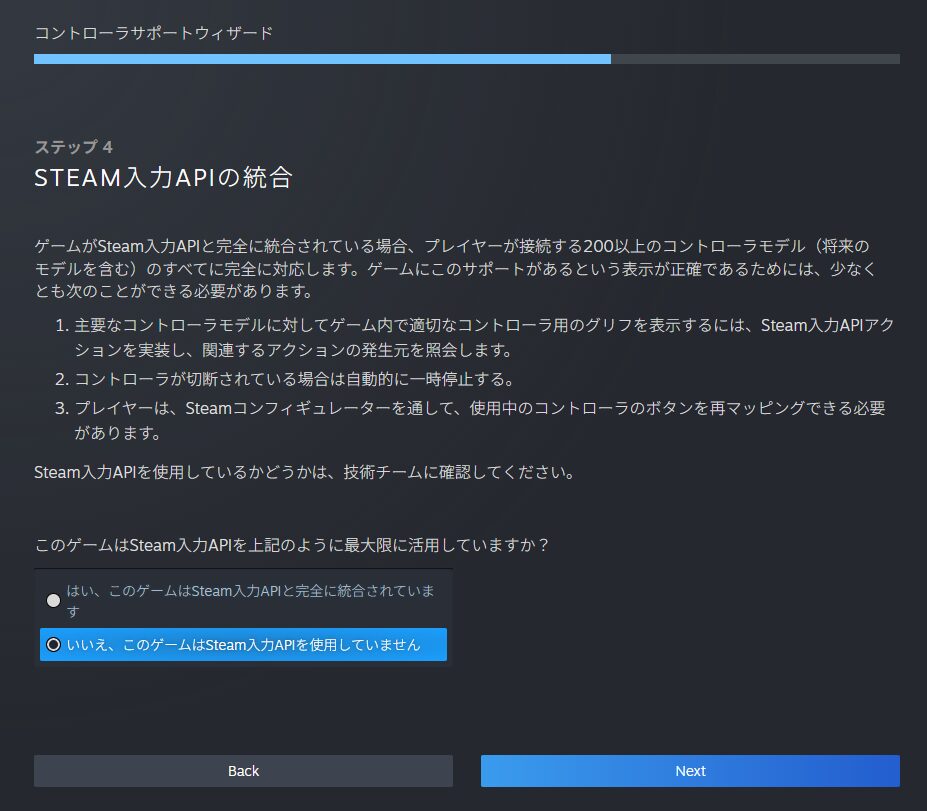
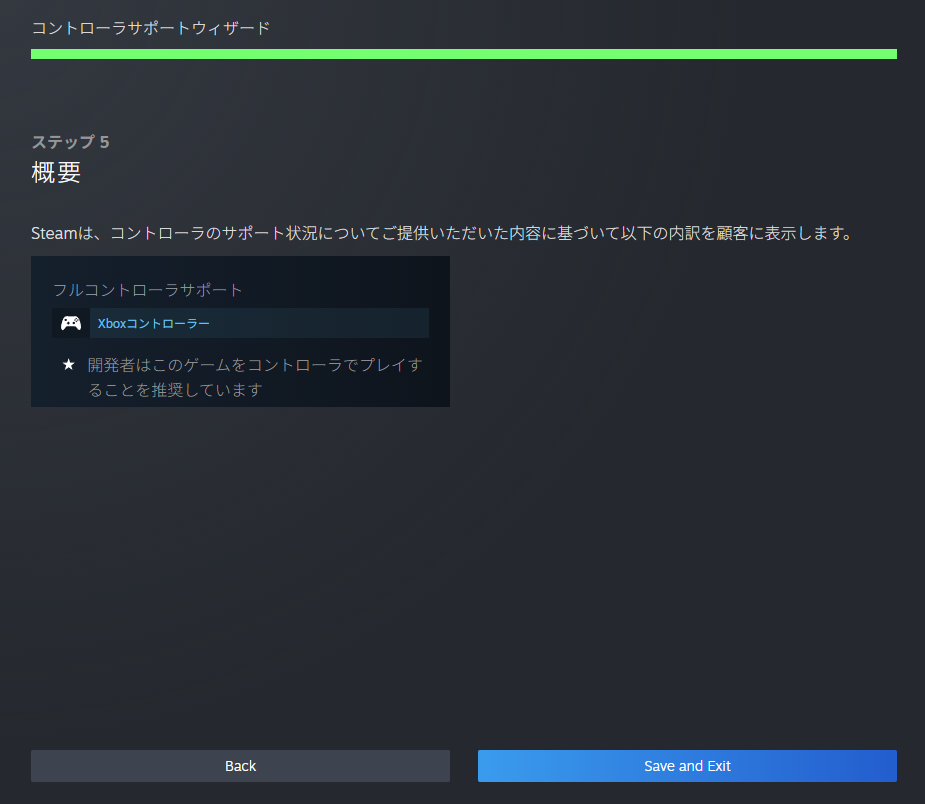
“Controller Support” lets you specify which controllers your game supports. Click the pencil icon to open a questionnaire that sets this automatically.
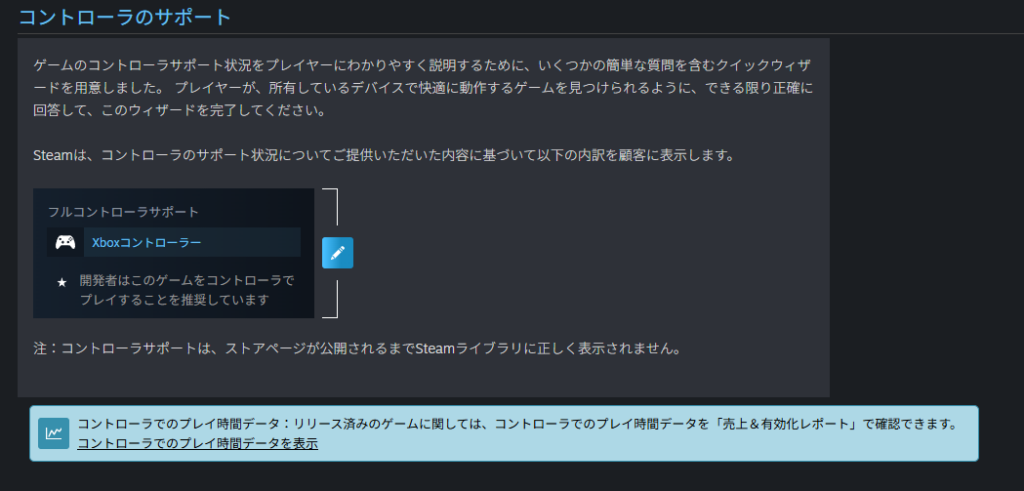
The questionnaire covers various controllers—there are many questions. If you’re unsure about your game’s controller support, I recommend purchasing a controller to test before answering.
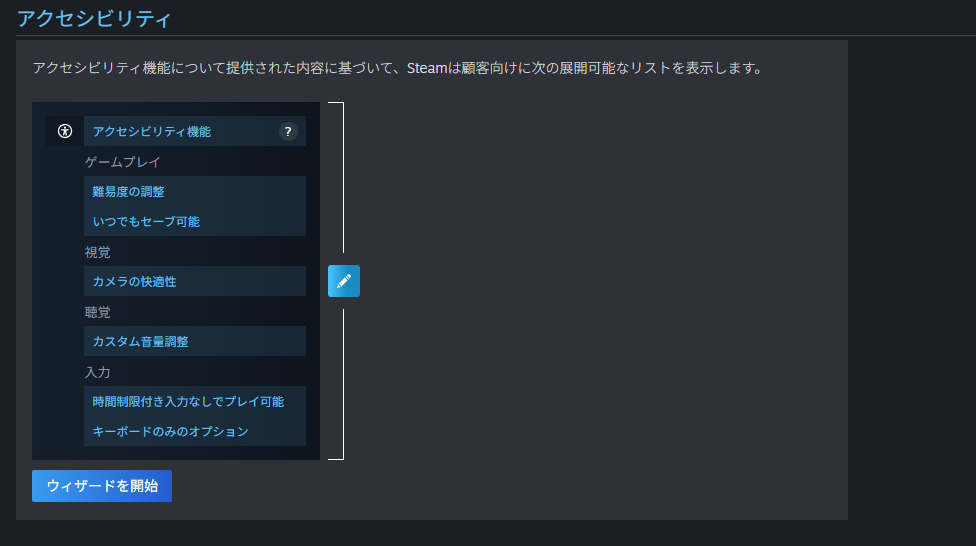
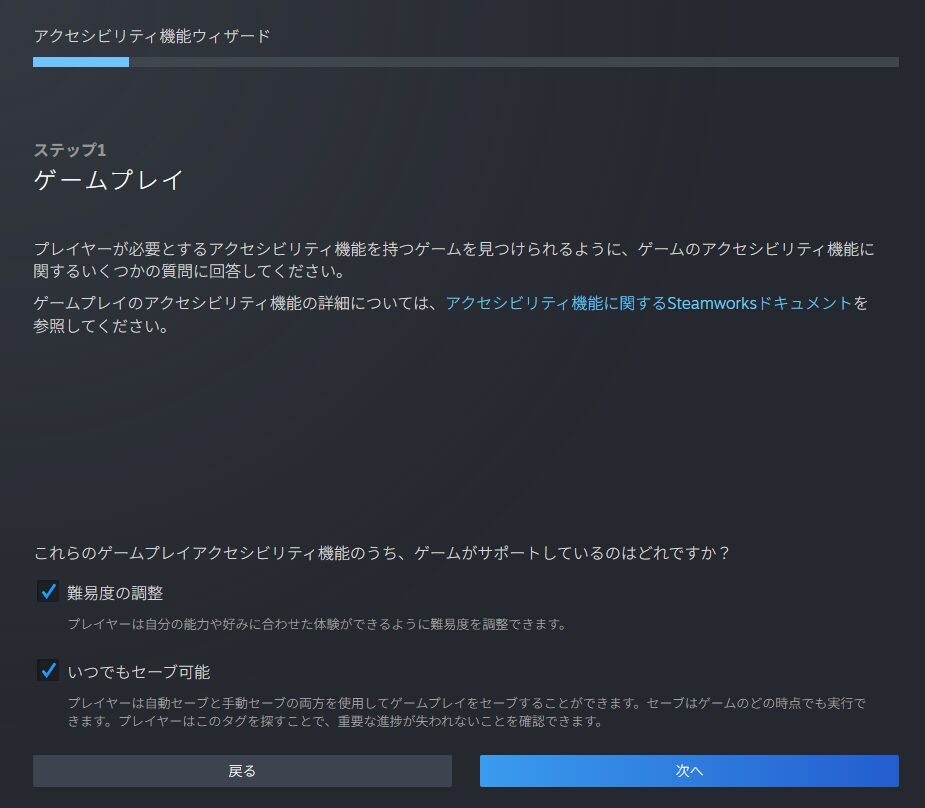
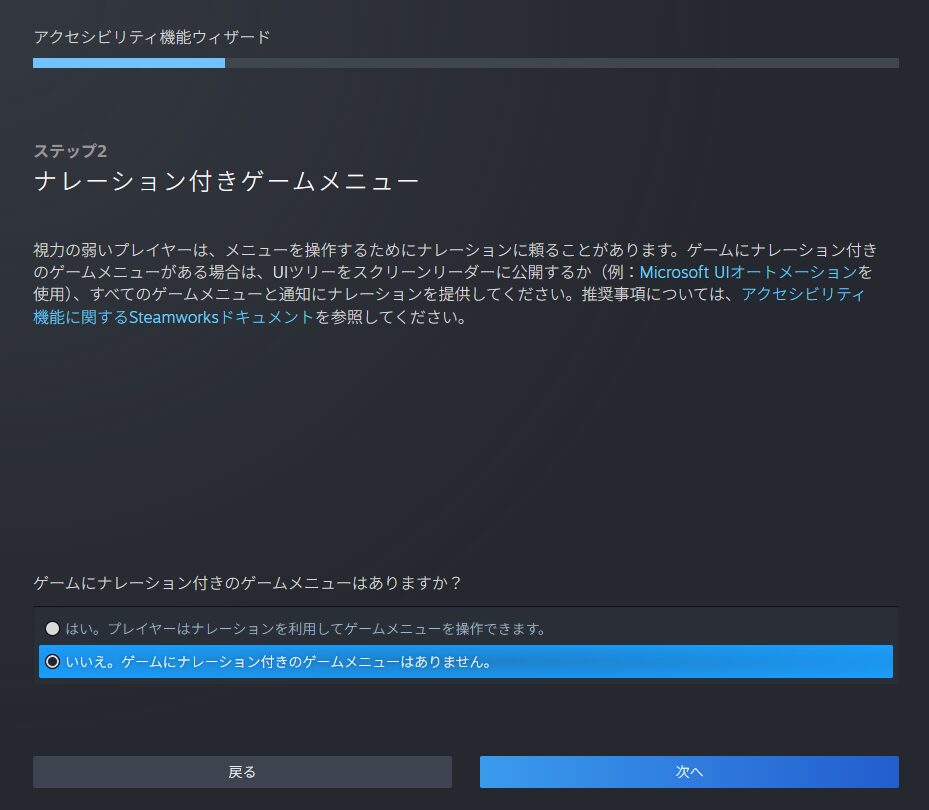
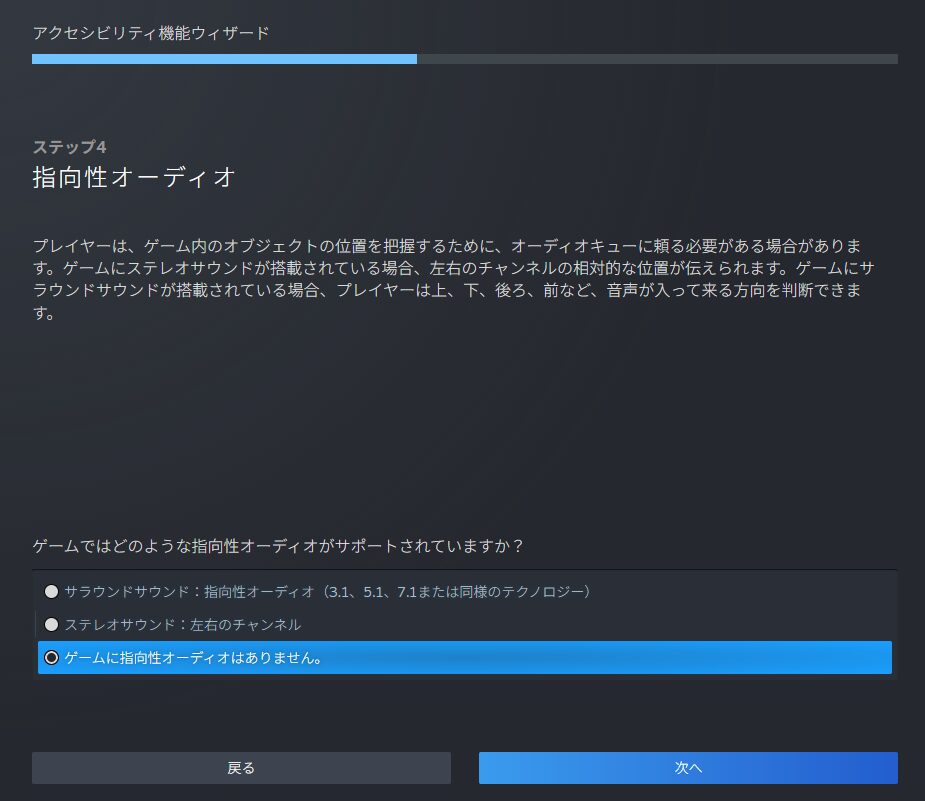
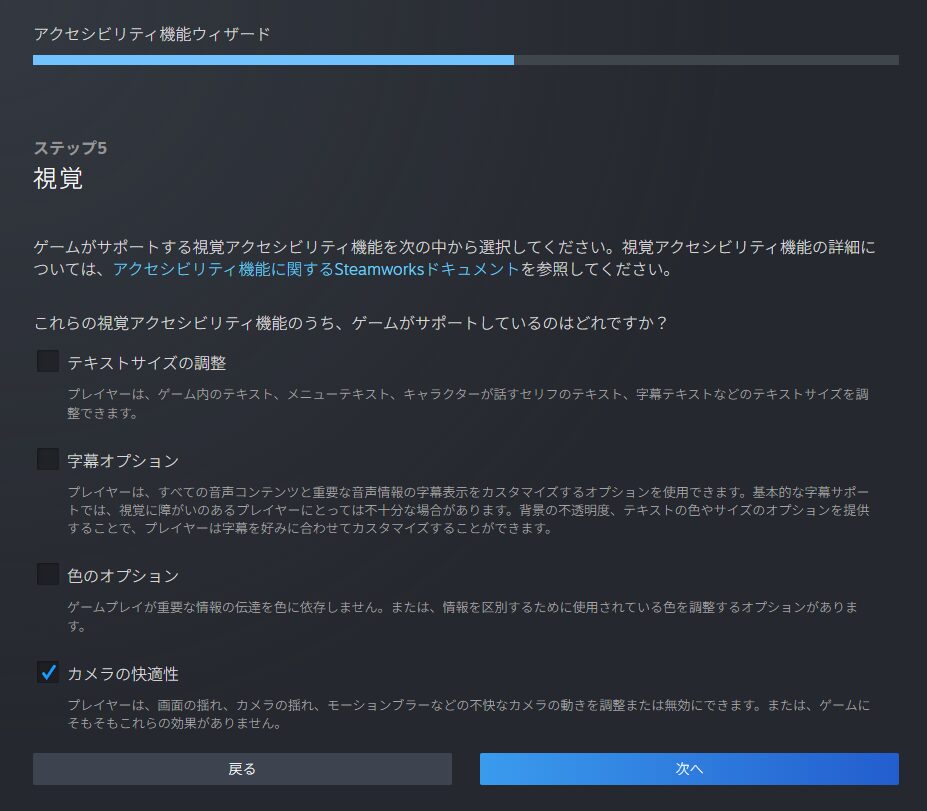
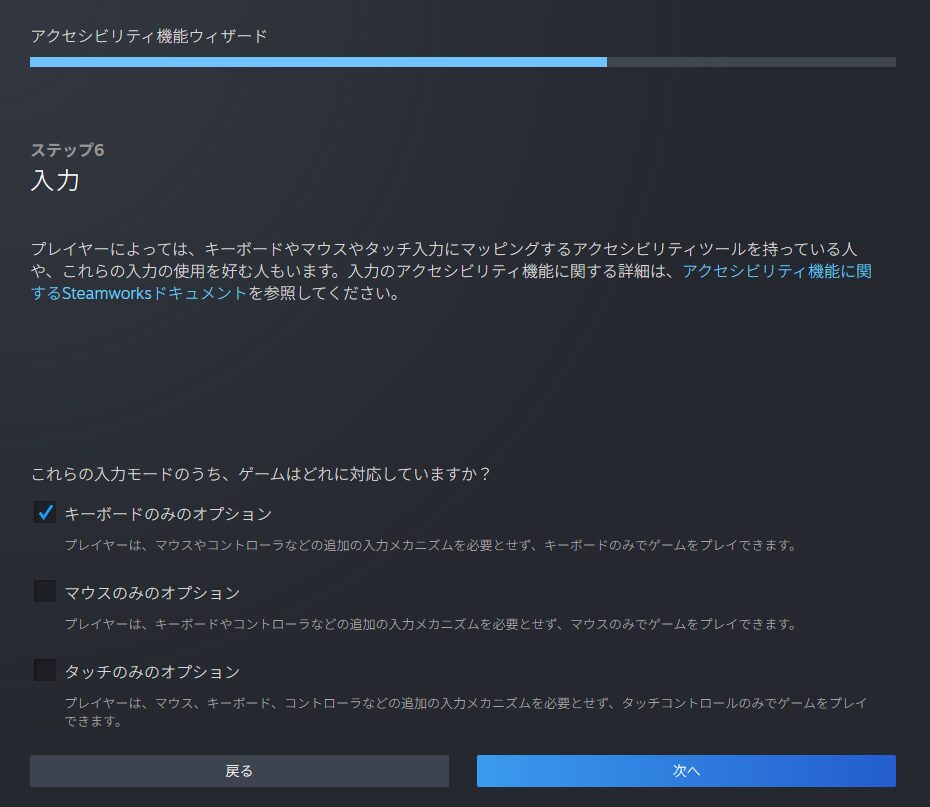
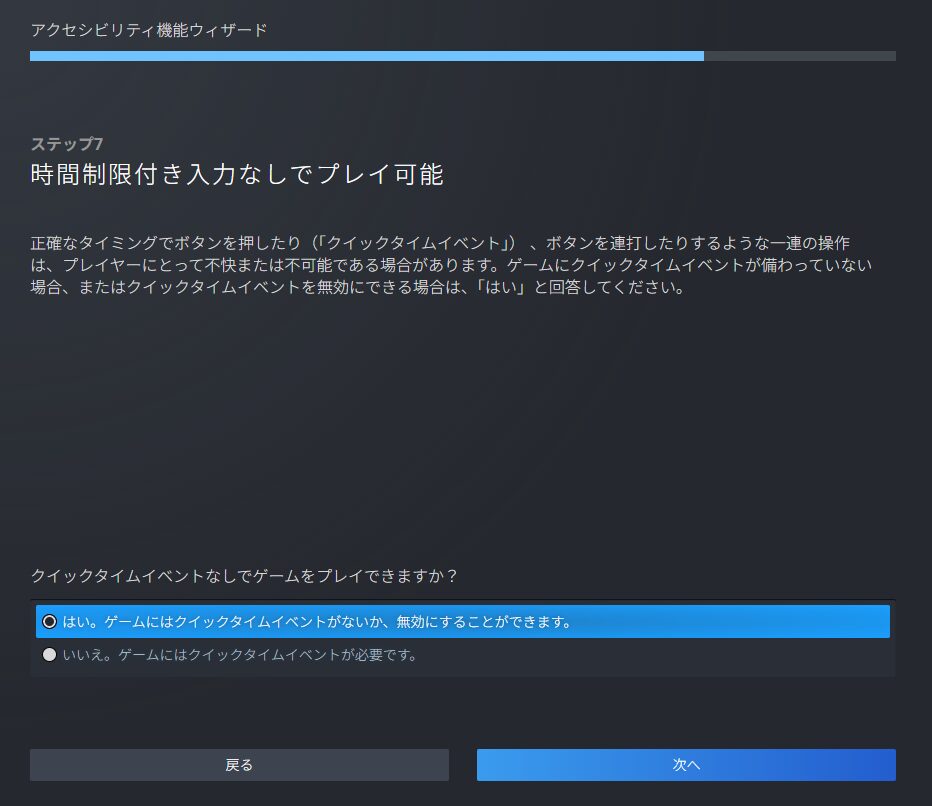
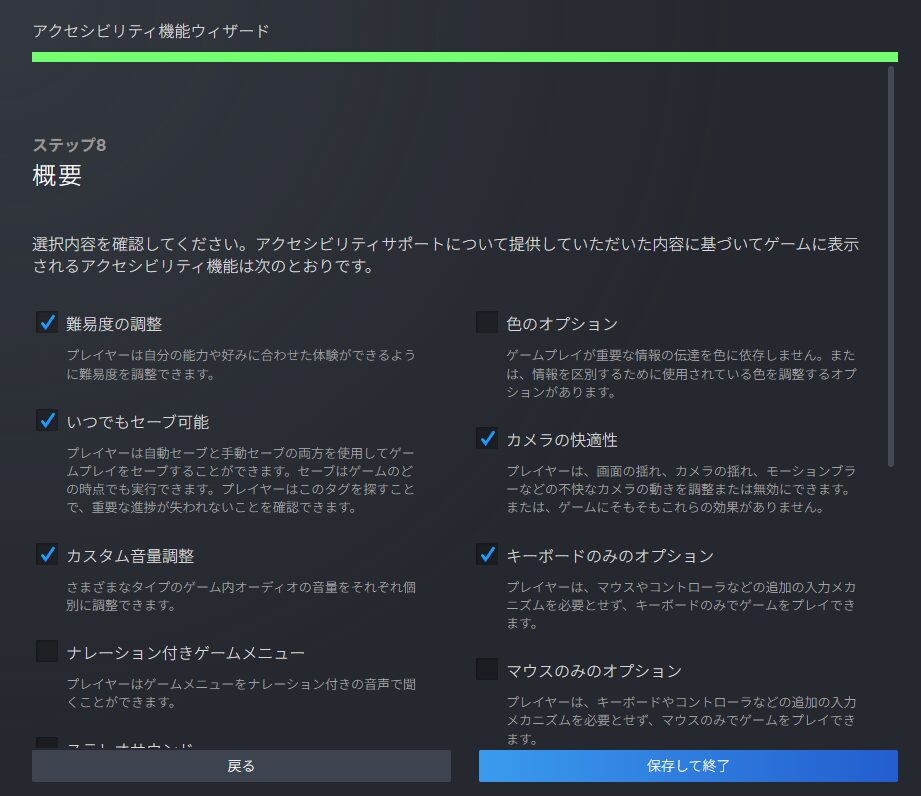
“Accessibility” covers how inclusive the game is to different players. Click the pencil icon or “Start Wizard” to access the accessibility questionnaire.
Simple questions follow: does the game have difficulty settings? Can the camera be freely adjusted? Can volume be individually controlled? Answer each question.
The answers are displayed quietly on the right side of the store page, so answer as accurately as possible.

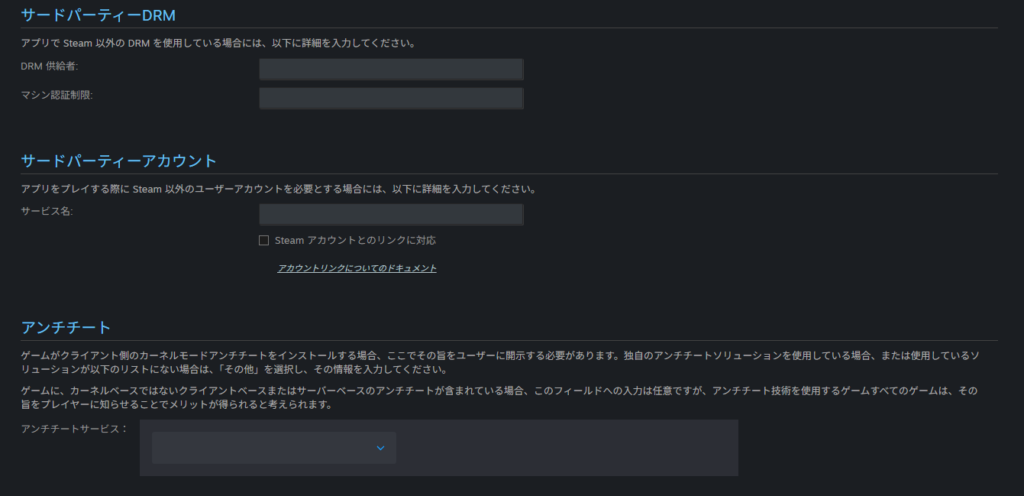
The “Third-Party DRM,” “Third-Party Accounts,” and “Anti-Cheat” sections are almost certainly not applicable to indie developers—leave them blank. If you have implemented any of these, fill in the relevant details.
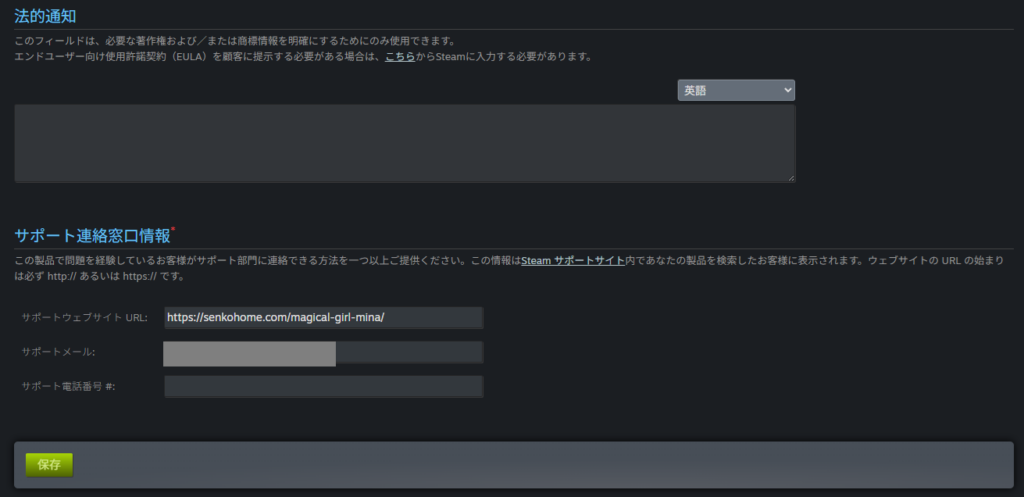
“Legal Notices” can be left blank for individual developers. For “Support Contact,” enter your website URL and a Steam-dedicated support email address.
Once everything is filled in, click “Save.” The Basic Info tab is now complete. Move on to the next tab.
Preparing the “Description” Section
Switch to the “Description” tab. This is straightforward—it’s where you write the in-game description that appears on your store page.
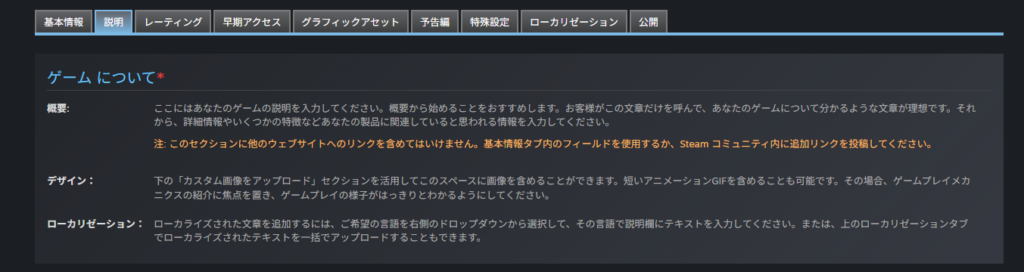
The content itself is up to you, but a few important points:
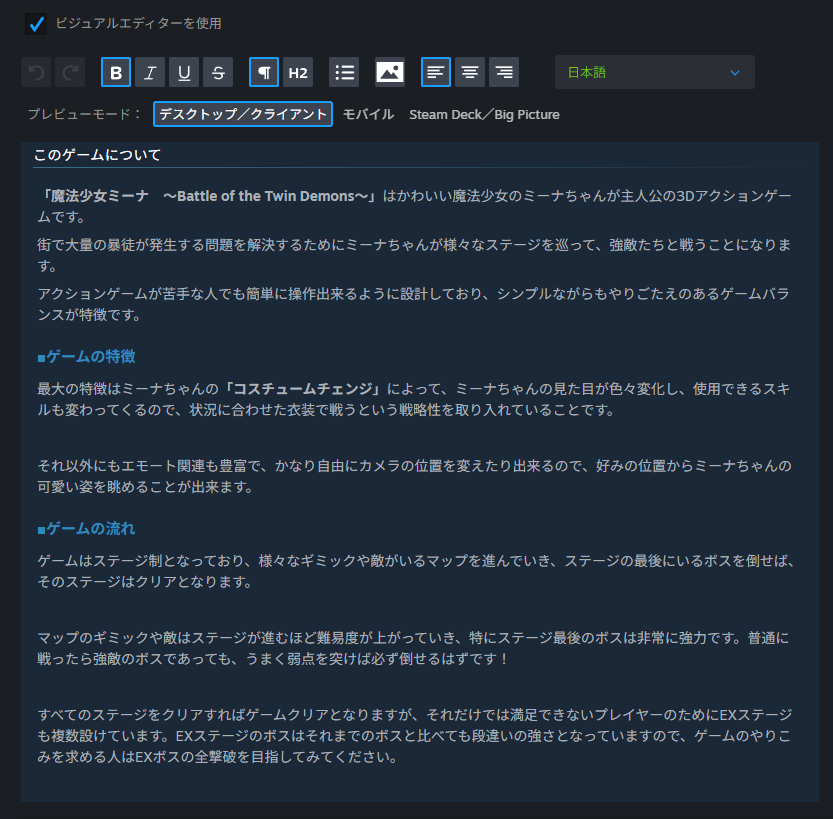
The description must be written separately for each supported language. Use the language dropdown in the upper right to switch languages (each language’s content is saved independently).
Take advantage of text formatting—headings, bold text, etc.—to make your description more visually appealing than plain prose.
You can also embed screenshots directly into the description by clicking the image icon in the formatting toolbar. Screenshots can be uploaded at the bottom of the page.
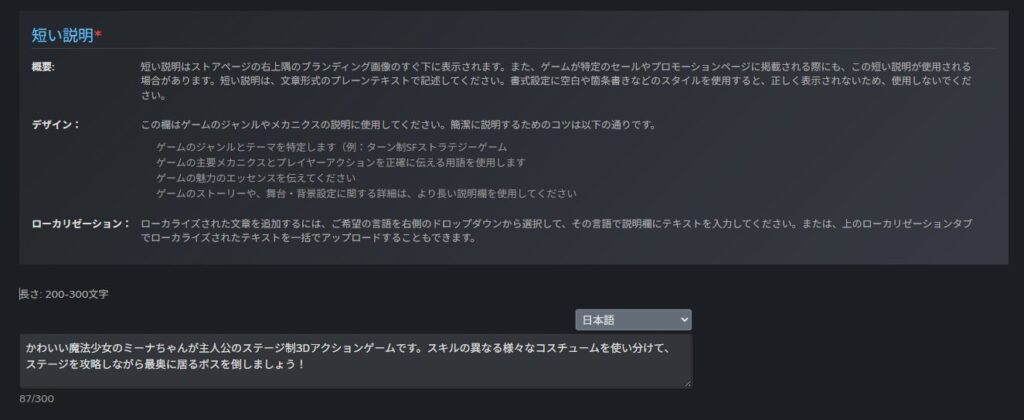
In addition to the main description, you also need to fill in the “Short Description.” This appears to the right of the trailer/screenshots when users open the store page.
It’s the first description users see, and it can leave a strong impression. Treat it as a one-line pitch for your game’s appeal rather than a detailed explanation.
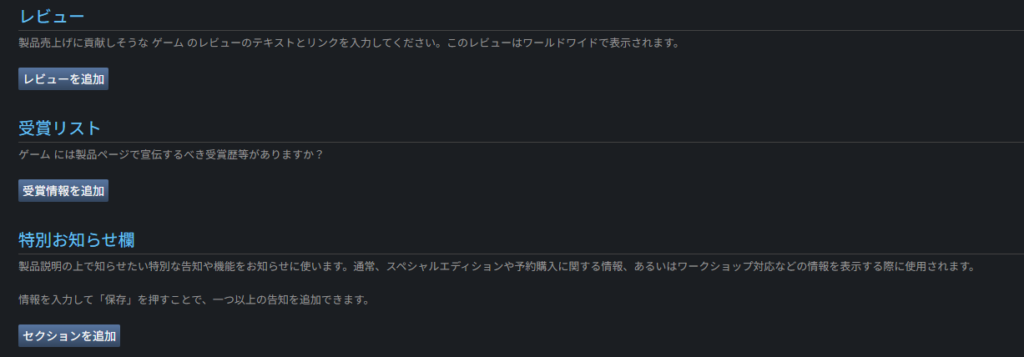
The “Reviews,” “Award List,” and “Special Notices” sections are for international awards and recognition—not relevant for most indie developers. There’s nothing else to fill in for this tab.
One thing I didn’t notice at this point: I hadn’t set a localized version of the game title. This gets flagged during review—see the review section later in the article for details.
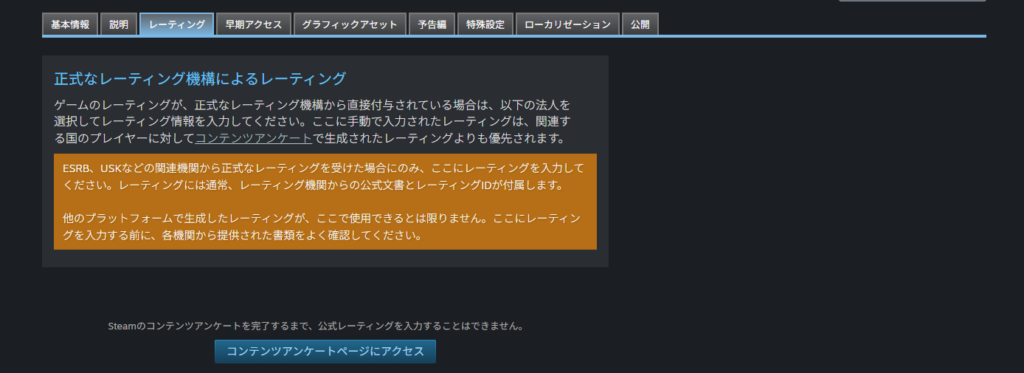
Preparing the “Ratings” Section
Move to the “Ratings” tab. This is where the game’s age rating is configured.
Click “Access Content Survey Page” to open the actual rating input.
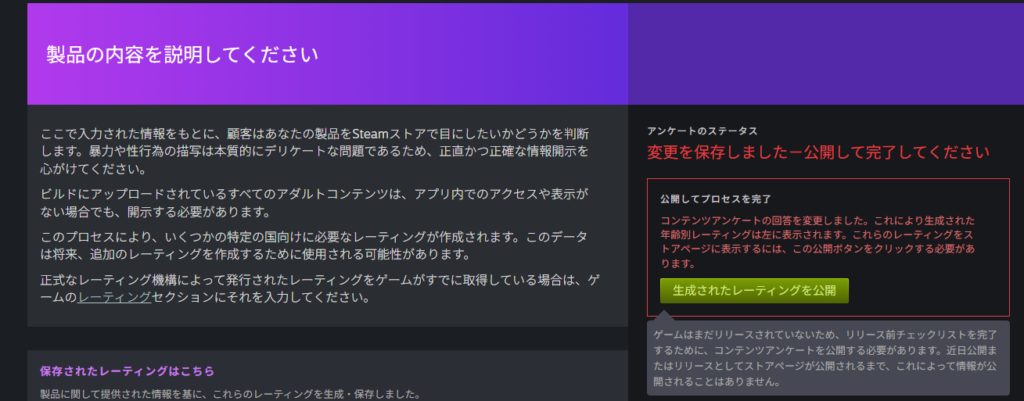
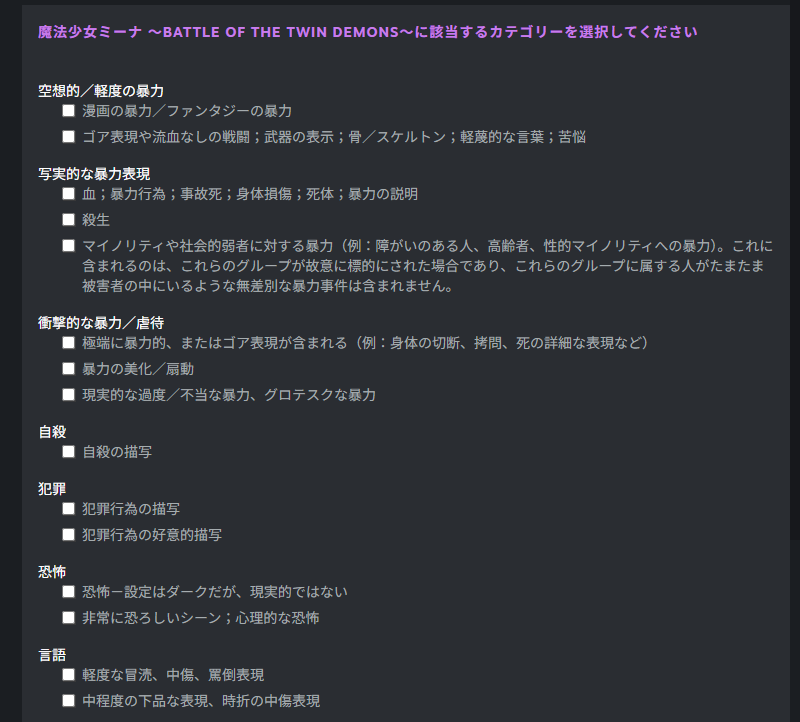
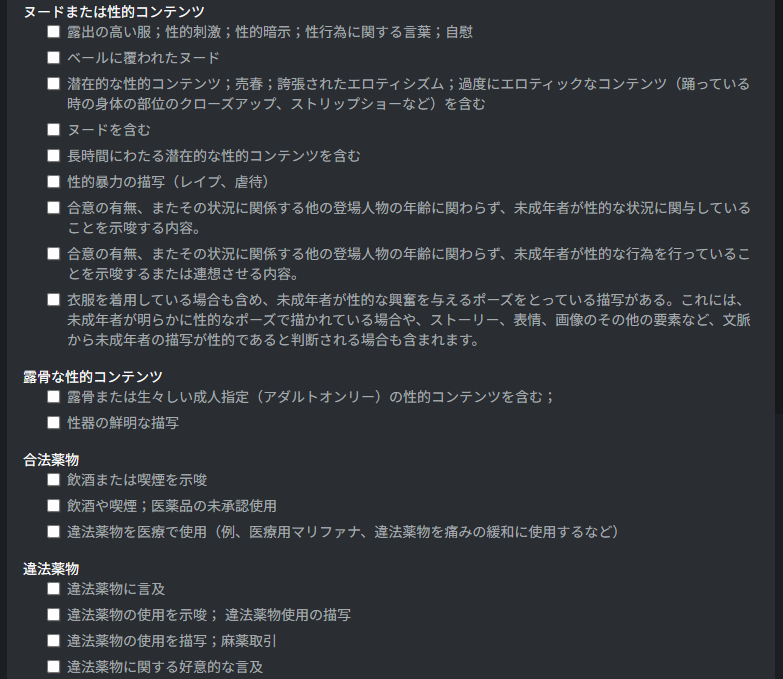
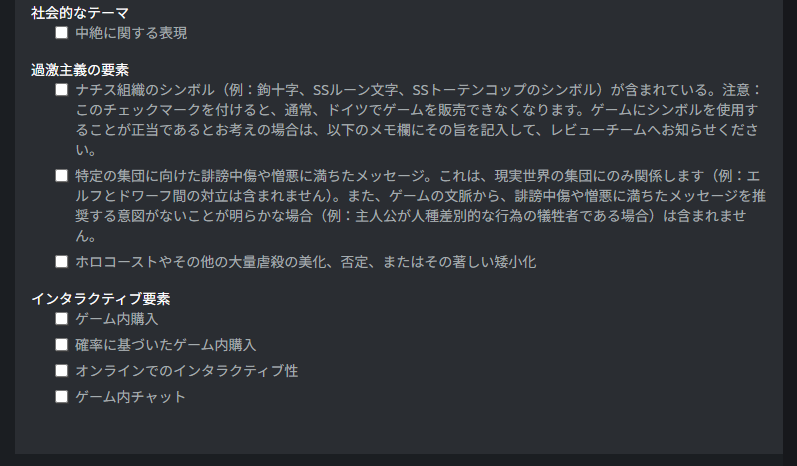
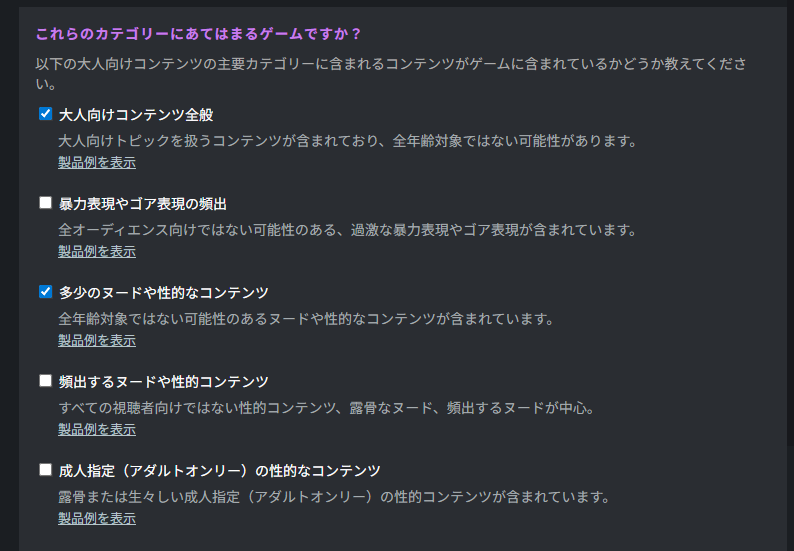
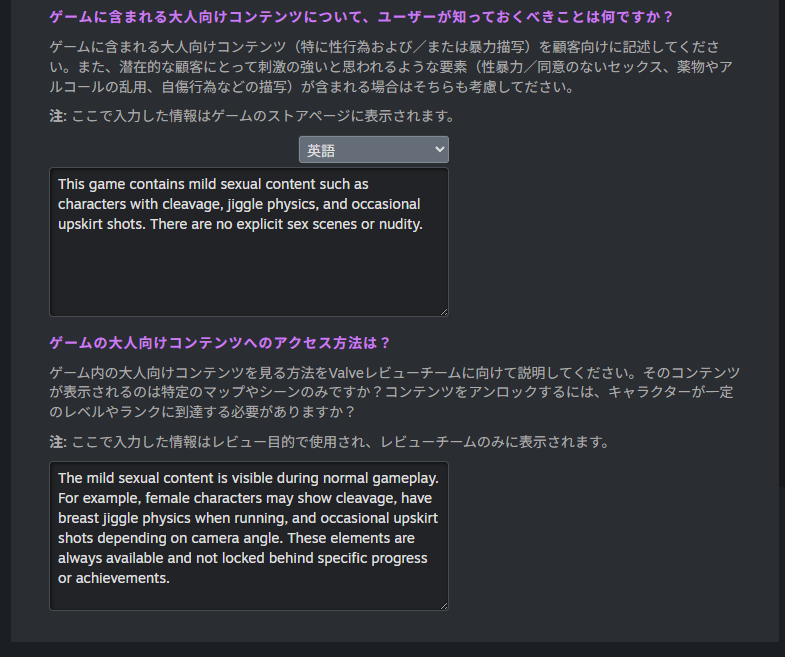
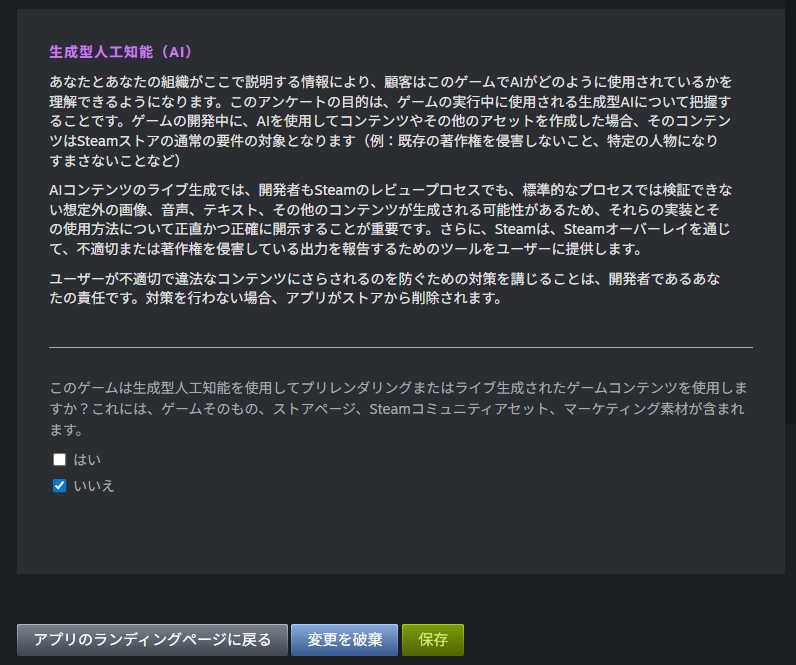
A series of questions about your game’s content will appear.
Answer honestly. My game has no explicit sexual or violent content, but it does have mild fan-service elements (bouncing chests, brief skirt shots, etc.), so my answers looked like the image below.
After completing all questions, click “Publish” (or “Save” for subsequent visits). The game’s rating will be automatically determined based on your answers.
My game received an all-ages rating, but ratings can apparently change later, so treat it as provisional.

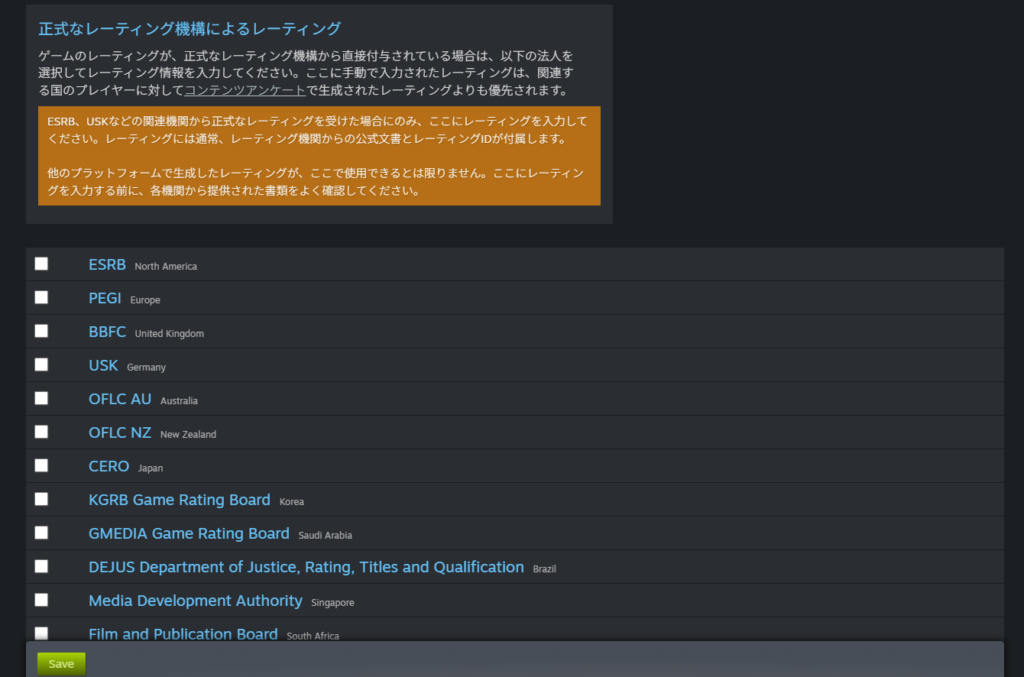
Returning to the Ratings tab, you’ll now be asked whether your game has official ratings from recognized rating bodies (like CERO in Japan).
Individual developers almost never have this, so leave all boxes unchecked and click “Save.” The Ratings tab is complete.
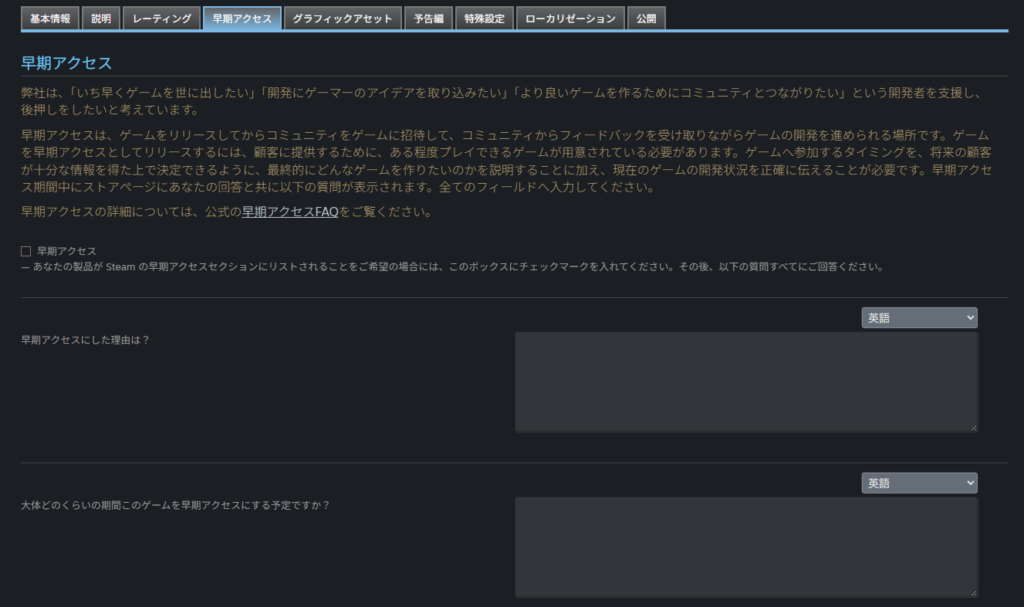
Preparing the “Early Access” Section
The “Early Access” tab is only relevant if you intend to release in Early Access. For most indie developers, Early Access is unnecessary—think of it as an optional feature to be aware of.
Early Access has grown more common in recent years, but it’s a sales model built around ongoing marketing and updates. The risks of selling an unfinished product are considerable.
Sustaining continuous work on a single title as a solo developer is genuinely difficult, so a standard single release is generally the safer choice.
I’m not using Early Access, so nothing to configure here.

Preparing the “Graphic Assets” Section
This is the most demanding part of creating a Steam store page: preparing the graphic assets.
At minimum, you’ll need:
- At least 4 “Store Asset” images
- At least 4 “Screenshot” images
- At least 5 “Library Asset” images
Each image has specified dimensions, so you’ll need to create images at the exact sizes required. These are also needed per language, so work multiplies with each language added.

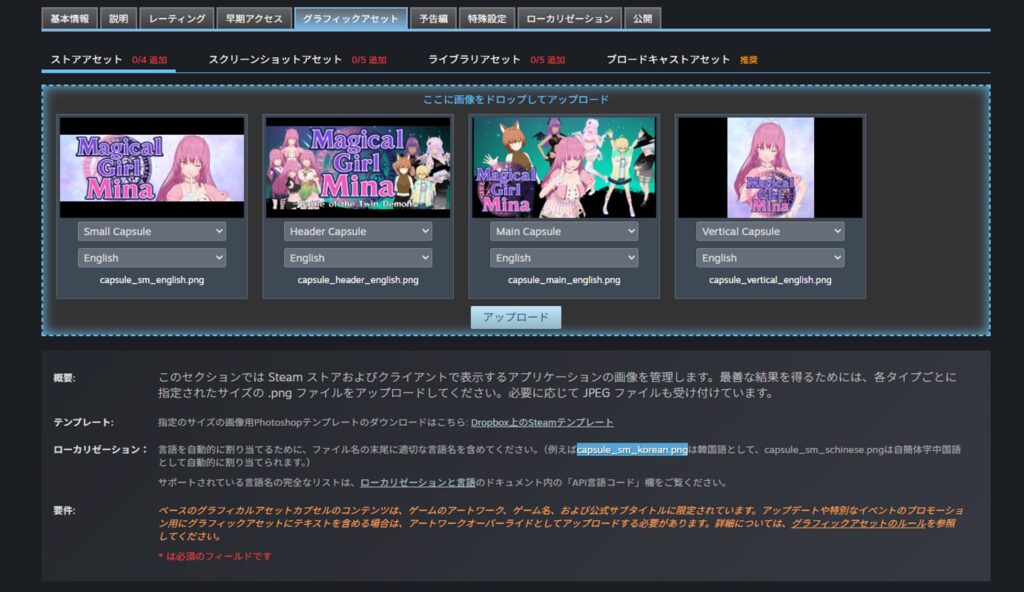
Store Assets
“Store Assets” are the promotional images displayed within the Steam store.
- Header Capsule: displayed in the upper-right area of the store page—the first image users see when they open the page. Put effort into this one.
- Small Capsule: the small banner shown in search results. Since it’s small, prioritize large, clear logo and character art.
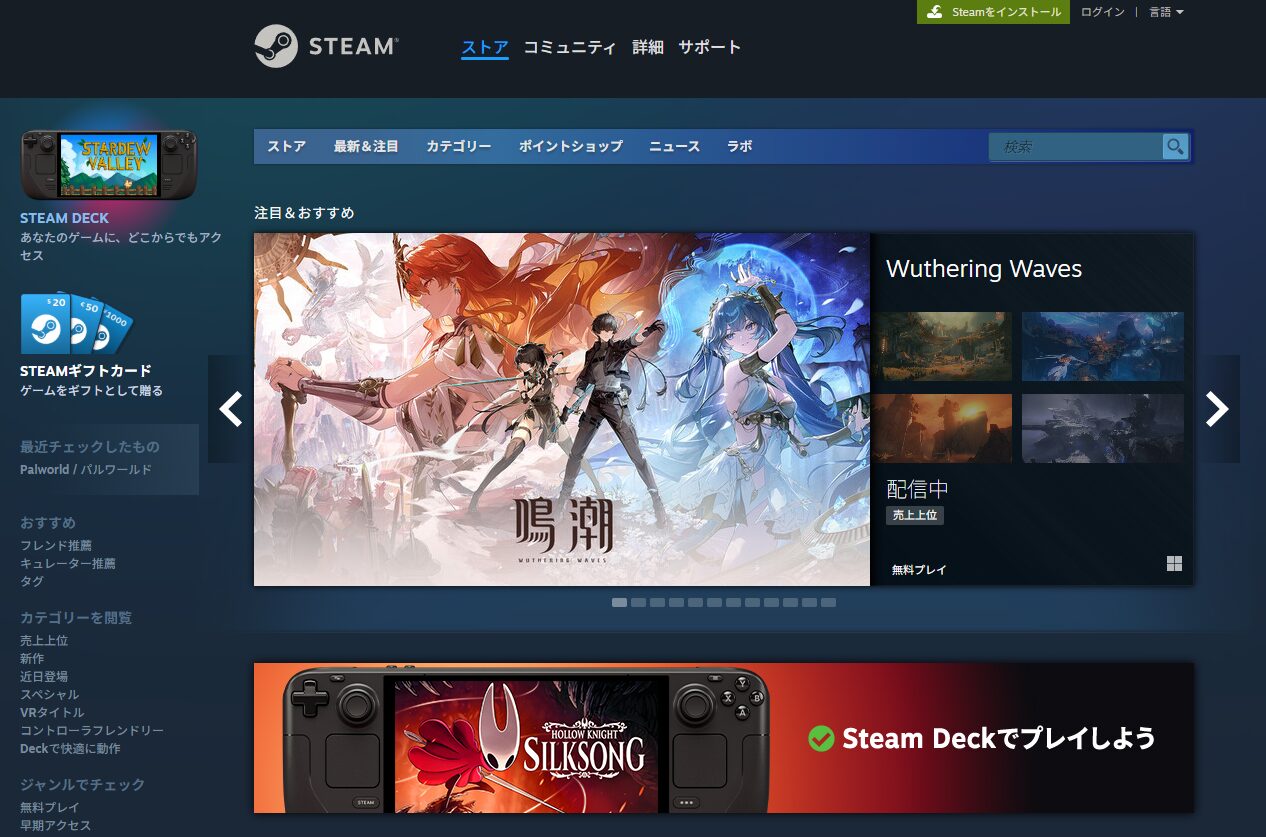
- Main Capsule: used on the store front page and when the store URL is shared on social media like X (Twitter).
- Vertical Capsule: displayed during seasonal sales, though less commonly seen.
Many developers reuse images across these formats, but since these are rare chances to make an impression, making each one memorable is worth the effort.
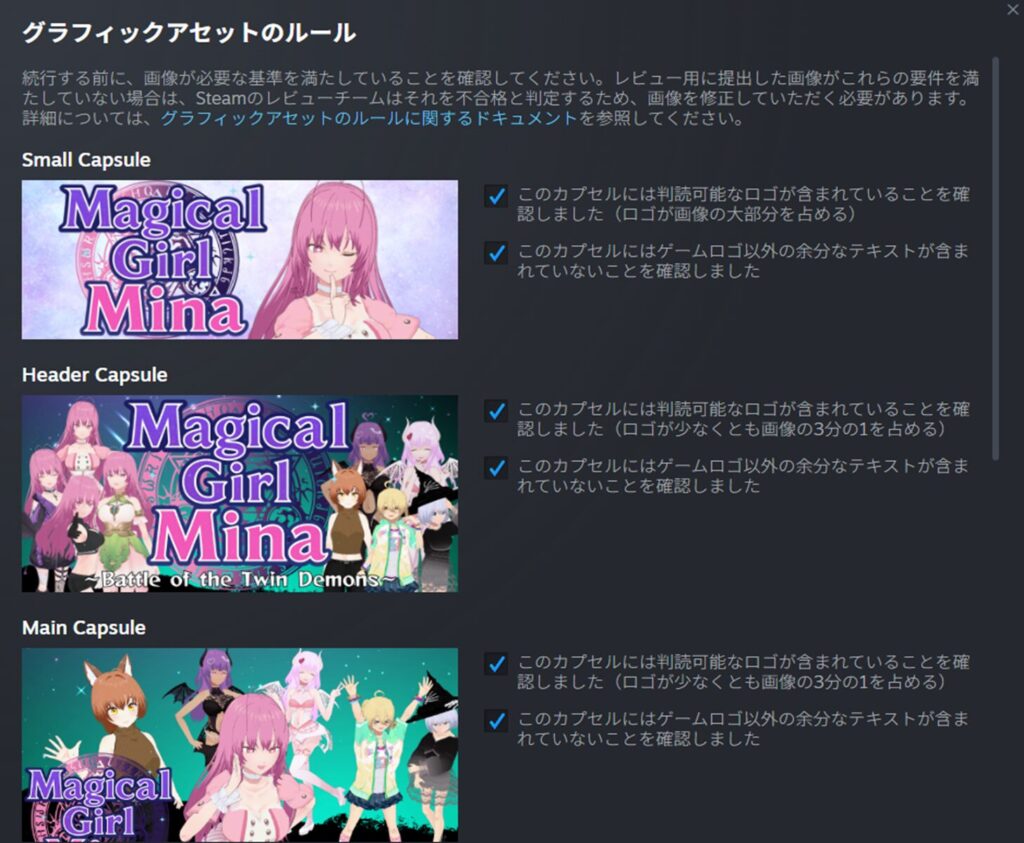
After creating and uploading each image, a confirmation screen appears. All formats check whether the logo occupies a large portion of the image—keep this in mind when designing.
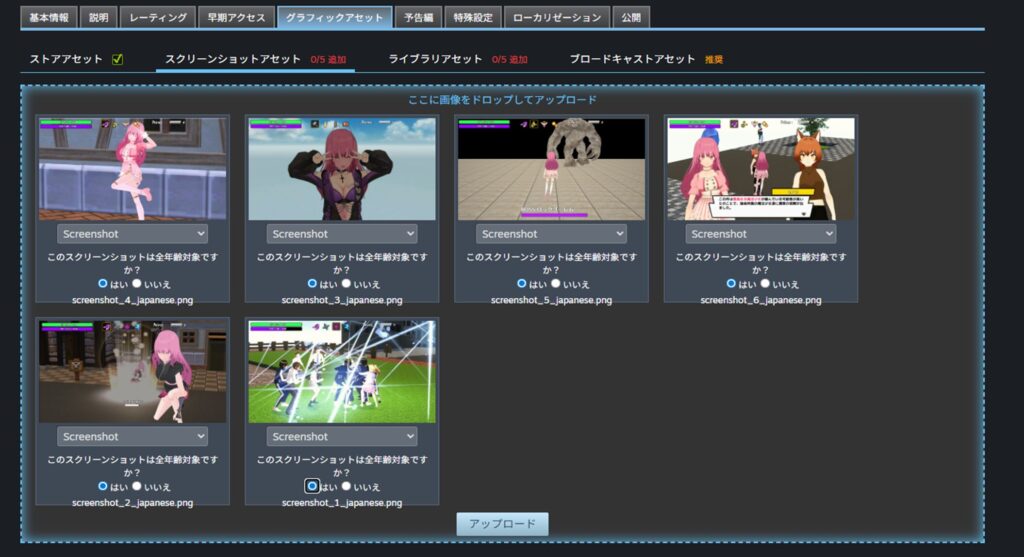
Screenshot Assets
The “Screenshots” tab under “Graphic Assets” is where you upload in-game screenshots.
Screenshots must meet specific size requirements—the raw output from Windows screenshot tools generally won’t work without resizing.
The screenshots uploaded here appear alongside the trailer on the store page, so choose images that showcase the most attractive or exciting parts of your game.
Screenshots are required per language, so make sure your game is in a state where you can capture localized screenshots in each supported language by the time you prepare the store page.
Library Assets
The “Library Assets” tab requires images similar to the store assets—essentially resized variations.
Library assets are shown in a player’s library after purchase, so they don’t directly impact sales. Consider them a thank-you image for buyers.
If you’re short on time, resizing your store asset images is acceptable. If you want to reward buyers with something special, a unique image just for them is a nice touch.
This comes down to personal preference.

One unique step: you need to combine your uploaded logo image with the large “Hero” image using the “Arrangement Tool.” After uploading both images, click “Open Arrangement Tool.”
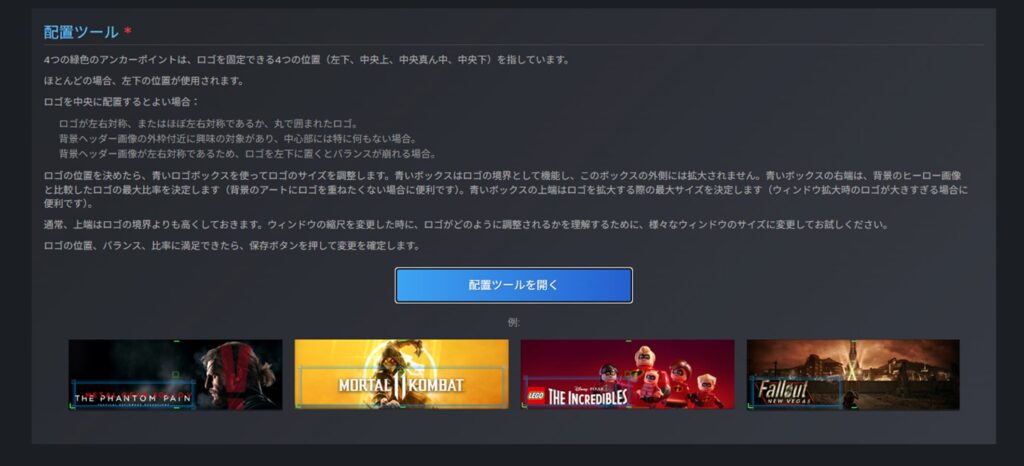
The hero image and logo will appear. Drag the logo to a good position on the hero image. (Positioning is done by grabbing the corner of the logo—there’s no other way, which makes the tool frustratingly limited.)
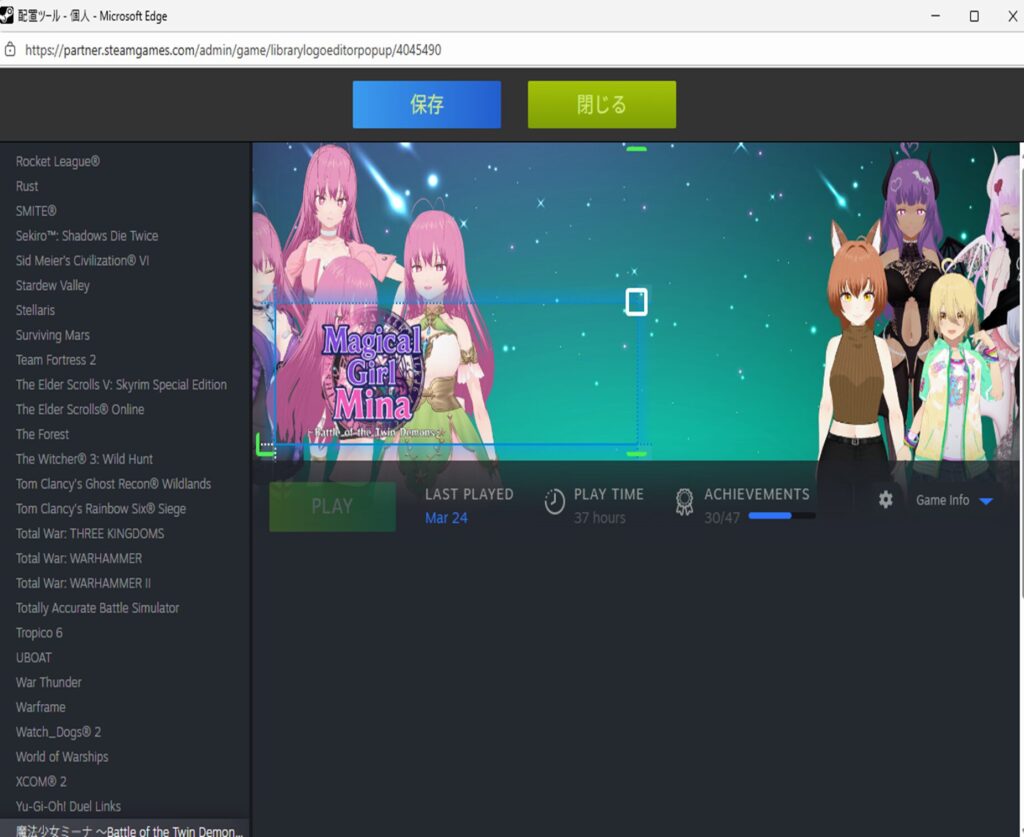
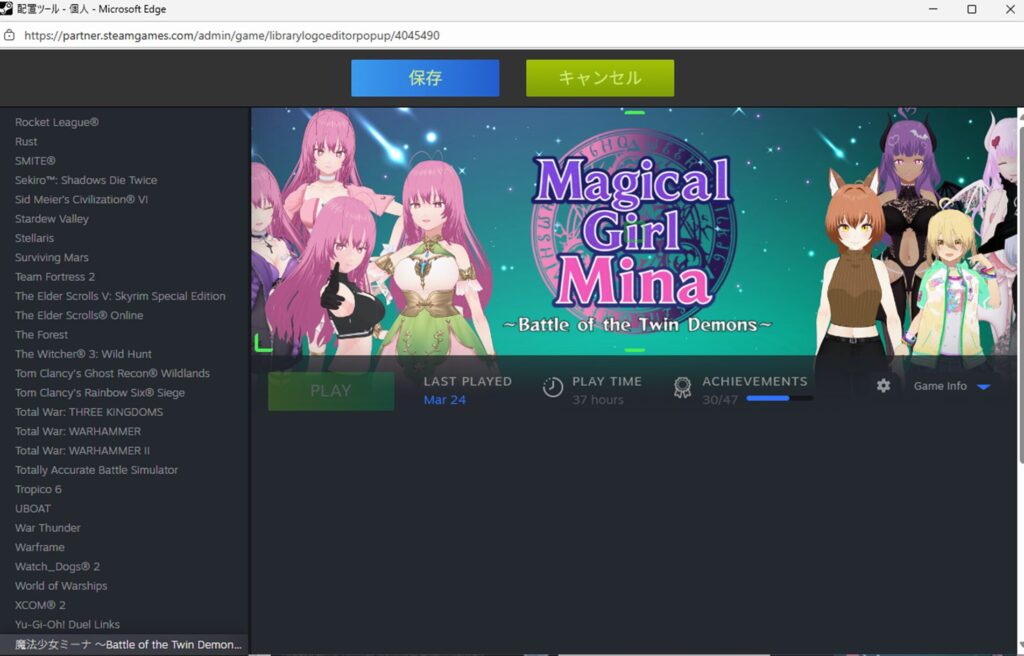
Once the logo and hero are arranged to your liking, the library asset is complete.
Broadcast Assets
The “Broadcast Assets” tab is for live stream–related images. Honestly, I’m not sure how much impact these have.
Very few indie games get streamed by others, and changing this image seems unlikely to make a meaningful difference. Unless you have a specific reason to customize this, leaving it at the default is fine.

Preparing the “Trailer” Section
The “Trailer” tab is where you upload your game’s trailer, promotional video, or gameplay footage.
Trailers aren’t technically required, but many reports suggest most users decide whether to buy a game based heavily on the trailer’s quality—so in practice, a trailer is effectively mandatory.
A trailer isn’t needed for the initial store page submission, but it will be required when submitting a game build, so you’ll need to create one eventually.
Particularly important: the first 5–10 seconds of the trailer are critical. Those seconds determine whether a user thinks “this looks fun.” Lead with the most exciting or visually striking content you can.
For solo developers, even just editing gameplay footage and putting the most exciting moments first is a solid starting approach.
Click “Create New Trailer,” set a title for the video, and click “Create.”
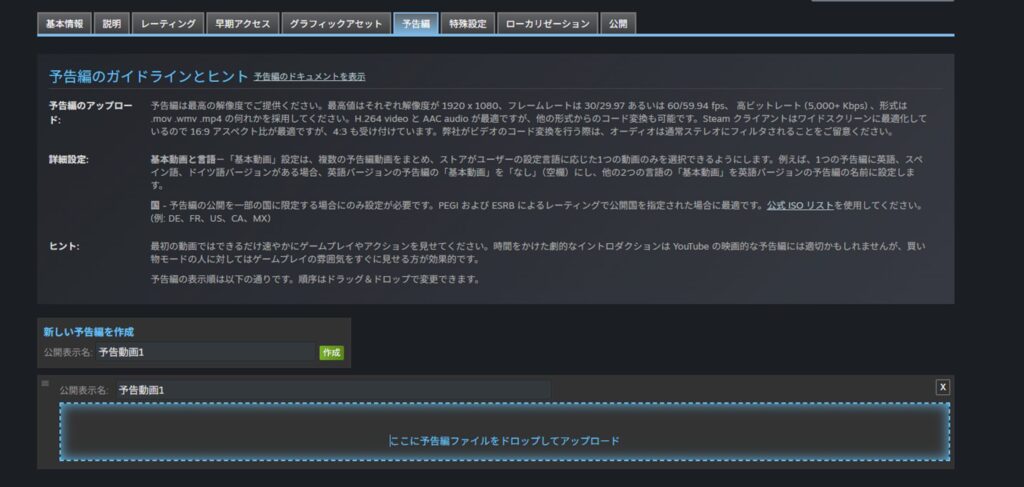
After uploading, the page will show “Converting…” for a while—Steam is processing the video. Use this time to work on other sections.
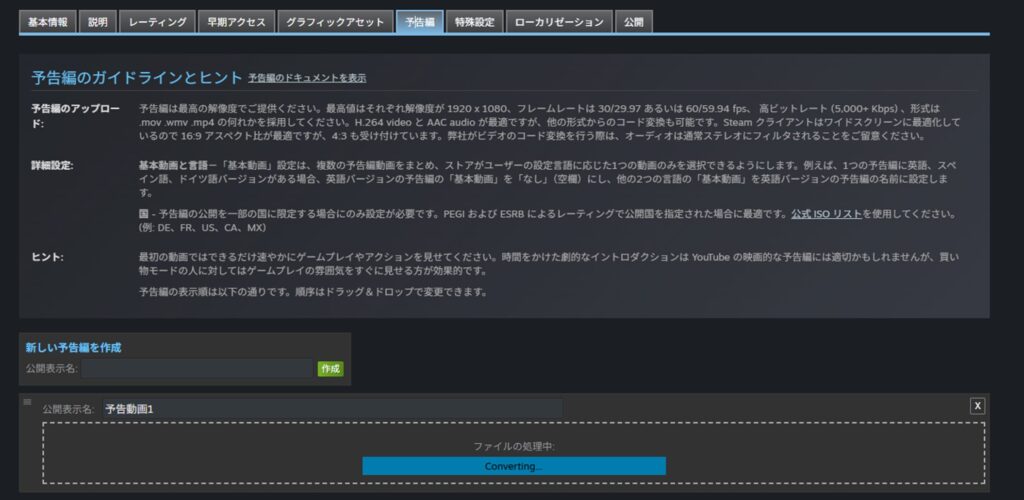
After approximately one hour (time varies with video length), the upload will complete.
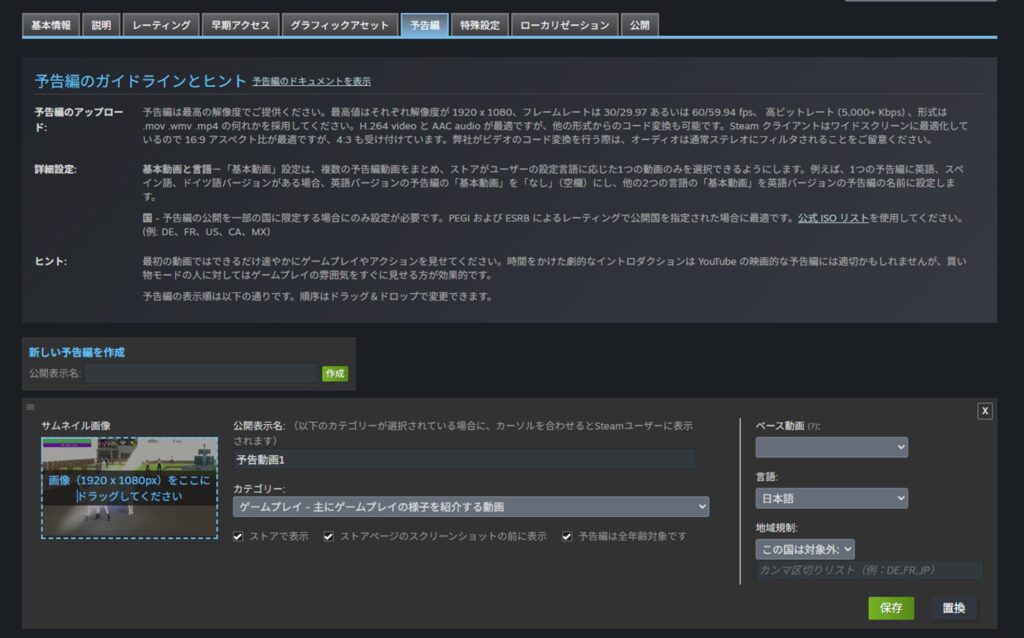
Once complete, you can upload a thumbnail image for the trailer. The capsule images created earlier work well as thumbnails. Set a category as well, then click “Save.” Regardless of which language is selected, the video will be shown to all regions unless you specifically restrict it.
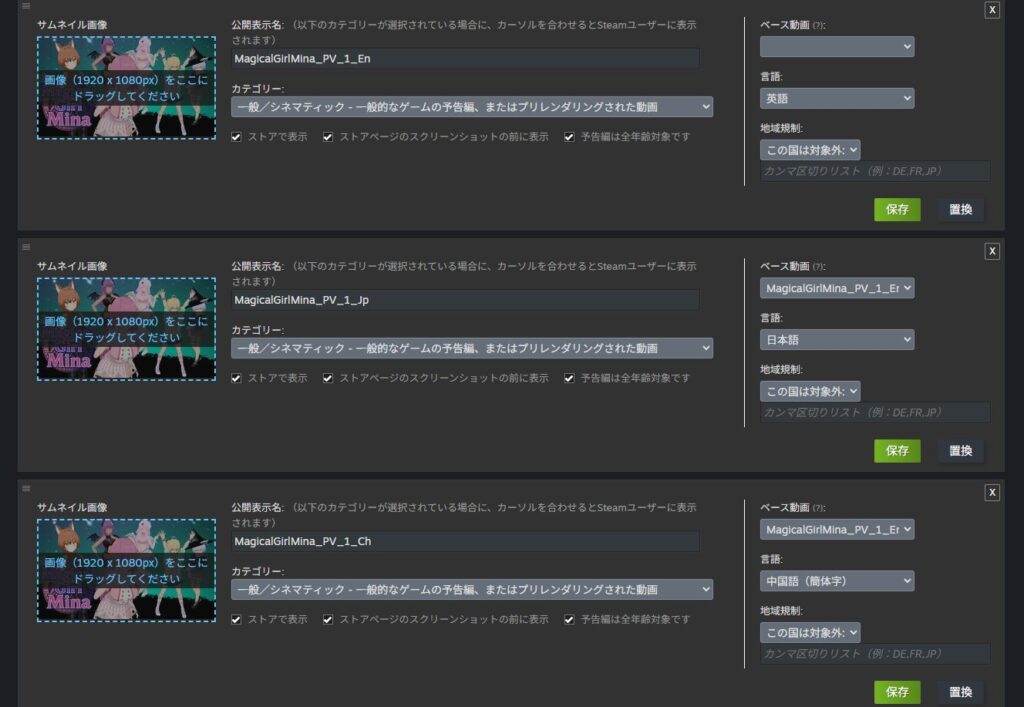
If you have multiple language versions of a near-identical video (same trailer, different subtitles or minor variations), you can set a “Base Video.” In my setup, the English version has no base video, while the Chinese and Japanese versions each have the English version set as the base video.
This way, English-region users see the English trailer, Chinese-region users see the Chinese trailer, and Japanese-region users see the Japanese trailer. This is especially useful the more languages you support.
Preparing the “Special Settings” Section
The “Special Settings” tab is for DLC content, demo configuration, and similar items. For an initial store page setup with no DLC or bundle, there’s nothing special to configure.
A demo can be added here if you have one ready, but most developers won’t have a demo at this stage. Separating the store page launch news from the demo launch news is also better marketing strategy (two separate announcements to generate buzz).
Demo creation is covered in the game build article.
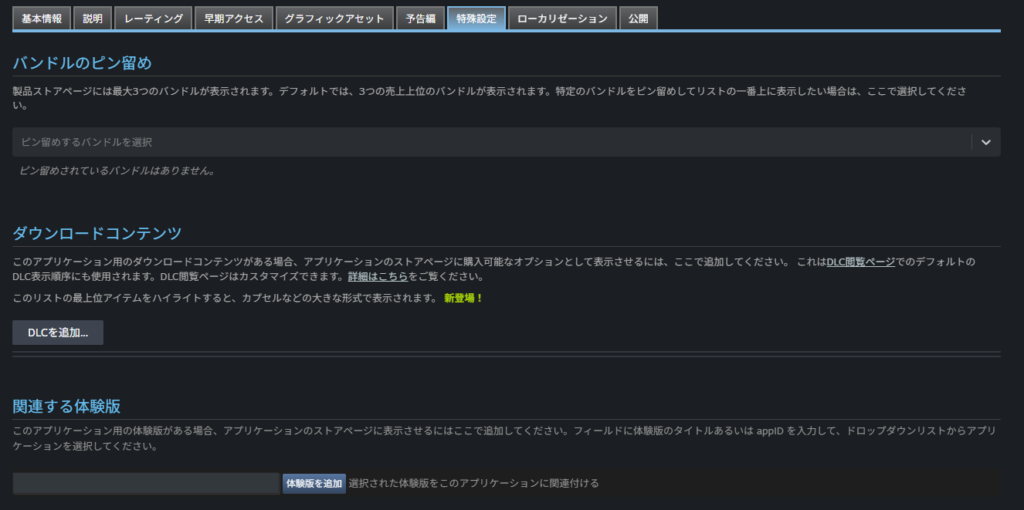
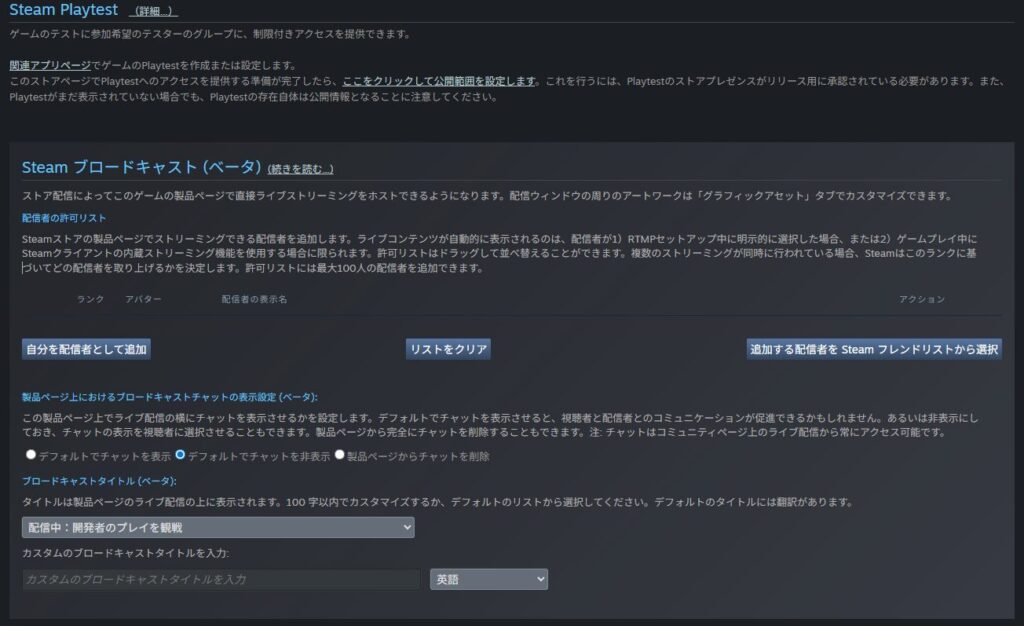
Other settings in this section—like granting test access to users or configuring live streaming—won’t be needed by most solo developers. If you need them, add users as described on the page.
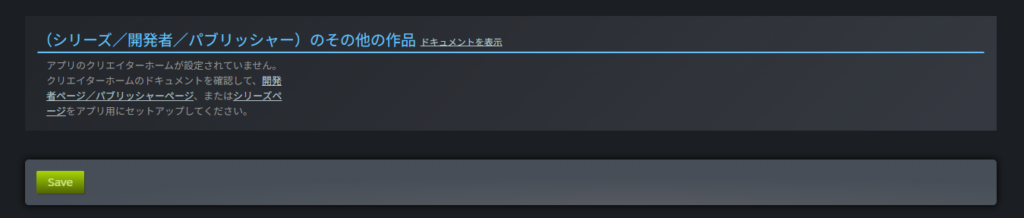
Series settings can be configured at the bottom if applicable, but nothing needed here for a first release.
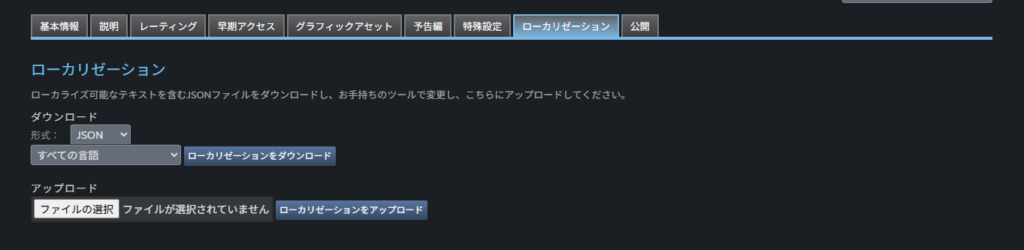
Preparing the “Localization” Section
The “Localization” tab provides a way to handle all localization for the store page in one place.
It works by exporting all fields that need localization in a JSON-like text format, which you then fill in and re-upload.
If you’ve been filling in each language individually on each screen, this tab isn’t necessary. It’s mainly useful if you have a very large number of supported languages and filling in each screen individually takes too long.
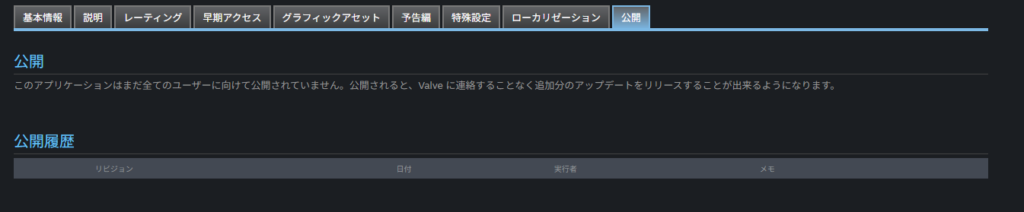
Preparing the “Publish” Section
The final “Publish” tab doesn’t have much meaning until the initial store page is published. I’ll note what it looks like after publishing.
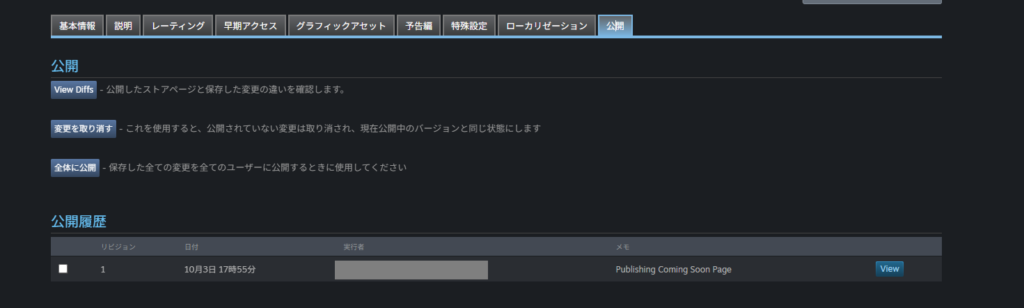
After publishing, the tab looked like this. It appears to be used for reviewing and reverting changes made after the initial publication.
Even after completing all the above tabs, the store page isn’t ready to submit yet—you’ll notice the checklist still has some incomplete items.
Preparing the App Icon and Shortcut Icon
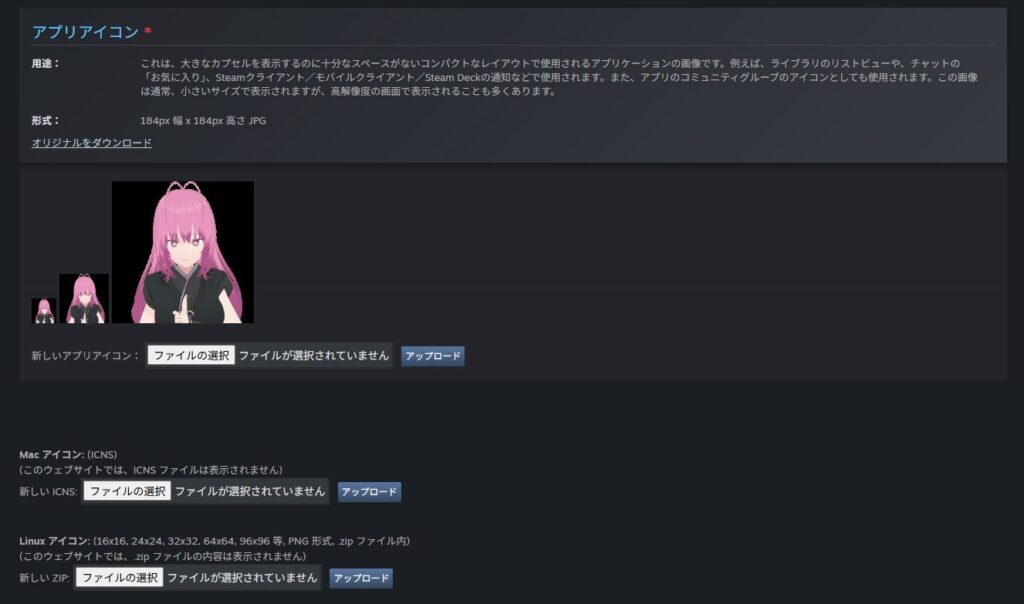
Among the remaining checklist items, you’ll find the app icon and shortcut icon setup.
Click the relevant checklist item to navigate to the icon upload page. Upload a shortcut icon in the specified size and format.
This icon appears when the game is launched, so it’s more important than it might seem. Checking “Convert shortcut icon to app icon on upload” will automatically set the app icon from the shortcut icon.
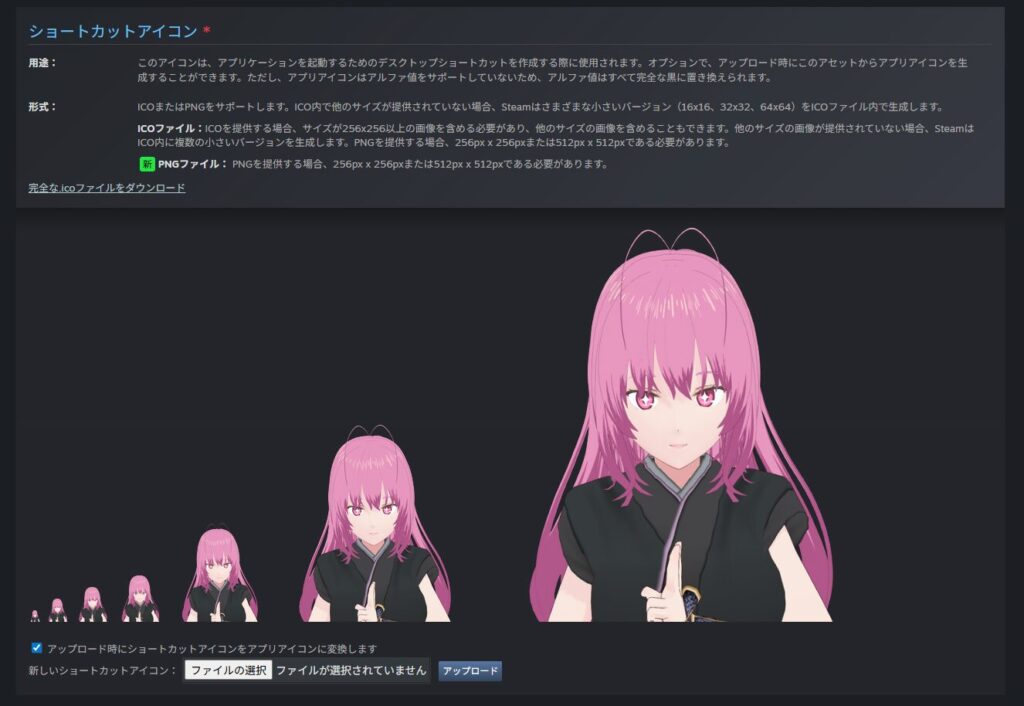
With that setting, the app icon is configured automatically—no need to upload them separately.
Store Page Review and Publishing
Submitting for Review
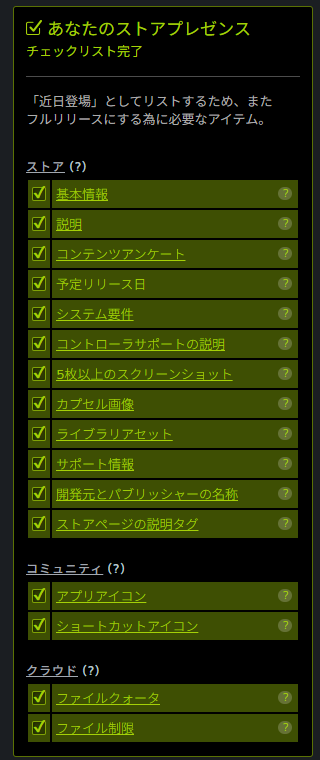
Once all the above steps are complete, the Store Presence checklist should show all items as complete, as shown below. At this point the store page can be submitted for review.
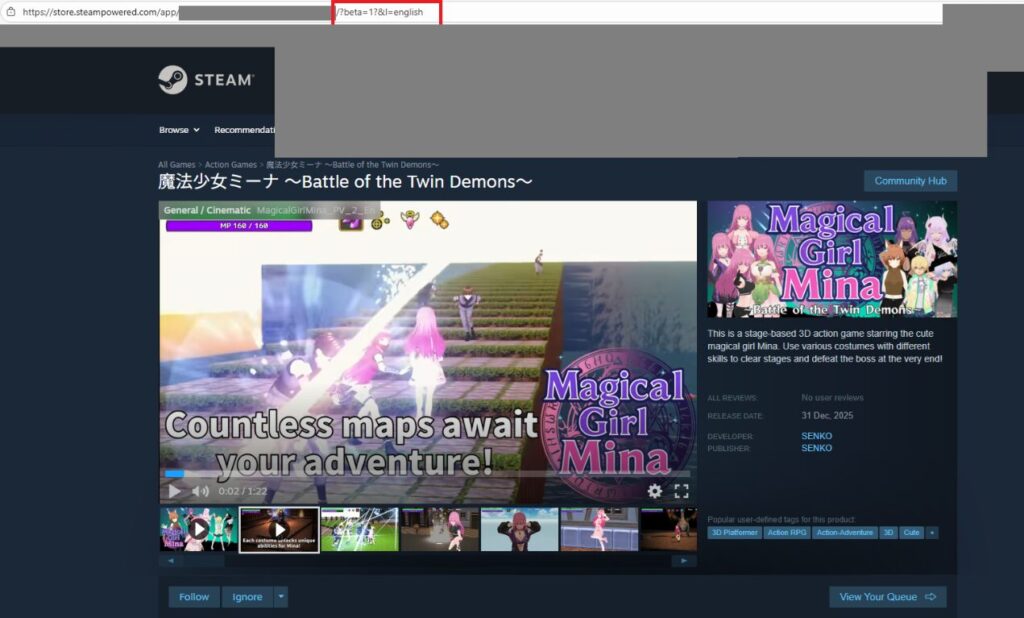
Before submitting, review the store page yourself. From the app screen, select “View Store Page” → “View in Beta Mode.”

Your store page will appear. Check carefully that everything is as intended before submitting. Review takes time, and correcting simple mistakes repeatedly adds up to significant delays.

If your store page has multiple languages, you can append “&l=english” to the preview URL to switch to the English preview. Use “&l=schinese” for Simplified Chinese.
For other languages, check “API Language Codes” in the Steamworks documentation.
To submit for review, click “Ready for Review” in the Store Presence section at the top of the app page.
A “Ready for Review” screen and a notes field will appear. Add any relevant notes and click “OK.”

The notes field doesn’t need to be exhaustive, but I wrote a brief game summary and a note about the rating content just to be safe.
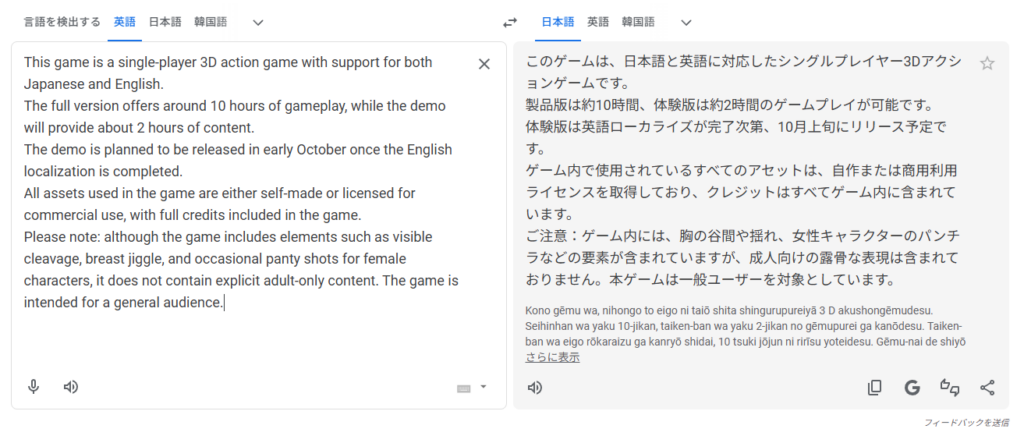
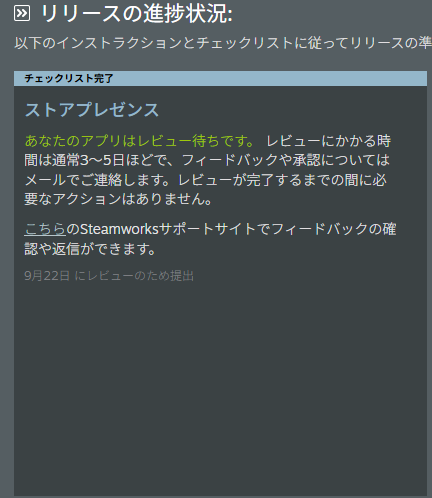
After submitting, the screen updates as shown. The previous screen said 2–3 days for review, but this one says 3–5 days—this kind of timeline inconsistency appears throughout Steamworks. Use the longer estimate when planning.
Wait a few days for the review to complete. Store page editing remains available during review, but making major changes after submission may trigger a re-review request.
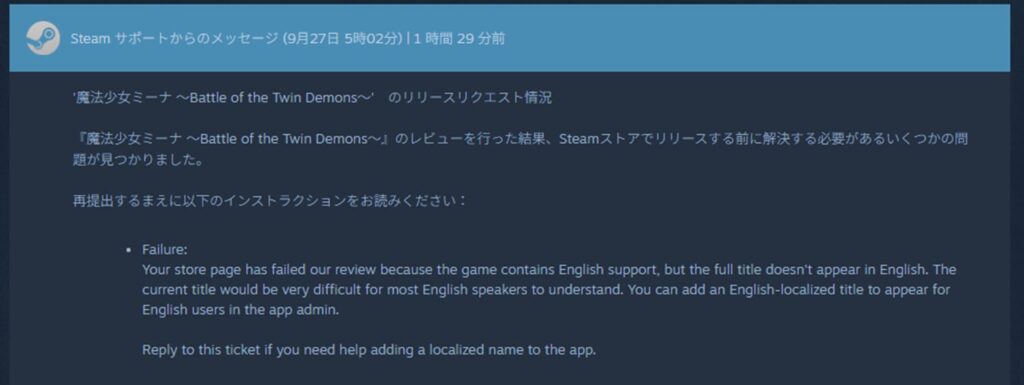
In my case, the review result arrived by email after 5 business days. The result: “Issues found.” The comment identified the problem.
The issue was that the game title had no localized version. Sure enough—I had no memory of setting a localized title.
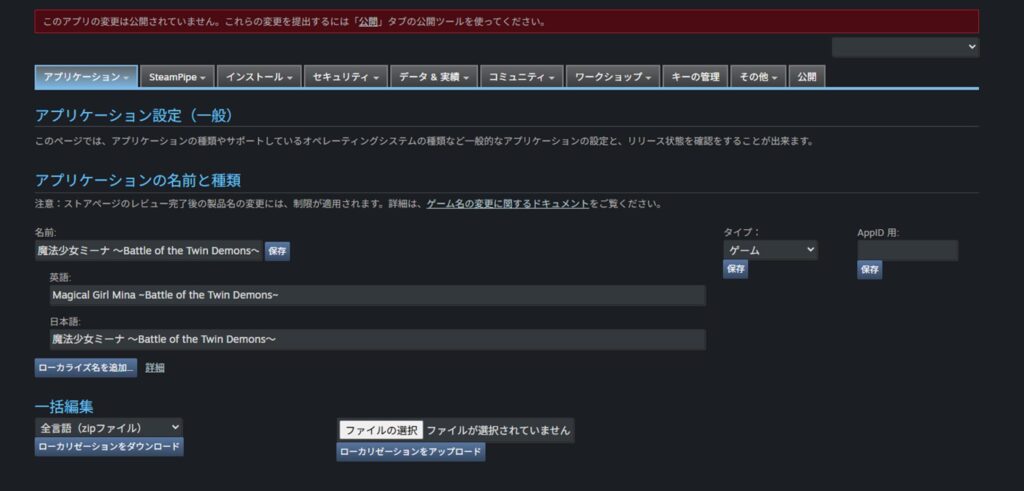
Research revealed that title localization is done not in the store page settings but via “Technical Tools” → “Edit Steamworks Settings.”

Under the “Application” tab, the game title (application name) can be localized.
It feels like this setting should live on the store page, but apparently it’s in a separate location by design. Add the localized title there, then resubmit for review using the same process.
After waiting another 4 business days (submitted again on Saturday, result arrived the following Thursday), the page was approved.
It seemed easier than expected, but apparently some developers receive 4–5 rounds of feedback. Don’t give up—address each issue and resubmit, and approval will eventually come (2–3 rounds seems typical).
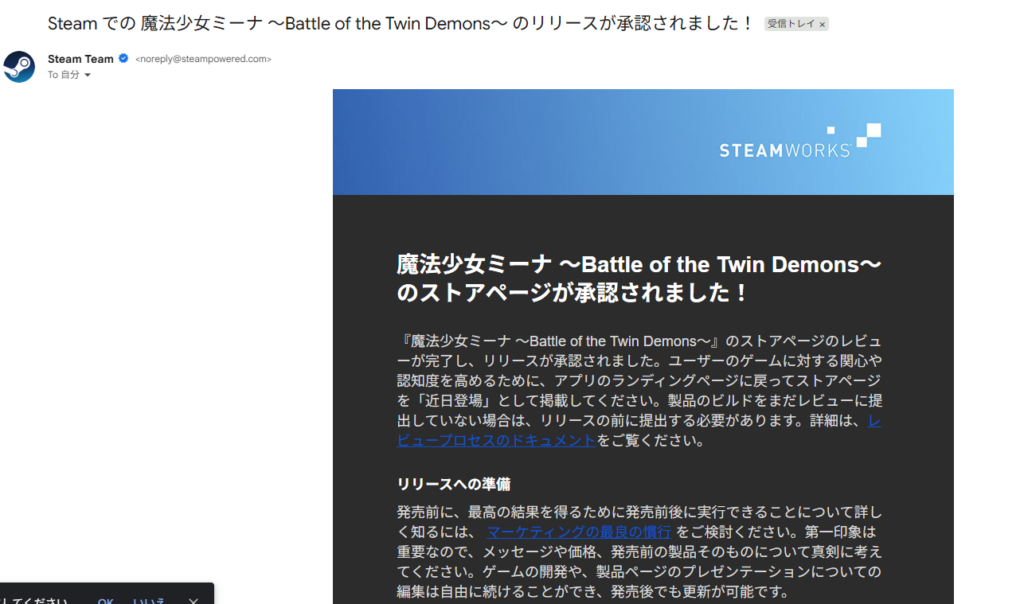
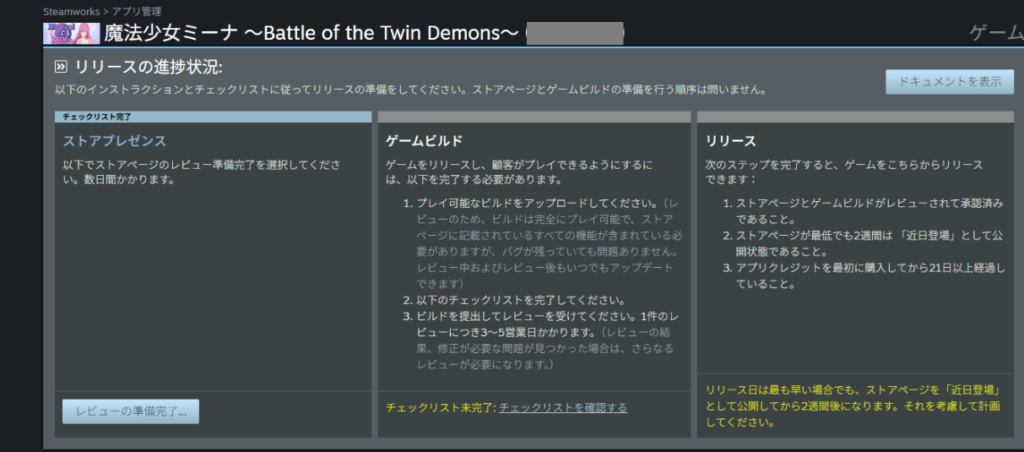
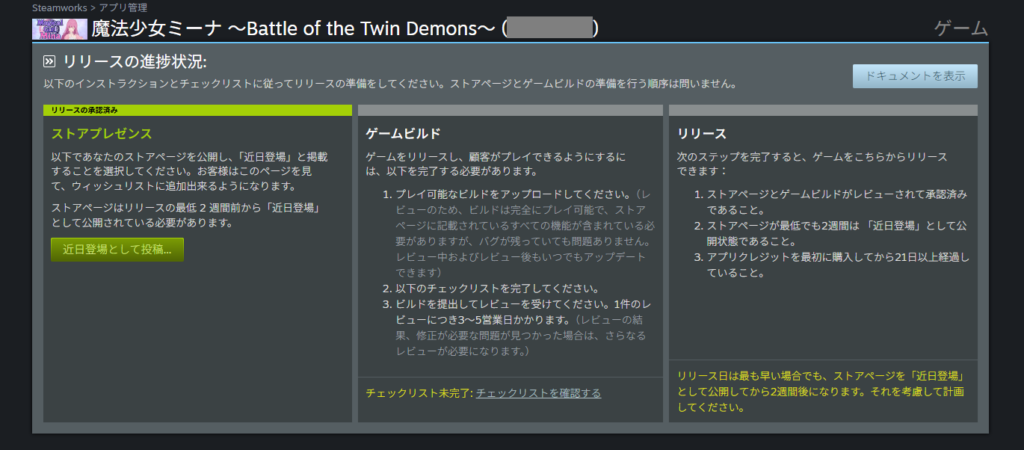
After approval, the app status looks like this. Changing the store page release date to “Coming Soon” should allow publishing (it appears publication after approval is manual, not automatic).
Interestingly, many other games have their release date set far in the future but still appear in Steam’s “Coming Soon” list.
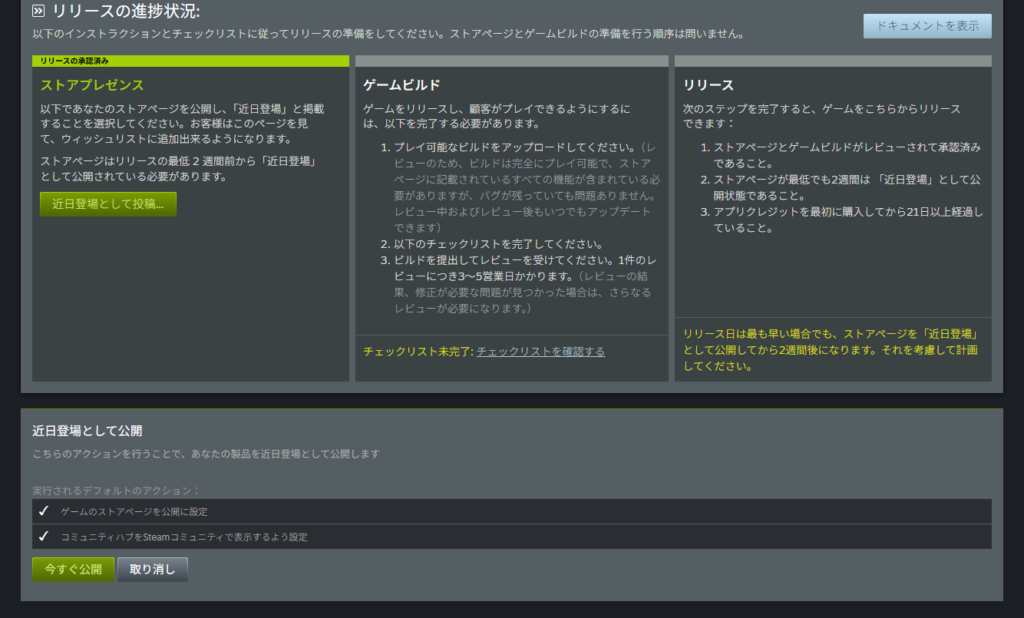
Clicking “Post as Coming Soon” confirms you can proceed to publish normally. So “Coming Soon” in the context of the store page button and “Coming Soon” as a release date label refer to entirely different things.
With the release date still set to the future, click “Publish Now” to make the store page live.
After a brief wait, you’ll be told the page will appear as “Coming Soon” on Steam within up to 10 minutes.
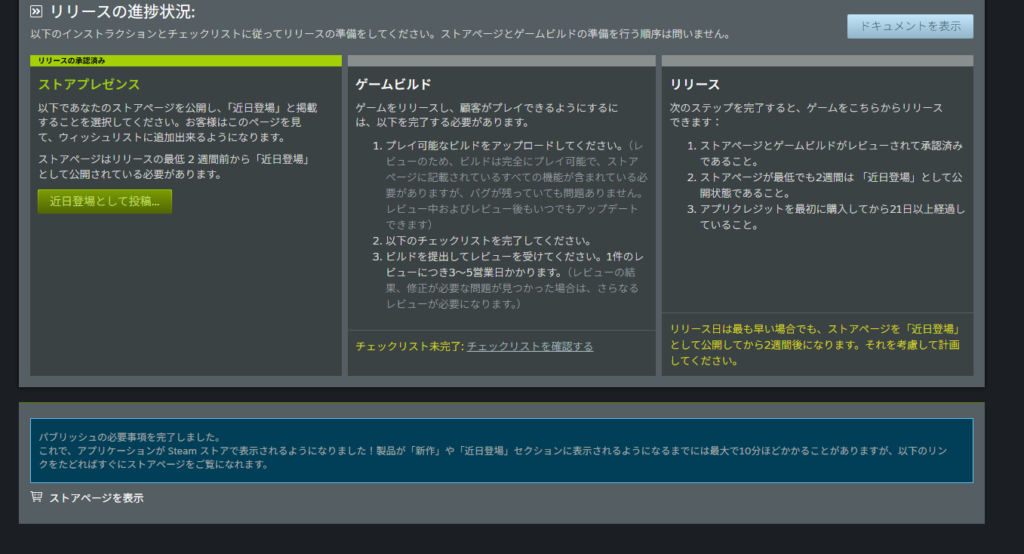
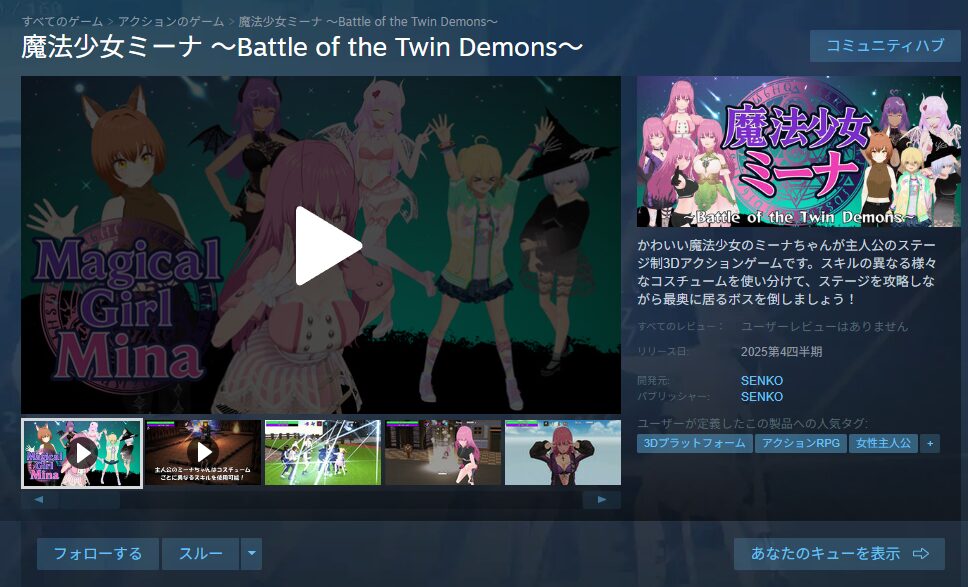
Checking the URL confirmed my game was now publicly visible on Steam.

That was a long journey, but the store page from preparation to publication is now fully covered. The length of this guide reflects how demanding the store page process actually is.
Updating the Store Page After Publication
After a store page is published, it’s common to make changes—updating the trailer, swapping screenshots, revising the description, and so on.
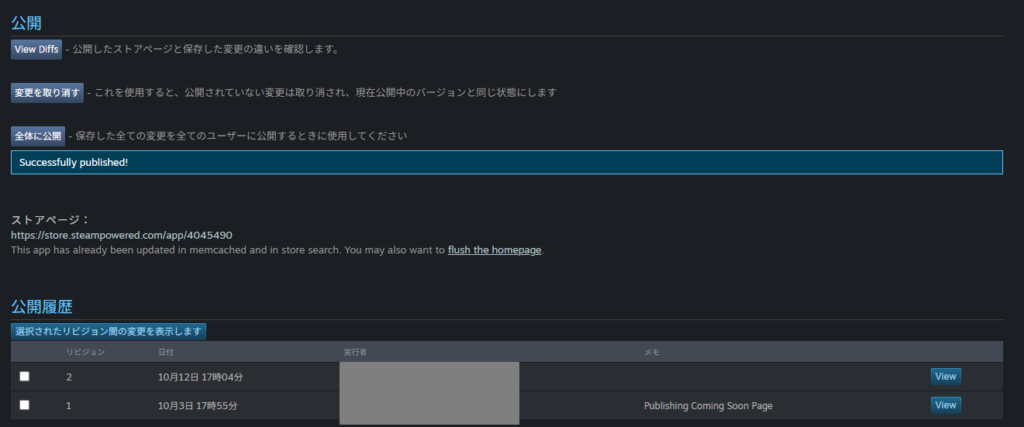
However, changes made to a Steamworks store page are only reflected in the beta view initially—users won’t see them yet. To apply changes to the live page, go to the “Publish” tab under “Manage Store Page.”
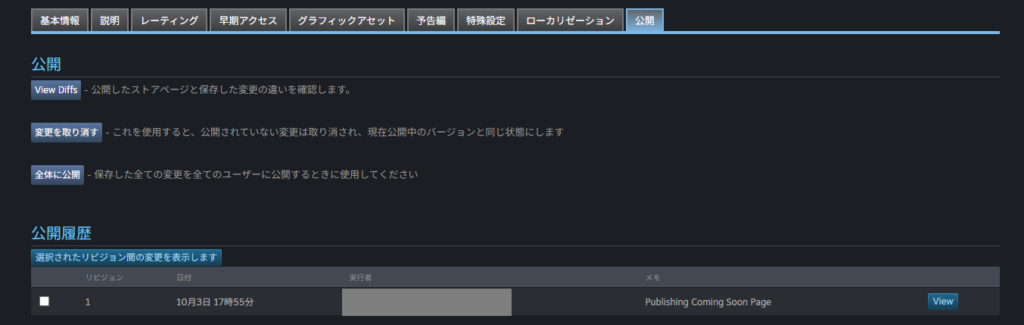
Click “View Diffs” to see a summary of changes. Always review the diff before publishing to confirm the changes are what you intended.
“Revert Changes” reverts everything to the currently published state. “Publish to All” applies the changes to the live store page and makes them visible to all users.
Published updates are tracked in a history log.
After publishing, verify the changes on the store page itself.
Summary
This article covered the full process of preparing and publishing a Steam store page. The Steamworks registration process was already demanding, but store page preparation is even more so.
That said, preparing a page to showcase a game you’ve worked hard on does have a certain satisfaction to it.
These steps reflect my own experience and may not cover every scenario. You may encounter different challenges at points I found easy.
Don’t give up. If you keep going, you’ll get there. Think of the difficulty as experience that will serve you in your next project.
After the store page is live, the remaining steps are demo and full game builds, then the actual release. If you want to follow along, continue with the articles linked below.
📚 Series: How to Sell Your Game on Steam (3/7)