Game Development with Bakin
I recently decided to challenge myself and started making an action game with Bakin. I’ve put together something that moves at a basic level, so I recorded a video.
It only has the minimum action elements implemented so far, but this is the kind of action game I’m aiming for.
As I continue developing, I decided to write articles so I don’t forget why I implemented each action the way I did, and hopefully so others can use them as a reference for their own game-making.
If you want to know why I started developing games, or what Bakin even is, please read this article first.
Also, the initial game settings and player creation were completed in the previous article, so if you haven’t done that yet, please check that article first and create your initial game state.
Implementing the Player’s Sword Attack Action
The foundation of any action game is the player’s (protagonist’s) action repertoire.
Concretely, this includes walking, running, jumping, close-range attacks such as sword swings, ranged attacks such as bows, using magic, and any other game-specific actions.
Basic actions like walking, running, and jumping are supported by Bakin out of the box, so you don’t need to worry about them. However, actions like swinging a sword must be implemented individually by the developer.
This article explains how to implement the sword-swing action that forms the core of an action game. Keep in mind this is just my way of doing it—there are other approaches, and future Bakin updates may change what’s needed.
Rather than memorizing the steps, try to understand the underlying thinking behind the implementation.
Creating a Cast for the Melee Attack Action
First, create a “Cast” to use as the “Melee Attack Action.” A “Cast” is a “character” that appears in the game world—the same word used for the actors in a stage play.
You might wonder why you need a “Cast” just to create an attack action. Honestly, it’s because that’s how Bakin works.
In Bakin, the basic way to implement attacks in an action game is to use a transparent cast as a hitbox.
In other words, when the player performs the sword-swing motion, a transparent cast is launched, and when that transparent cast collides with an enemy, damage is applied. That’s the flow.
There may be easier approaches, but based on my research this seems to be the only way—so keep this in mind for now (hopefully future updates will simplify things).
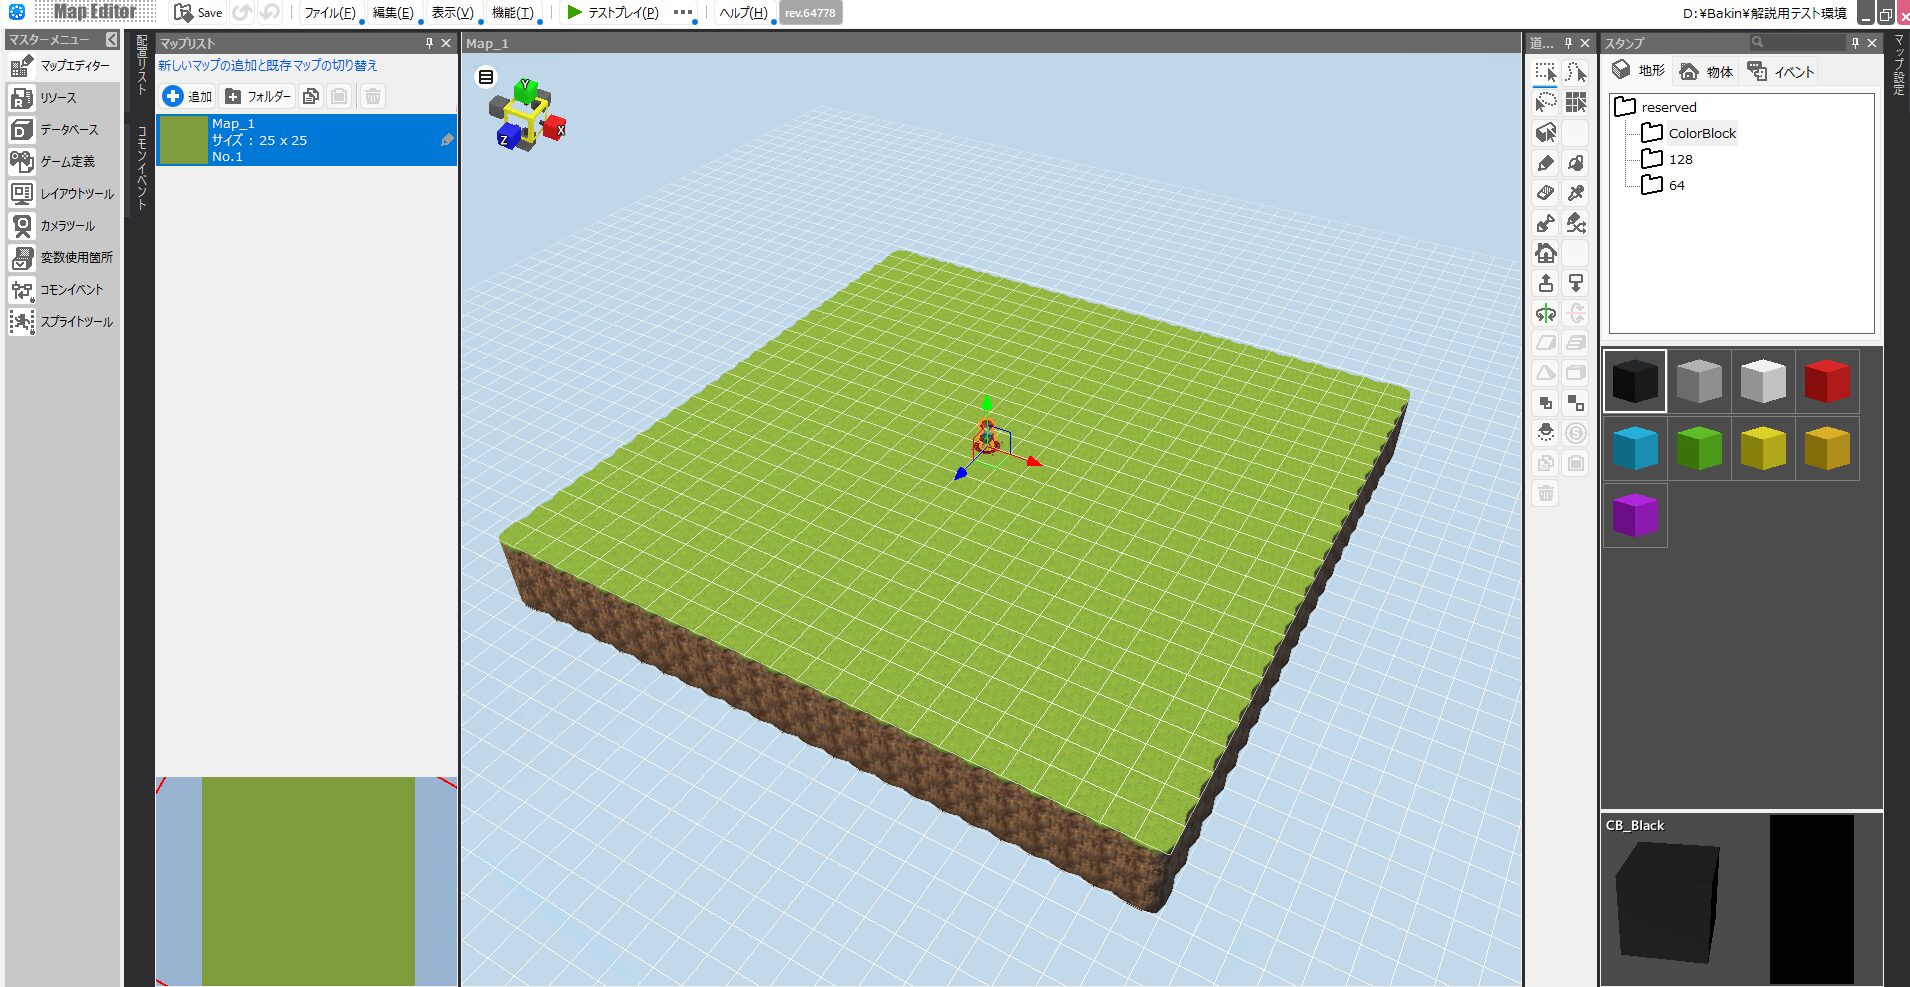
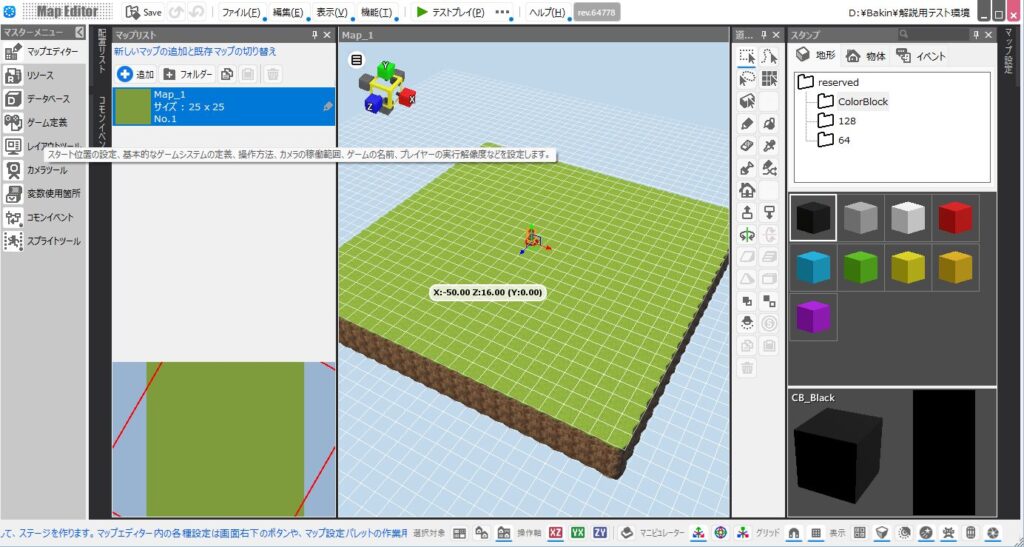
To create the Cast, select “Database” from the menu on the left side of Bakin.
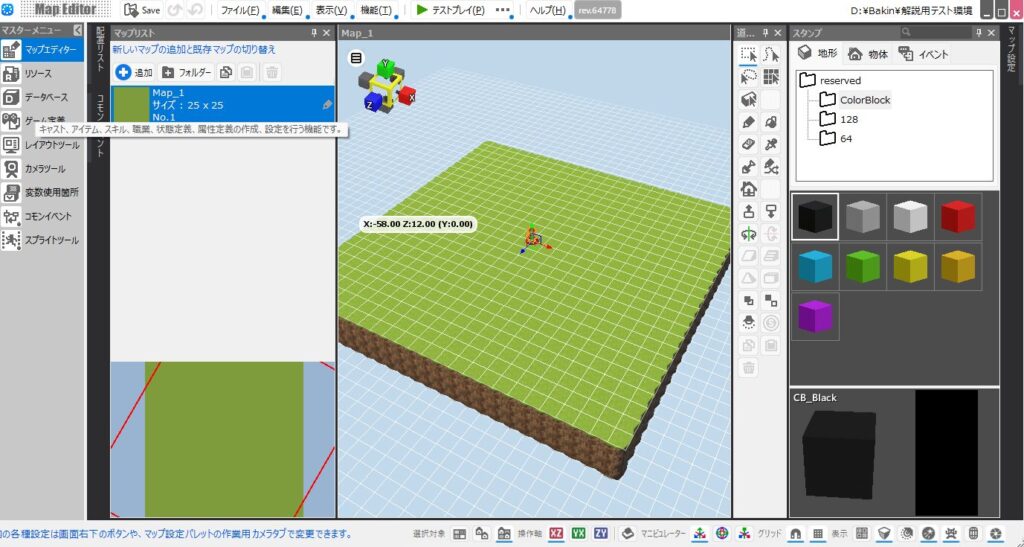
In “Database” you can configure everything that appears in the game world.
For example, characters (“Casts”), items that provide various effects, and skills usable in combat are all defined in “Database.”
This time I’ll build the player’s attack actions using “Cast,” so I created a new folder called “Player Actions” to store the actions I make.
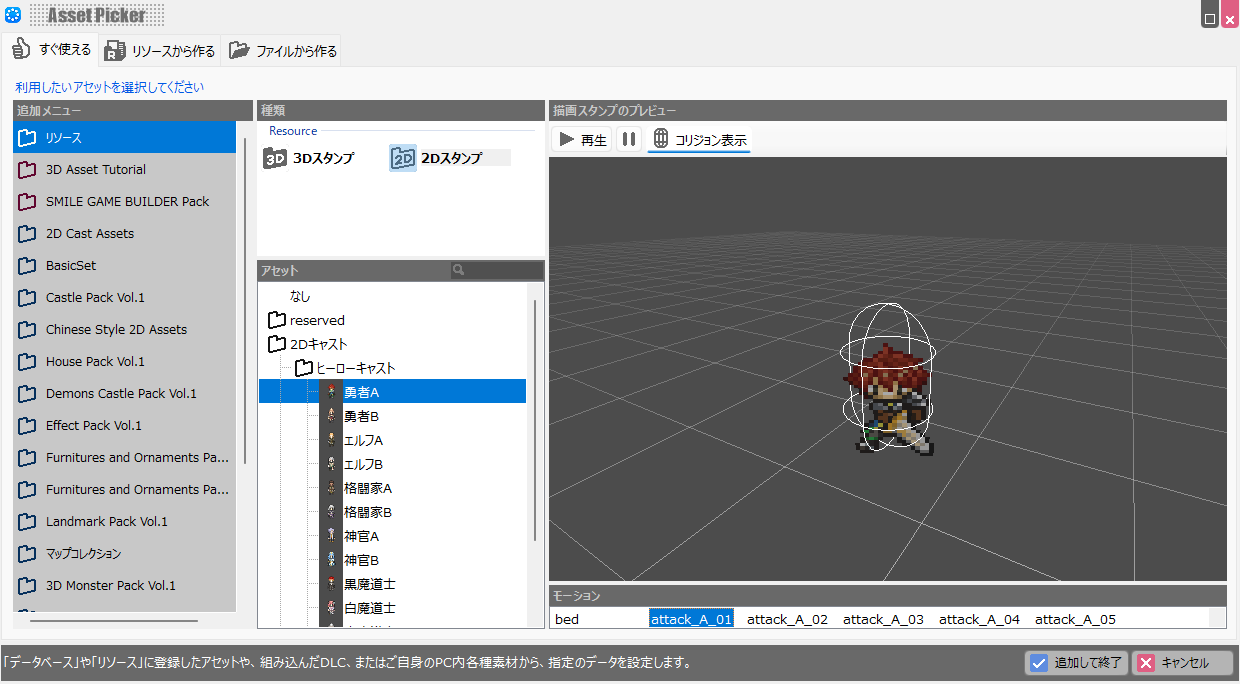
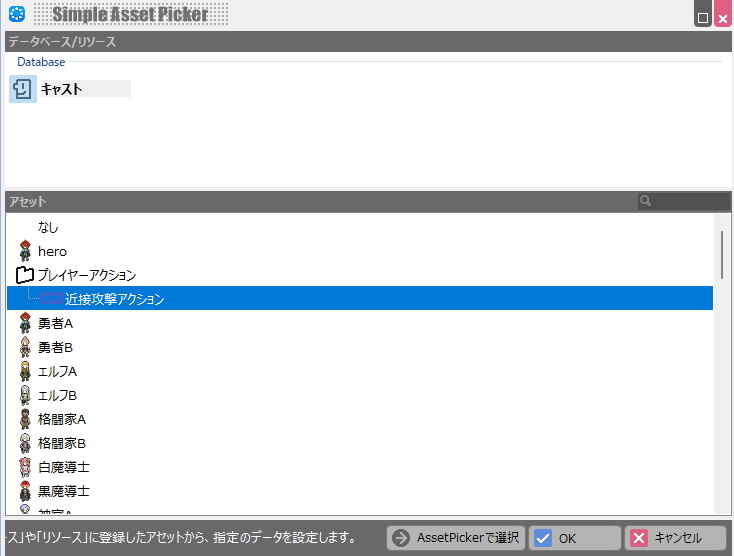
Next, press the ”+ Add” button at the top of the “Cast” section.
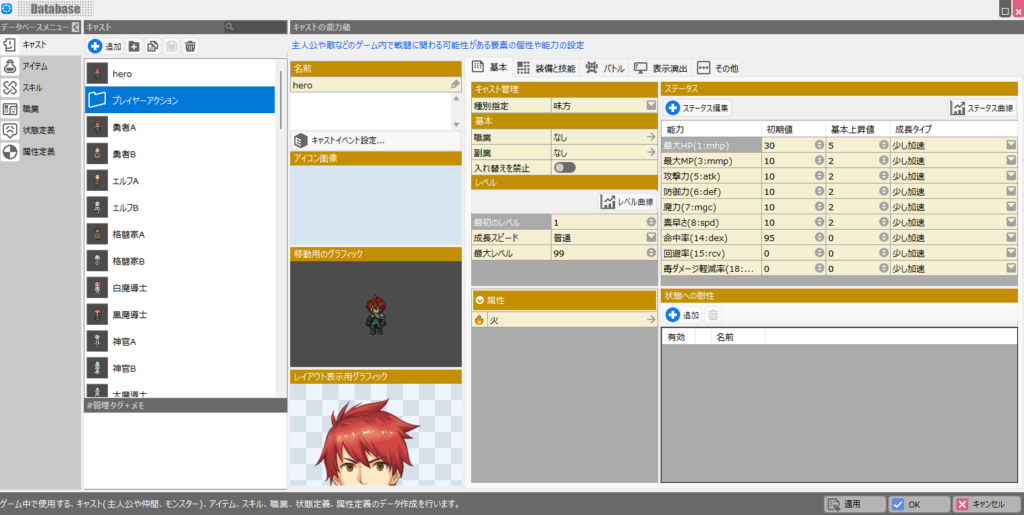
A screen appears to select an image for the Cast, but leave it as “None” and press “Add and Finish.”

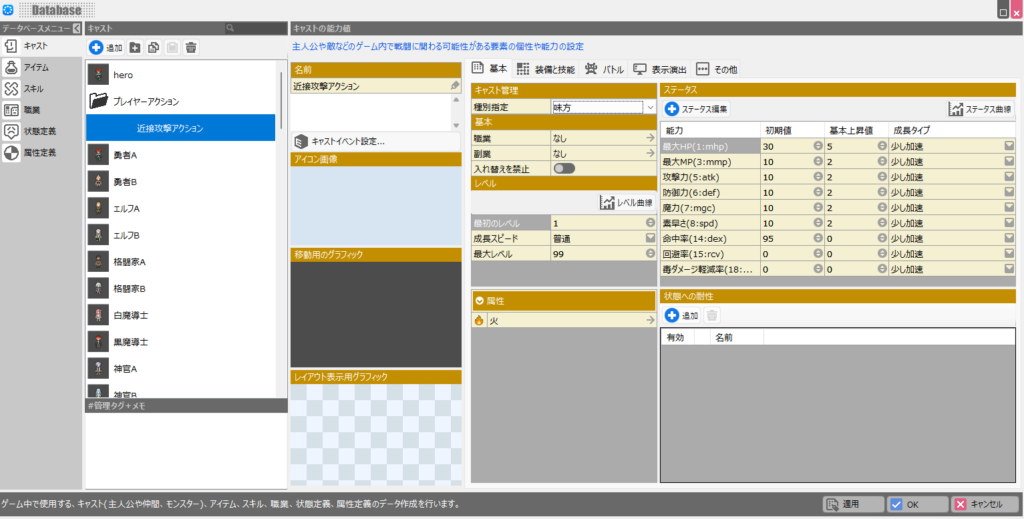
A new cast is added. Rename it “Melee Attack Action” and then adjust its settings. First, set the “Type Designation” in the “Basic” tab on the right to “Ally.”
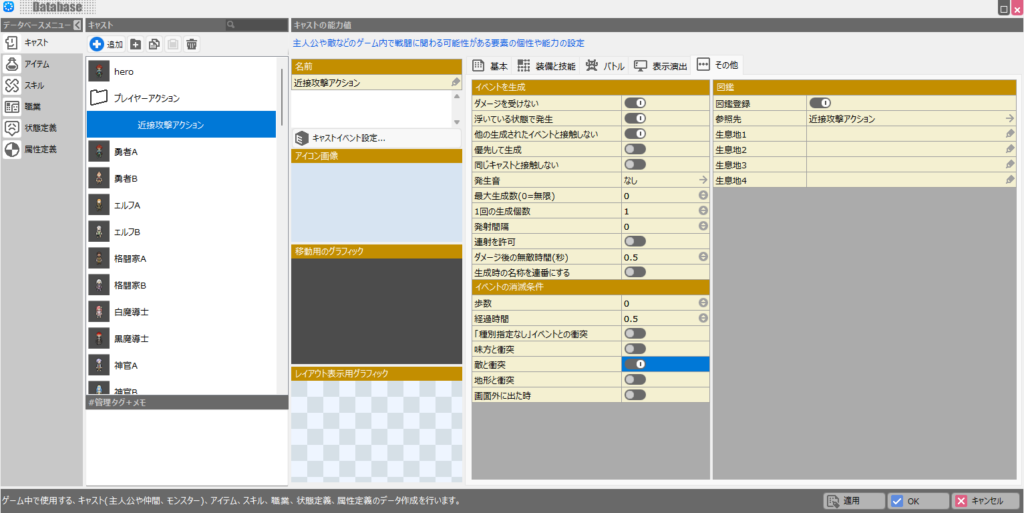
Next, open the “Other” tab and check “Does Not Receive Damage,” “Generated While Floating,” and “Does Not Collide With Other Generated Events” as a precaution (the cast will work without them). You must also set the “Event Disappear Condition.”
Without this, the event will linger forever (though you can also remove it from within the event script). Generally, setting “Event Disappear Condition” to “Elapsed Time” with a short interval like “0.5” seconds is fine.
It’s also a good idea to enable disappearance on “Collision with Enemy” for now. Ideally you’d generate separate child casts (sword, spear, etc.) from “Melee Attack Action,” but since we’re using this cast directly for the attack, this setup works.
That covers the cast settings for now. Next, we’ll create the Cast Event for this cast.
Creating the Cast Event for the Cast
To implement the sword-swing action, you need to set up the swing motion and the slash projectile inside the “Melee Attack Action” cast.
These configurations are done in what’s called a “Cast Event,” accessible via the “Cast Event Settings” link under the cast name.
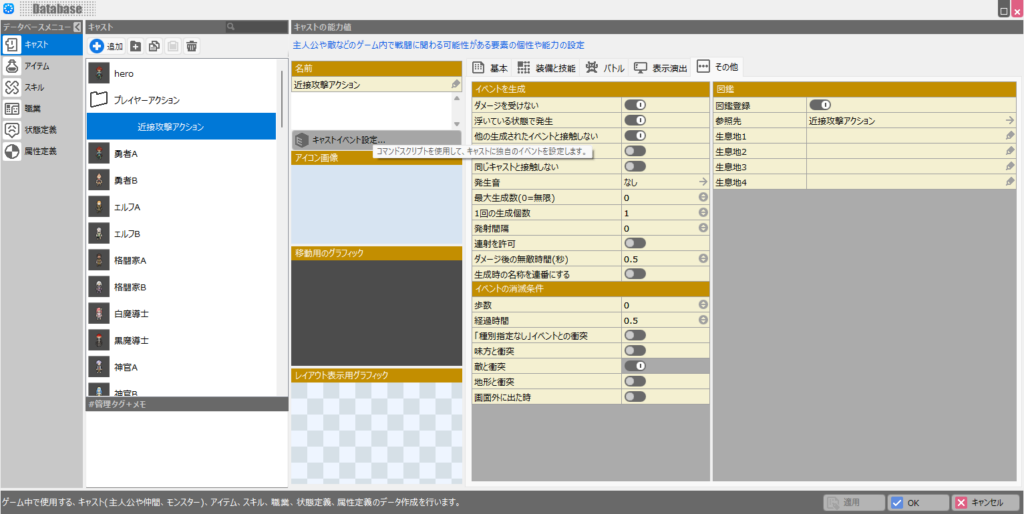
In “Cast Event” you can configure “Sheet List,” “Conditions for Sheet Execution,” “Elements That Change on Sheet Execution,” and “Command Script Launched on Sheet Execution.”
“Sheet List” and “Conditions for Sheet Execution” are used to switch between multiple events based on conditions—for example, a treasure chest has one event for the first time it’s opened and a different event for subsequent inspections.
“Elements That Change on Sheet Execution” lets you modify the cast’s collision, movement, and graphics settings.
For this case, change the “Collision Settings” to uncheck “Collide with Player.” Finally, the main part of the cast event is the “Command Script Launched on Sheet Execution.” This is complex—the best way to learn it is by doing.
For this “Cast Event,” the content needs to match the following image.
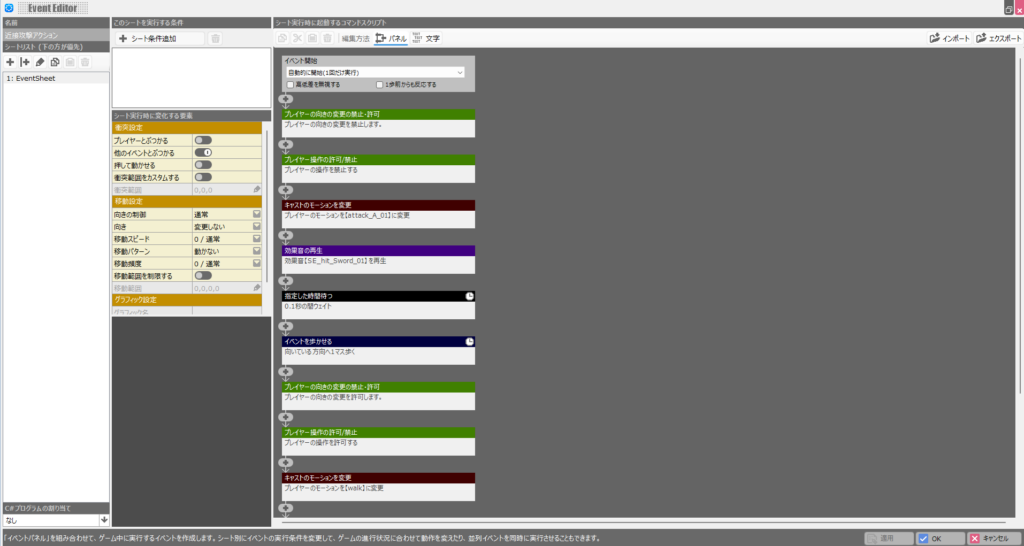
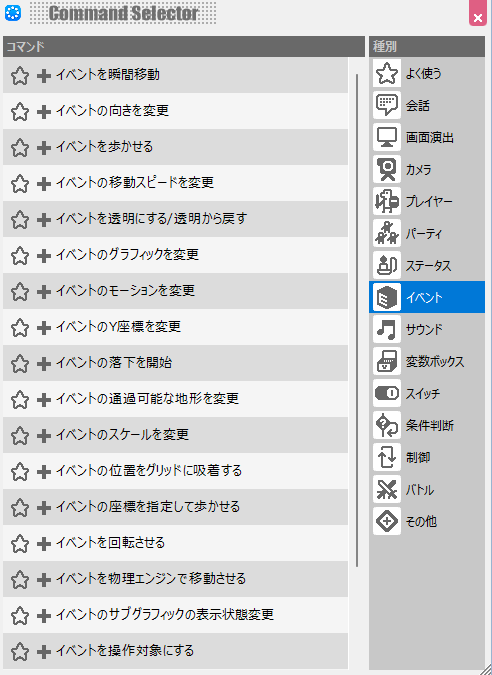
The “Command Script Launched on Sheet Execution” opens when you press the ”+” button. Each script is categorized, and you’ll generally find what you need by looking under “Event” for event-related operations.
It’s too much to explain everything, so please search for the scripts that correspond to the list shown above on your own.
Now let me explain the flow shown in the list. For “Event Start,” use “Start Automatically (Execute Once)” this time.
Since this event will be triggered by a game-defined launch button, that setting is fine, but for other triggers a parallel execution mode is often better.
After that, the scripts flow as follows: Disable player input → Player swings sword → Sound effect plays → Launch slash → Re-enable player input.
The reason we disable player input first is that without it the player can move freely during the sword-swing animation.
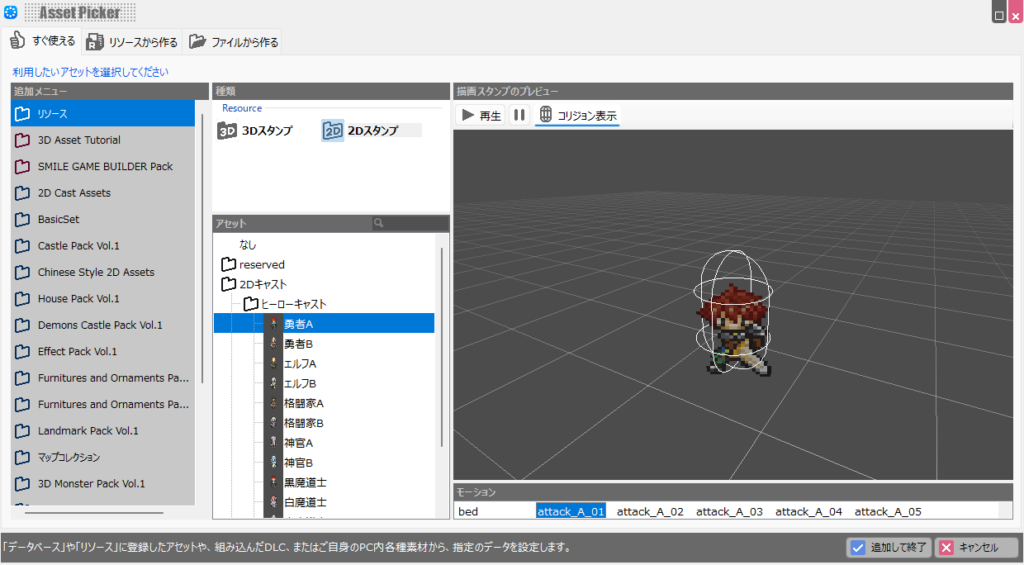
Next, “Change Cast Motion” sets the “attack_A_01” sword-swing motion for “Hero A.” This motion is included with Bakin by default, so we can use it.
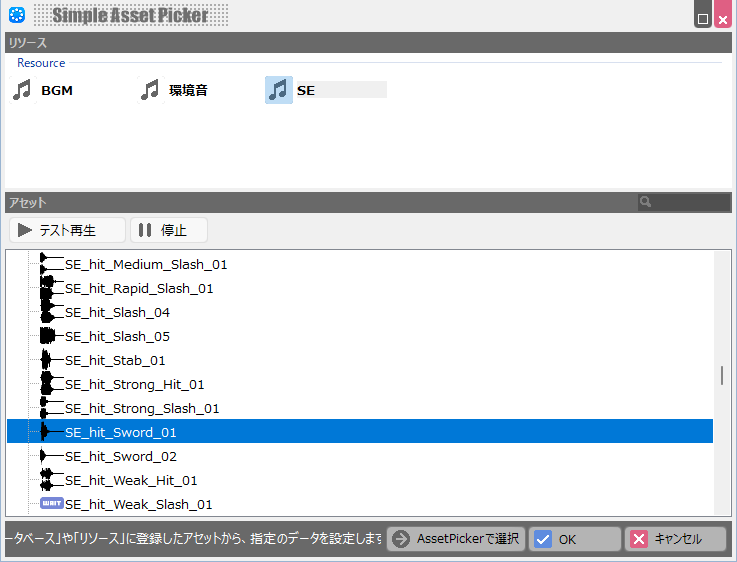
Then, “Play Sound Effect” plays the sword-swing sound. Use “SE_hit_Sword_01,” also included with Bakin by default.
The “Wait 0.1 Seconds” is included because without it, damage hits the enemy the instant the sword swings, which feels jarring.
It’s not strictly required, but the appropriate wait time will need to be tuned individually for each weapon to avoid that jarring feel.
Small inconsistencies like this can cause noticeable stress for players, so aim for a polished, natural feel.
After that, moving the event one tile is what creates the range of the slash—that one tile is the hitbox for the attack.
The range also needs to stay consistent with the weapon graphic. Too long or too short and players will notice. After the sword swing attack finishes, re-enable player input and switch back to the normal walk motion before ending.
The motion change might seem unnecessary, but I’ve added it as a precaution. This completes the cast event flow for the sword attack. We’re almost done, but we still need to set up the trigger that calls this cast event.
Assigning the Cast to the Game-Defined Launch Button
To trigger the created “Cast Event,” select “Game Definition” from Bakin’s master menu.
On the opened screen, select “Rules and Controls” and scroll down in the second column to find “Event Launch (Dynamic Generation).” Assign the cast you created to Launch Button 1.
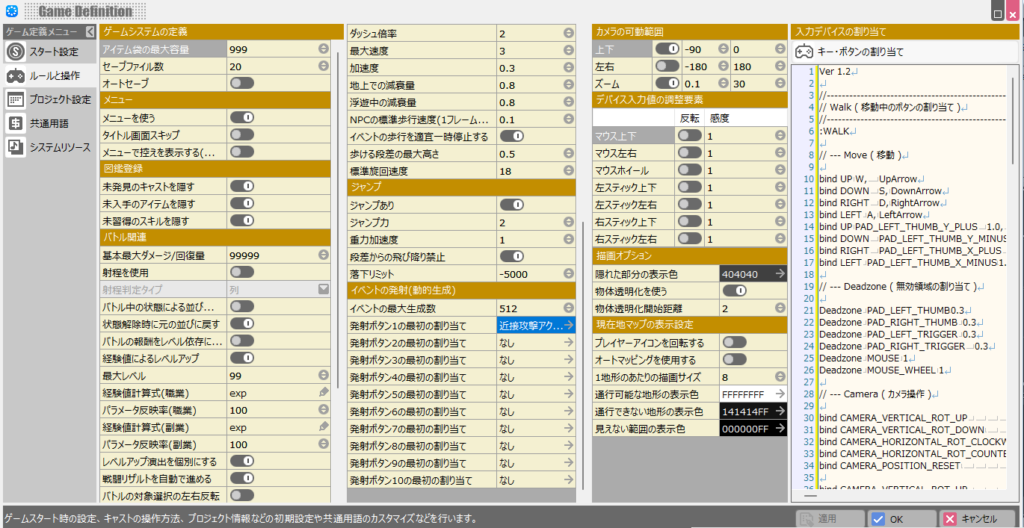
Now pressing Launch Button 1 during the game will call the “Melee Attack Action” cast, which triggers its cast event—executing the event we just created.
Testing in the Game
Let’s verify the sword-swing logic works correctly. Run “Test Play” and press Launch Button 1 (default: “Z” key). If everything is correct, the player should swing the sword.
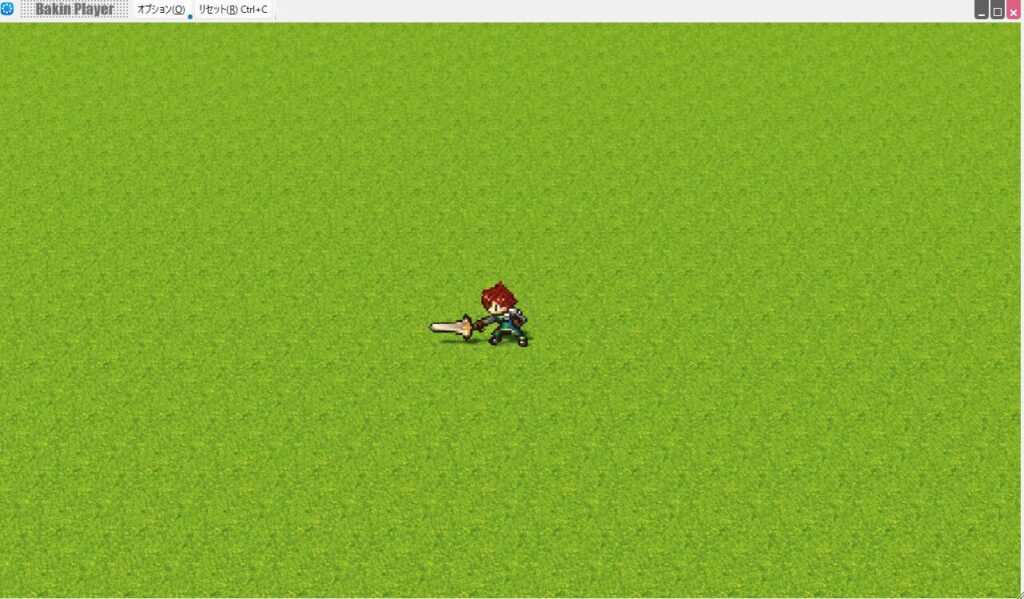
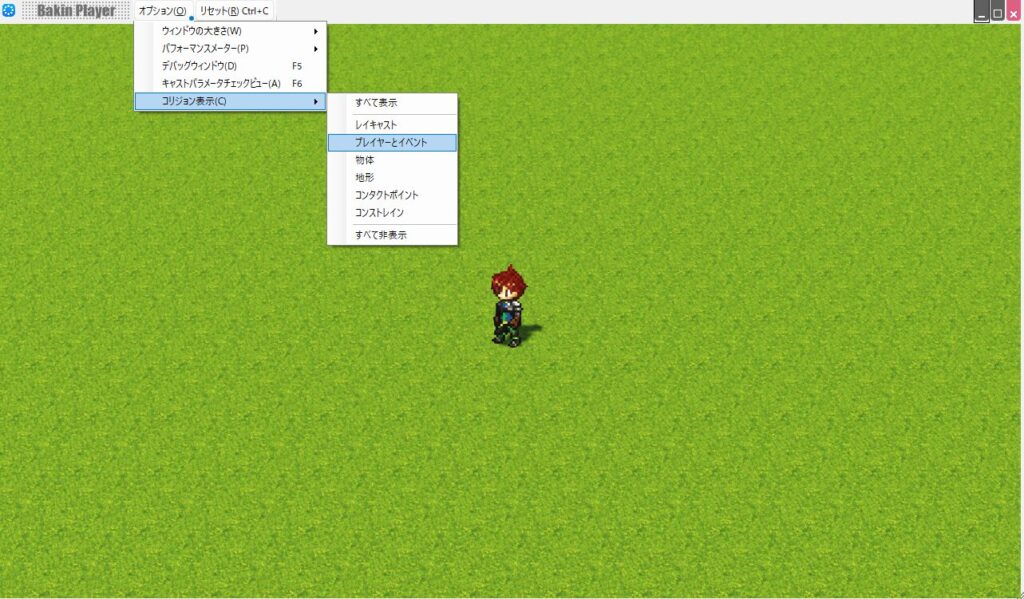
However, you may not be able to tell from the display alone whether the hitbox is what you intended. To check, go to “Options” in the top bar during test play, select “Show Collision,” and check “Player and Events.”
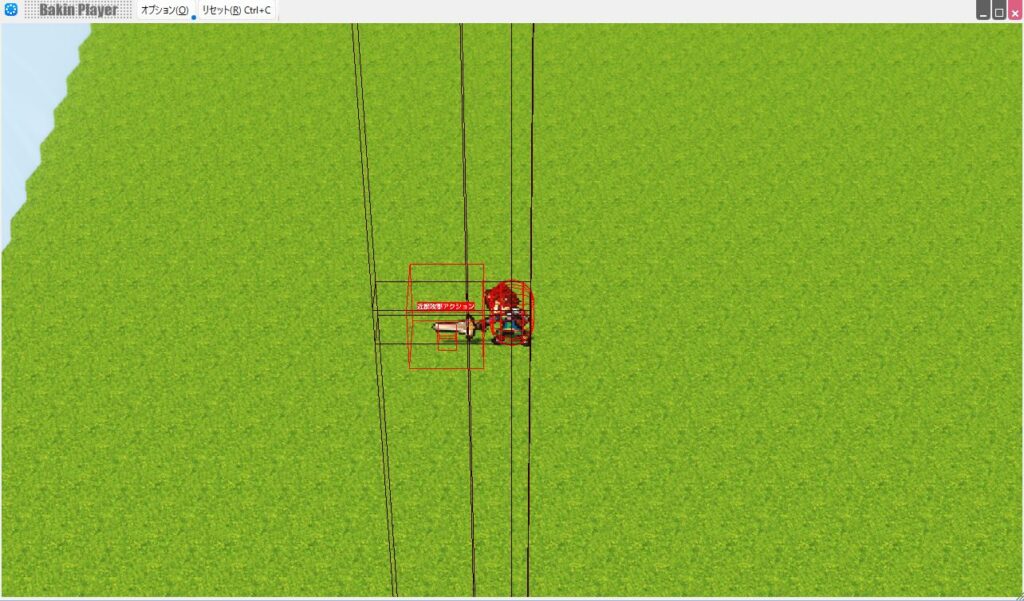
The actual hitbox is now displayed as a red outline. The red-outlined square is the “Melee Attack Action,” so anything it touches will take damage.
Looking at it this way, you can confirm the implementation is working as intended. The “Show Collision” feature is invaluable in many situations going forward—make sure you remember it.
When your game isn’t behaving as expected, the collision setup is very often the culprit.
Summary
In this article I explained how to implement the sword-swing motion in Bakin. At this point there are still no enemies, and damage logic hasn’t been set up yet, so all the player can do is swing the sword.
In upcoming articles I’ll explain enemy implementation and damage processing, so check them out if you’re interested.
📚 Series: RPG Maker Bakin: Game Development Guide (3/17)