Adding Motions to a VRoid Imported into Bakin
Bakin’s major update Ver1.13, released on December 18, 2024, made it possible to directly import VRM format models (VRoids). For details on how to import VRoids into Bakin, see the article below.
However, simply importing a VRoid into Bakin leaves you with only the default motions, which makes it difficult to use the character meaningfully in a game.
“Motions” refer to a character’s animations—a game with only one attack motion, for example, can only recreate a very repetitive battle. Many old games were that simple, but in modern games, character motions have an enormous impact on overall quality.
So if you seriously want to use an imported VRoid in a game, adding motions yourself is essential. This article provides a concise guide on how to add motions to a VRoid imported into Bakin.
[Note] VRMA Files Currently Cannot Be Imported
Before getting into the steps, one clarification: people familiar with VRoids may know that adding animations (motions) to a VRoid normally involves “VRM Animation (VRMA)” files.
However, as of this major update, Bakin does not support VRMA. So even if you prepare a VRMA file, it cannot be used to animate a VRoid imported into Bakin—please be aware of this limitation.
Support may be added in the future, but until VRMA can be used freely, please follow the steps described in this article to add motions.
Steps for Adding Motions to a VRoid
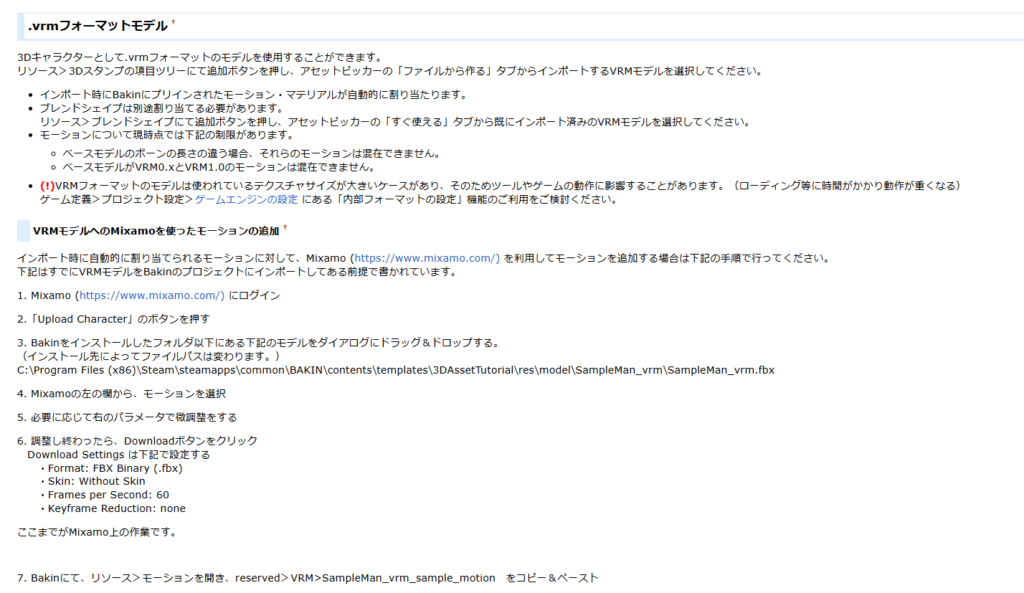
The process of importing a VRoid into Bakin and adding motions is actually documented in the official Wiki.
Someone with enough background knowledge can probably figure out what to do from that documentation, but it may be a high hurdle for first-time game creators.
To summarize, adding motions to a VRoid character in Bakin requires roughly three steps:
- Import the VRoid into Bakin (only minimal default motions are added)
- Download the desired motions from Mixamo
- Import the Mixamo motions into the VRoid in Bakin
Step 1 was covered in the previous article, so this article focuses on steps 2 and 3.
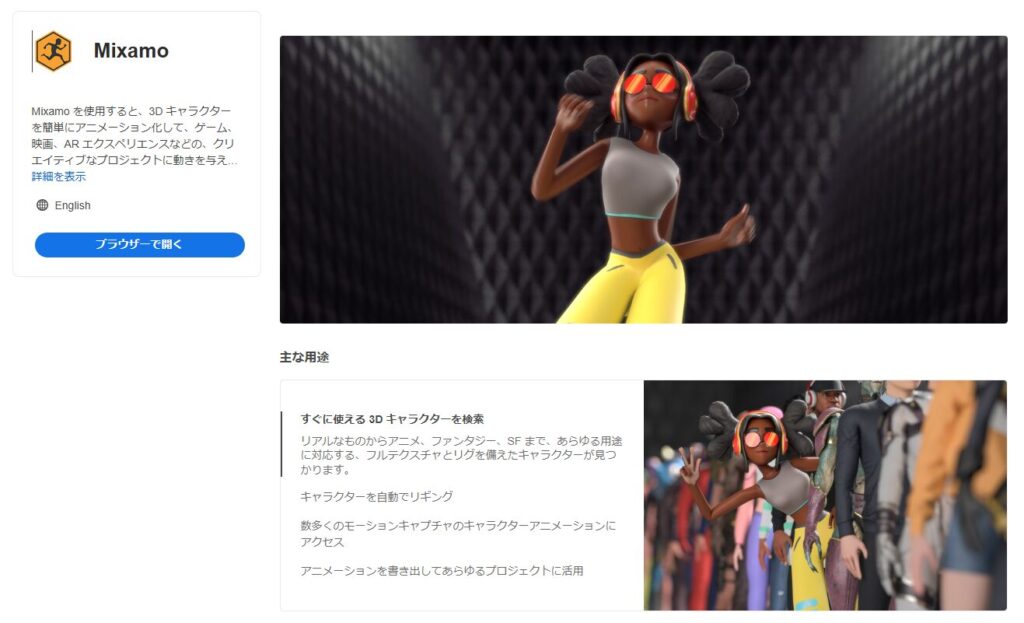
What Is Mixamo?
Both I and the Wiki use the word “Mixamo” as if it’s common knowledge, but most readers are probably hearing it for the first time.
In one sentence: “Mixamo is a free web service that creates high-quality animations (motions) for 3D characters you provide.”
If that’s hard to picture: it’s a service that lets your original VRoid dance, swing a sword, fire a gun, and more.
There are other services that create animations for 3D characters, but what makes Mixamo stand out is that it’s completely free.
Once you use it, you’ll frequently find yourself thinking, “I can’t believe this is free.”
Mixamo is operated by Adobe—the US company behind Photoshop and Premiere Pro, among many other industry-standard tools. (Technically it was originally a separate company’s service before Adobe acquired it in June 2015, but being a large corporation is probably what enables offering this level of service for free.)
For adding motions to 3D characters in game development, Mixamo is an extremely valuable tool—and we’ll be making full use of it here.
Creating Animations (Motions) in Mixamo
Let’s get started with Mixamo. Open the official Mixamo website (https://www.mixamo.com/) in your browser.
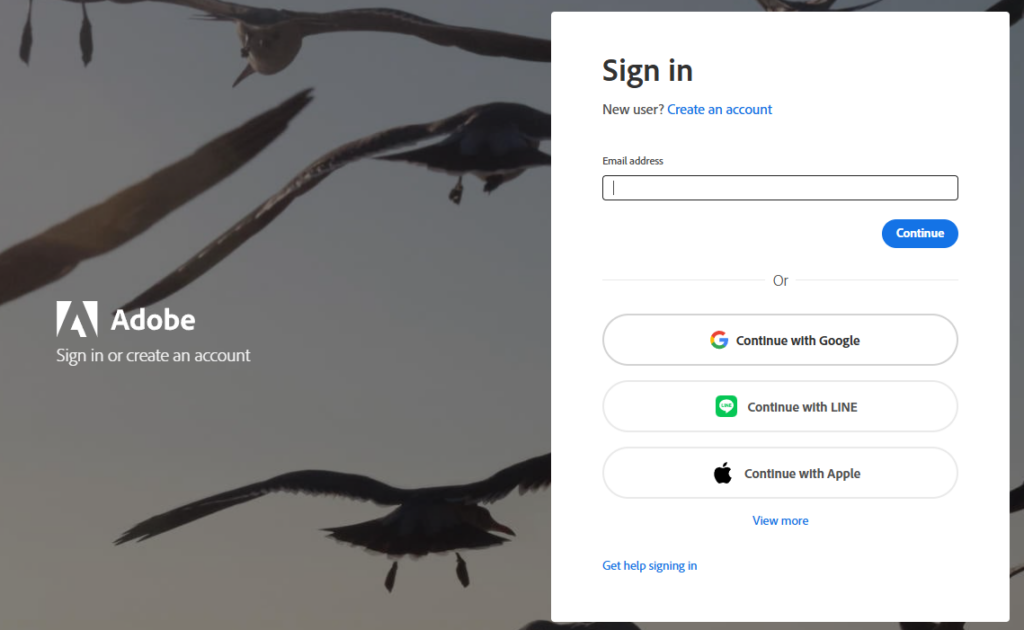
You’ll see a screen like the one below. If you’re new, click “Sign Up for Free,” or if you have a Google account, click “Log in.”
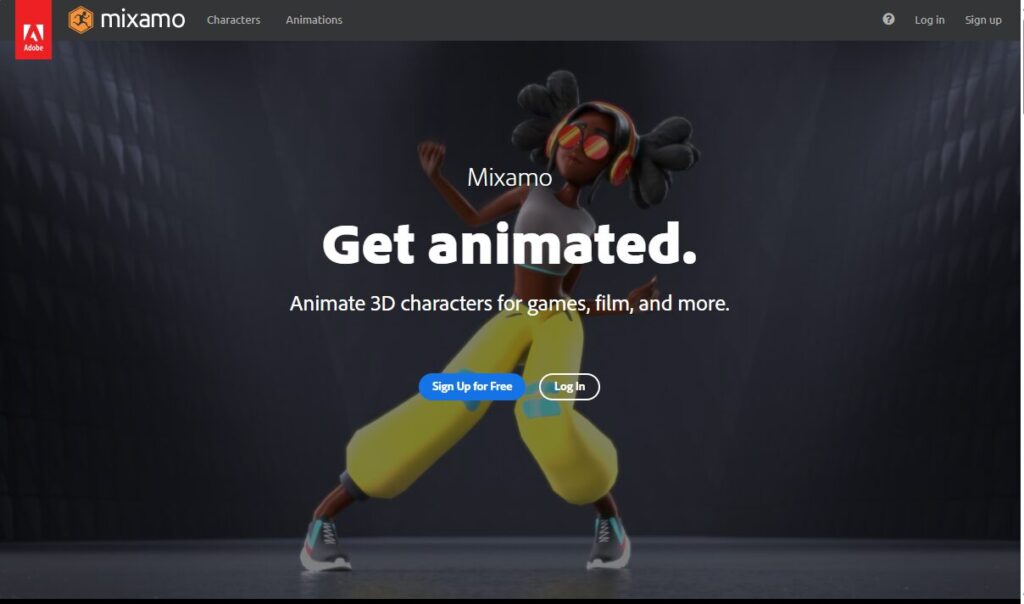
Most people have a Google account, so I’ll log in using Google as I usually do.
When the sign-in screen appears, click “Continue with Google” and link your Google account to Mixamo. If you don’t have a Google account, use “Sign Up for Free” to create one.
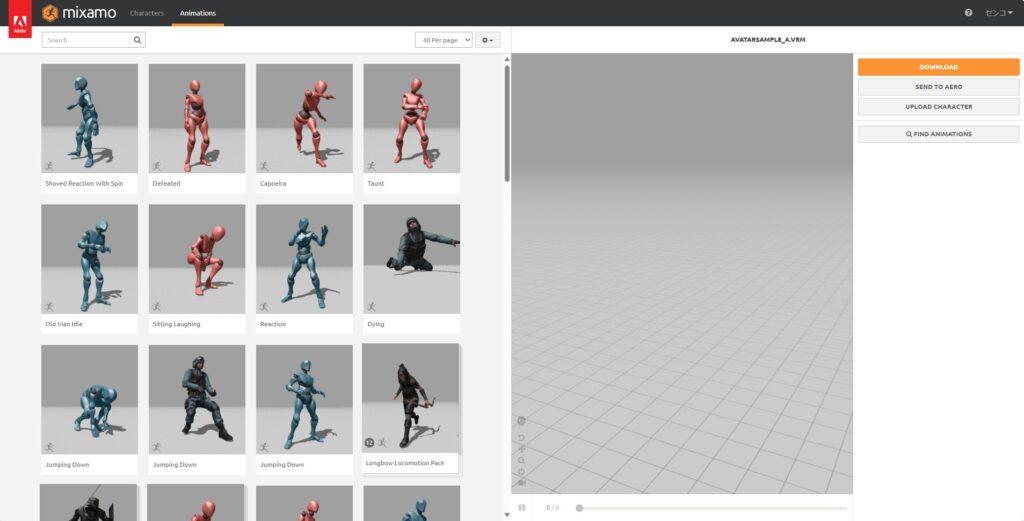
After logging in successfully, you should see a screen like this. The first thing to do when adding motions is to upload your 3D character to Mixamo.
Click the “UPLOAD CHARACTER” button on the right side of the screen.
A file selection screen will appear.

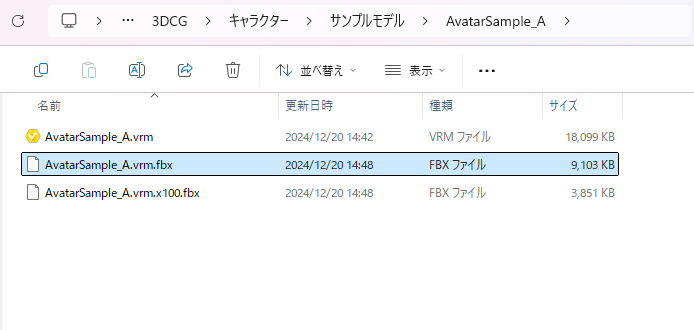
The file to upload is the “VRMName.fbx” file found in the folder created when you imported the VRoid into Bakin in the previous article.
[Update May 2025] With the Bakin Ver1.14 update, the file for Mixamo has been renamed to “VRMName.vrm.mixamo.fbx.” Please use that file for uploads.
Most people probably don’t recall creating this file—but Bakin actually generates it automatically when you import a VRM file. The “VRMName.x100.fbx” file is also created the same way; these are intermediate files left over from Bakin’s behind-the-scenes conversion to FBX format.
Drag and drop the “VRMName.fbx” (or .vrm.mixamo.fbx) file into the Mixamo upload screen.
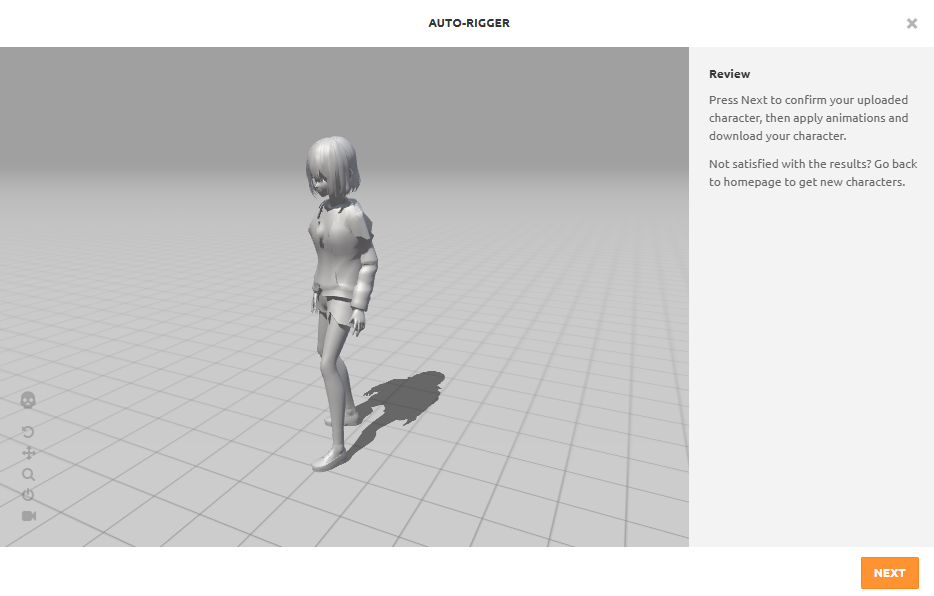
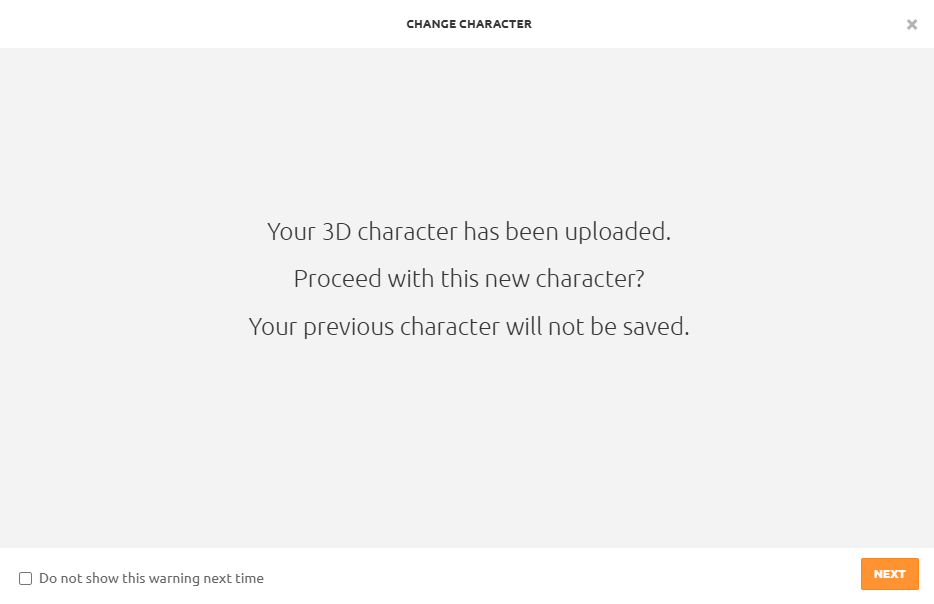
When the upload is complete, a confirmation screen will appear. The preview may look different from what you expected, but the appearance here doesn’t matter much for motion creation.
What matters is that the rig—the structure controlling the 3D character’s skeleton—is properly configured. As long as the model isn’t clearly broken at the skeletal level, it should be fine.
Note that Mixamo uploads sometimes fail mysteriously. If an upload fails, don’t give up—try uploading again a few times and the model will often come through successfully.
If it looks like the image below, click “OK” to proceed.
Similarly, click “OK” on the next screen as well.
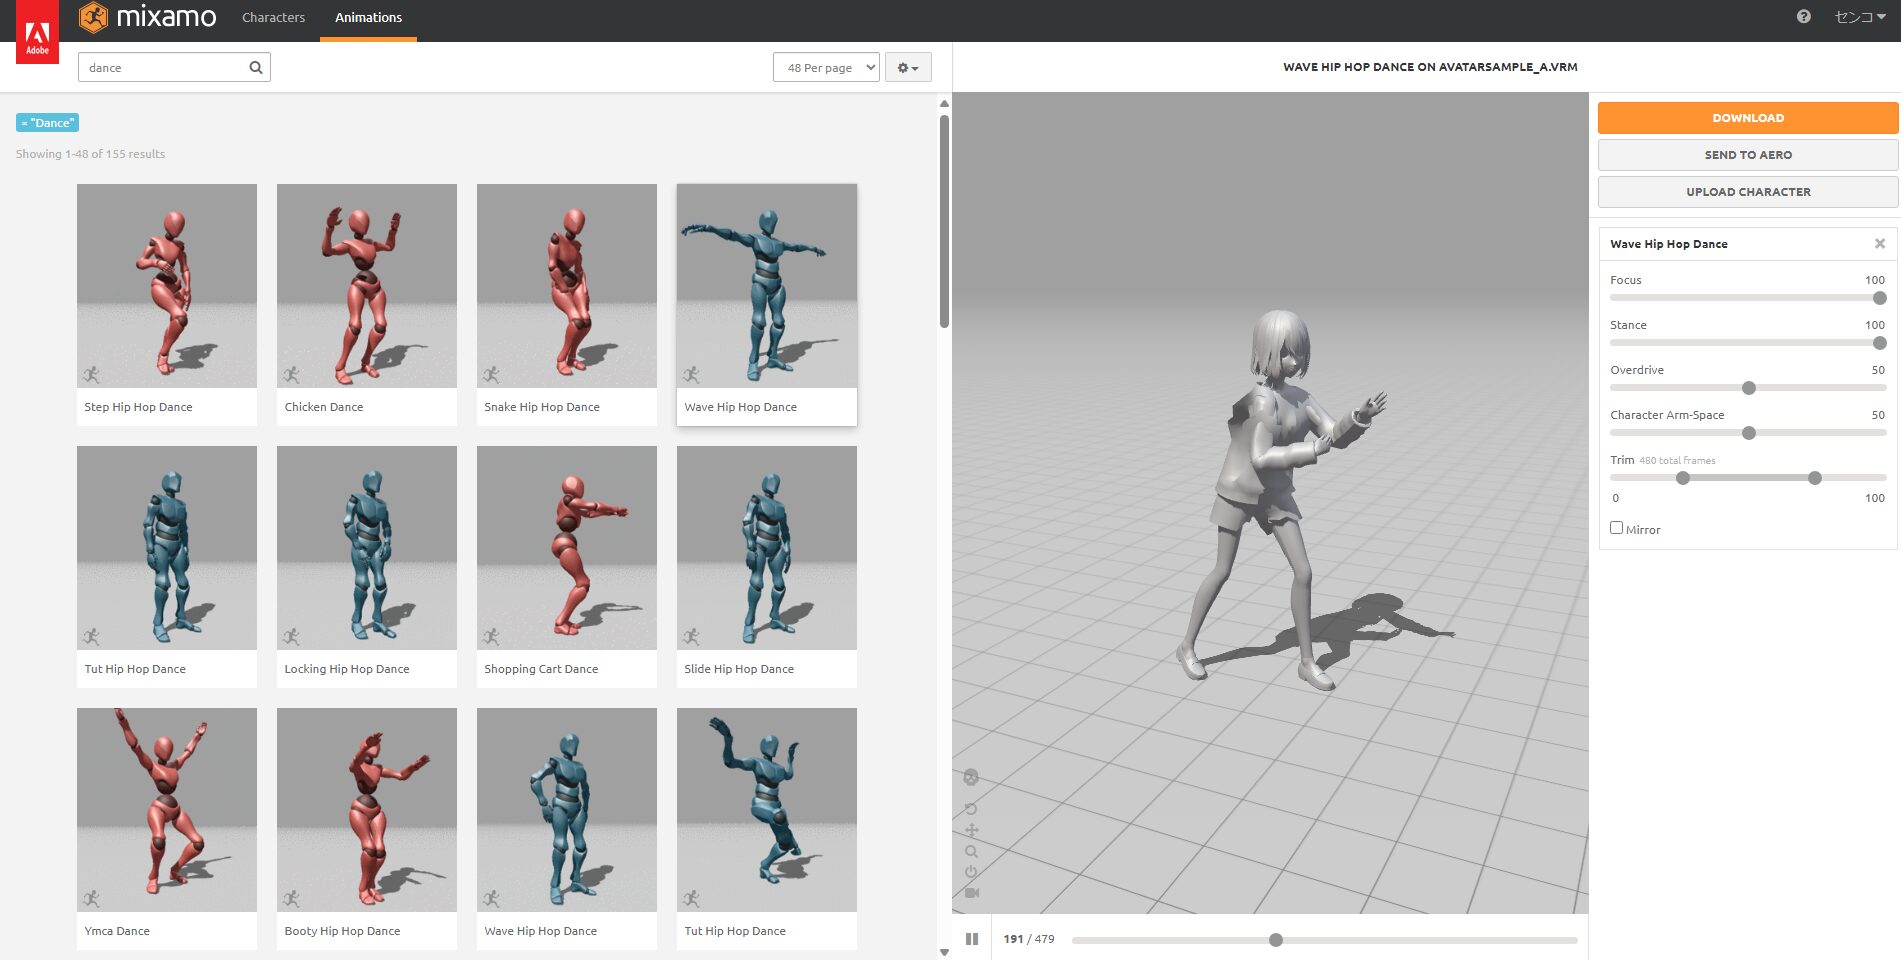
Your uploaded 3D character should now appear in the preview panel on the right. Click any animation on the left side to try it out.
The character in the preview will animate according to the selected animation. Mixamo works by applying pre-made animation templates to your character—you’re not creating animations from scratch.
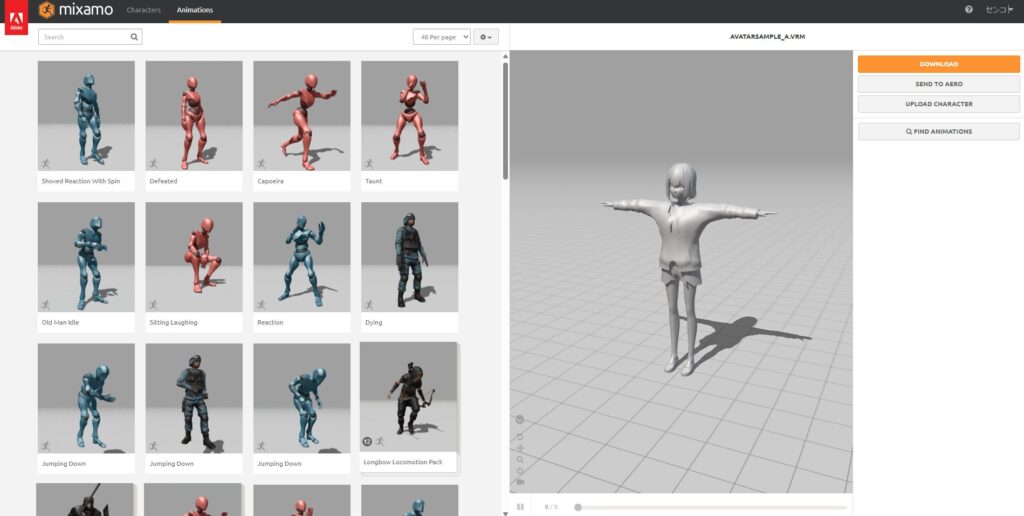
For this example, let’s try making the character dance. There’s a “Search” field in the upper-left of the website. Type “dance” and search.
A large number of dance animations will appear. You can search for any motion you have in mind this way.
Browse through the results and find one you like.

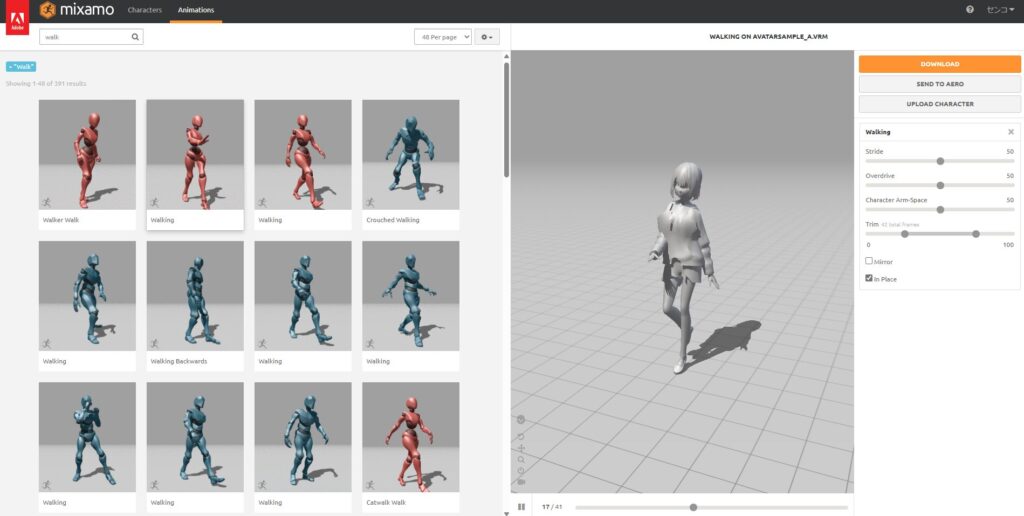
Depending on the animation selected, various parameters may appear on the right side of the screen. You don’t need to worry about these at first, but adjusting them lets you tweak the animation.
Common parameters available for most animations include:
- Overdrive: controls animation speed. Motions often feel too slow by default in Bakin, so this is useful for tuning.
- Character Arm-Space: controls arm angle. Especially useful for female characters in frilly outfits where arms clip through the skirt by default.
- Trim: trims the animation. Bakin’s motion settings also support trimming, so this parameter is generally not needed.
Most animations work well with default values, but remember that parameters can be adjusted if needed.
Once you’re satisfied with the parameters, click the “DOWNLOAD” button on the right to download the animation.
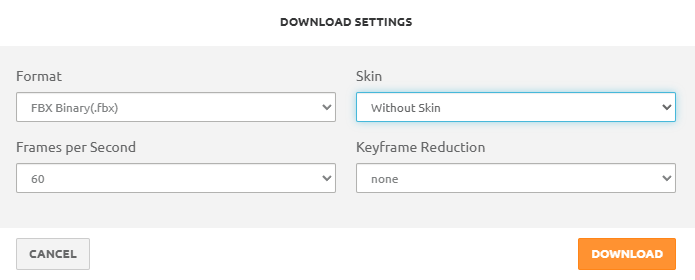
Use the following settings in the download dialog (items in parentheses indicate changes from defaults):
- Format: FBX Binary (.fbx)
- Skin: Without Skin
- Frames per Second: 60
- Keyframe Reduction: none
Click “DOWNLOAD” to save the FBX file to your PC.
One side note: if you import a walking or running animation directly into Bakin, the hitbox and character position can end up significantly misaligned. For walk and run animations, check the “In Place” parameter option to get a version where the character moves in place without translating forward. This produces much better results in Bakin.
Adding Motions to Bakin
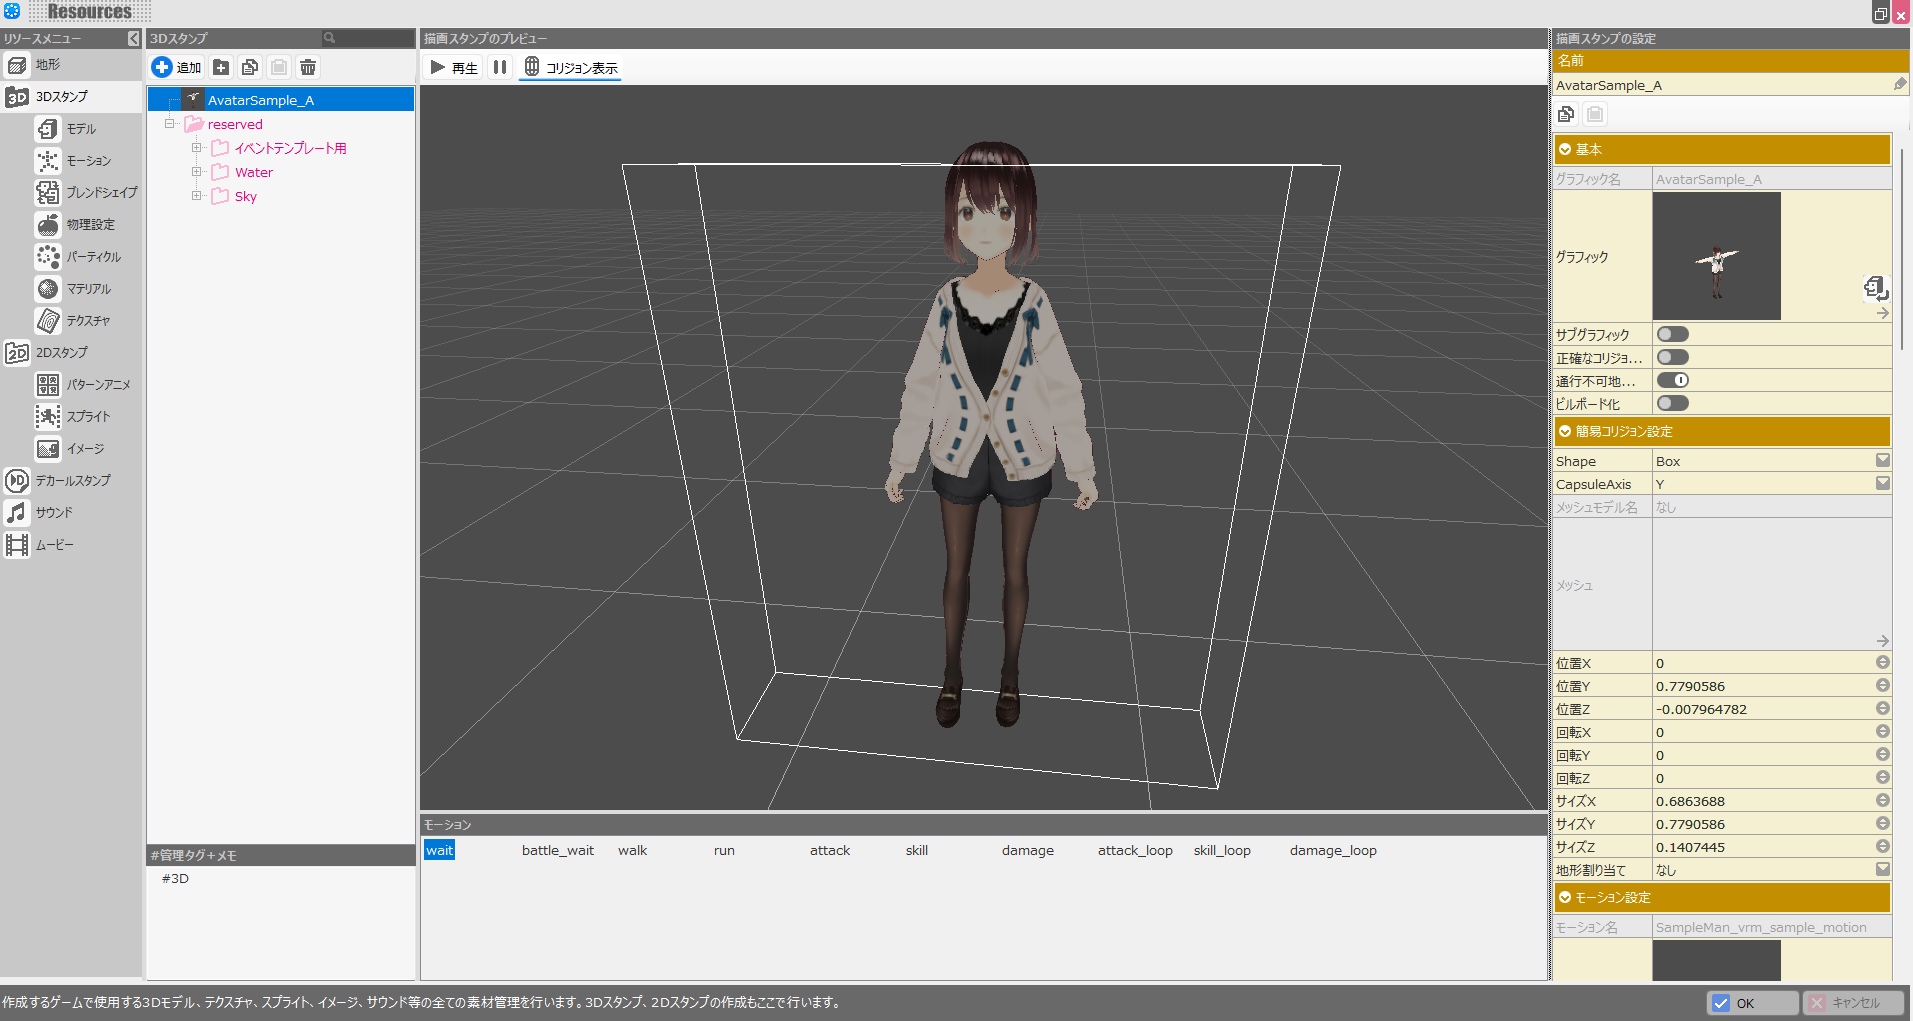
Now let’s add the Mixamo animation to Bakin as a motion. In Bakin’s master menu, go to “Resources” and select “Motion” inside the “3D Stamps” section.
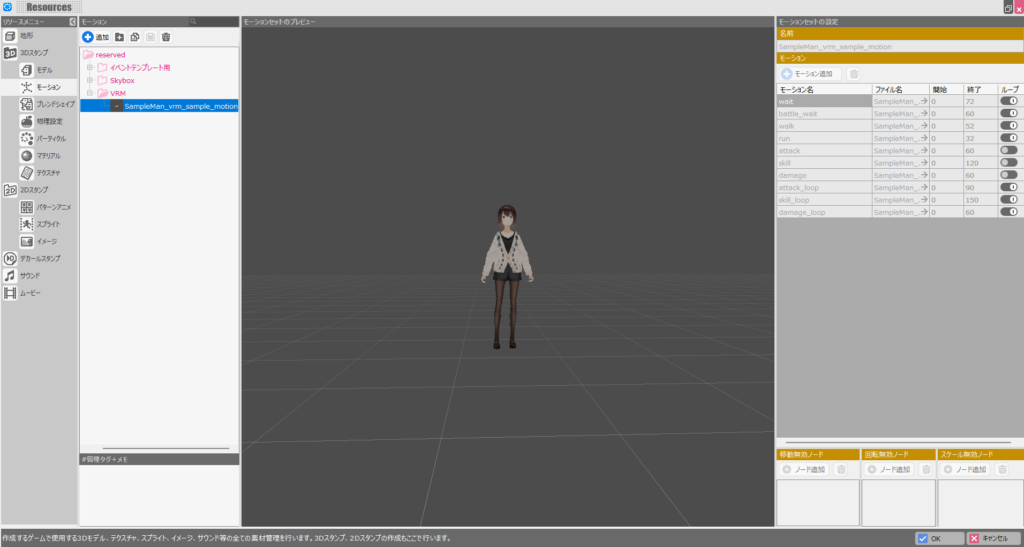
The VRoid added in the previous article has a motion called “SampleMan_vrm_sample_motion,” but this is a Bakin-provided motion that cannot be edited.
To add new motions, you need to copy and paste “SampleMan_vrm_sample_motion” to create a new separate motion.
Select the motion, press Ctrl+C to copy, then Ctrl+V to paste (or use the “Copy” and “Paste” buttons at the top of the screen).
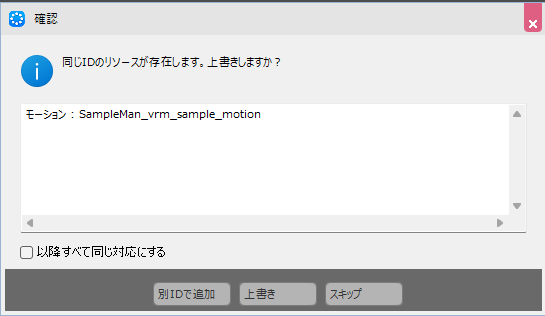
A confirmation dialog will appear—select “Add with New ID” to create it as a separate motion.
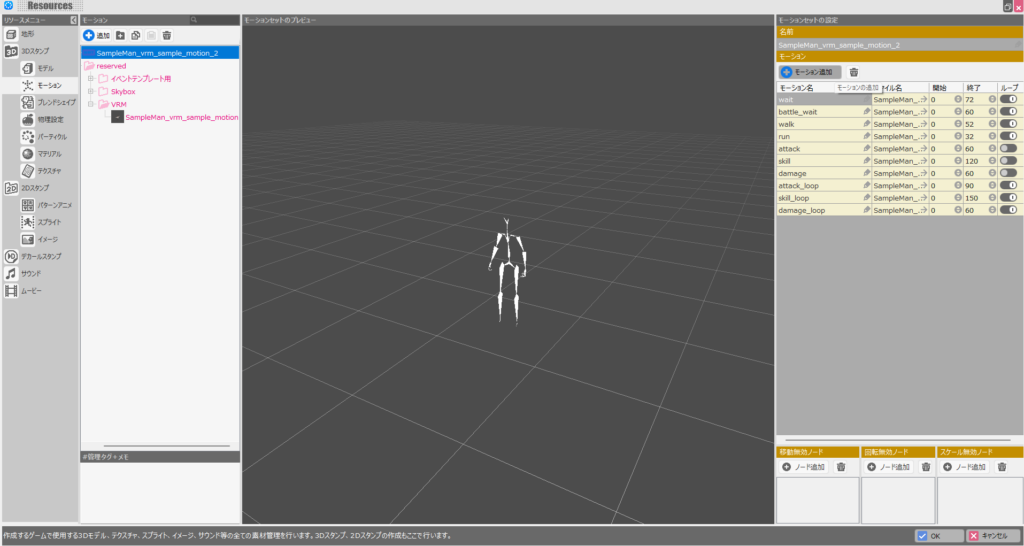
A new motion called “SampleMan_vrm_sample_motion_2” has been created. You’ll notice that the motion list on the right side of the screen is now editable.
Click “Add Motion” on the right side of the screen.
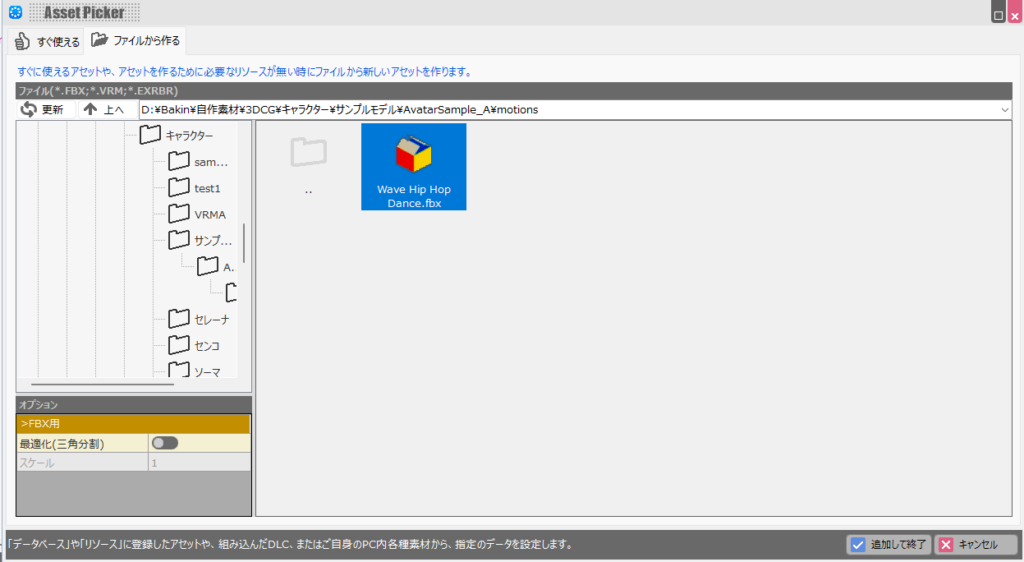
In the dialog that appears, select the FBX file downloaded from Mixamo and click “Add and Finish.”
[Update May 2025] It appears that in Ver1.14 and later, the “Optimize (Triangulate)” import option (the switch in the lower-left) must be enabled (toggled right) for motions to import correctly in some cases. Whether it’s always required is unclear, but try enabling it if your import isn’t working.
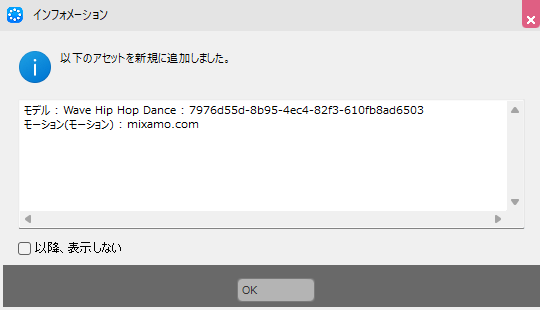
An information dialog will appear—click “OK.” Clicking OK for information dialogs is fine going forward as well.
The motion has been added to the bottom of “SampleMan_vrm_sample_motion_2.” When first added, the motion name will be filled with the filename. Change it to something descriptive.
Since this is a dance motion, I’ll name it “dance.”

The motion has been added, but if you check the 3D stamp character, you won’t see any new motions available yet.
This is because the motion linked to the 3D stamp is still the default “SampleMan_vrm_sample_motion.”
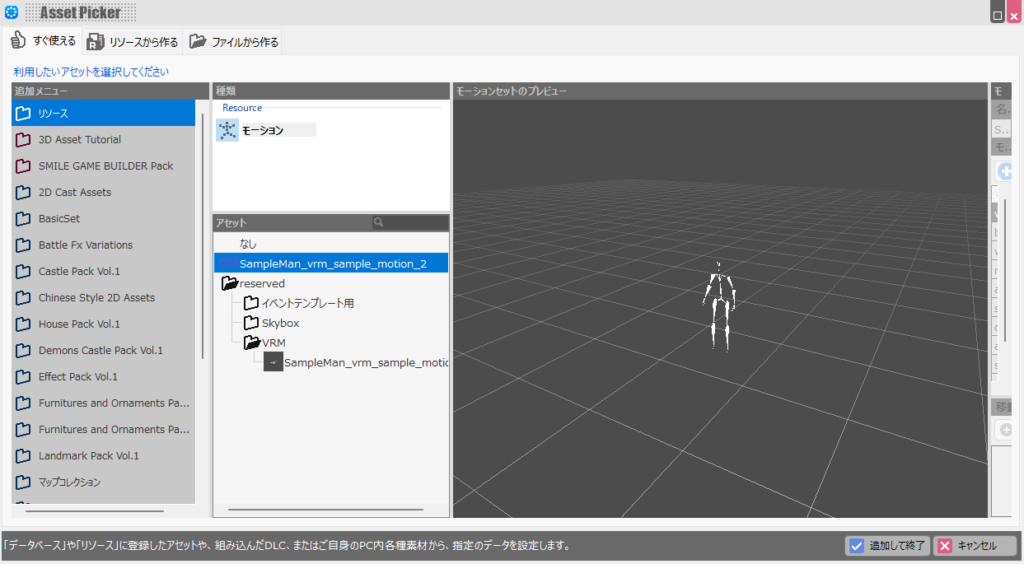
Click on the motion field and switch it to the copy you created.

Clicking the motion field brings up a motion selection screen. Select the “SampleMan_vrm_sample_motion_2” you created and click “Add and Finish.”
The 3D stamp character is now set to use the newly created motion. However, at this point (likely a Bakin bug), adding a motion causes the default motions to display incorrectly, as shown in the image.
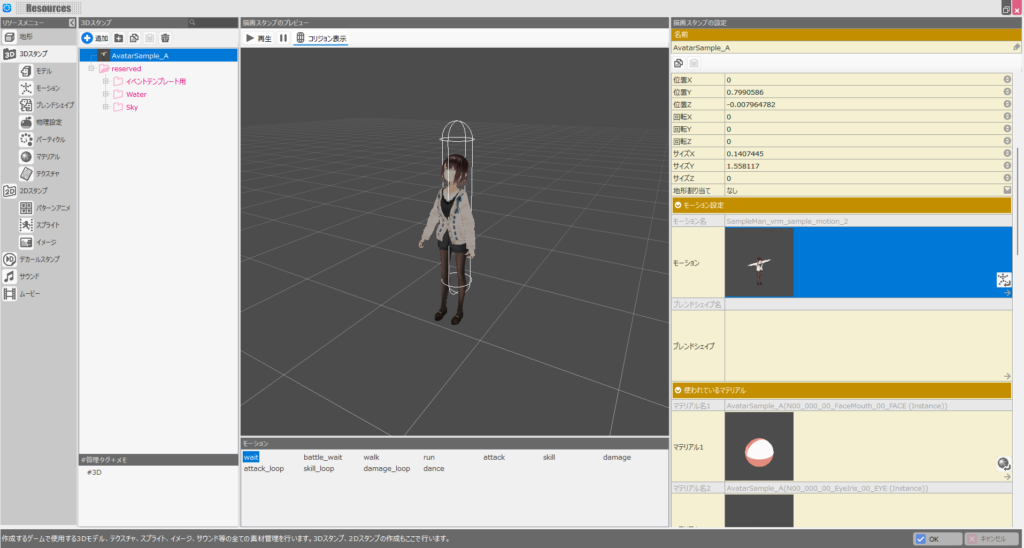
As mentioned in the previous article, Bakin does have quite a few bugs, and getting bogged down in minor ones wastes time—so let’s move past this one. The “dance” motion we added should animate correctly.
If you’re adding your own motions, just avoid using the default motions and rely only on the ones you added yourself—the bug won’t affect you.

That completes the process of adding motions to the 3D character. Here’s a video of the dance in action inside a Bakin game:
It looks a bit surreal in context, but you can see the animation is smooth. Combined with the blend shapes covered in the previous article, you can have the character dance while changing facial expressions at the same time.
Mixamo also has many more cute and cool animations available—explore to find ones that match your vision.
Motion Name List in Bakin
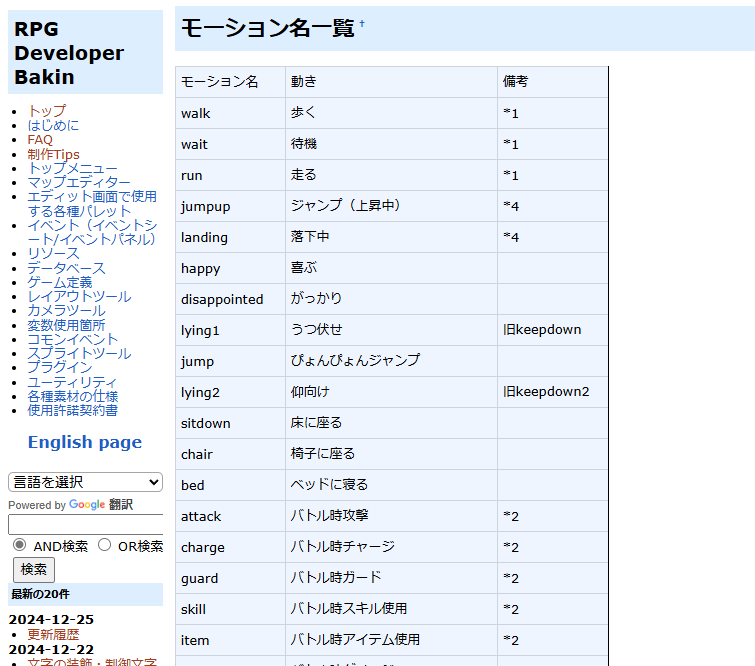
One final note: Bakin has reserved motion names that the system uses automatically.
For example, a motion registered as “walk” will automatically play when a character walks in-game, without needing to specify it explicitly in a script. Similarly, “run” is used for running, and “wait” is used for idle animations.
The full list of reserved motion names is available on the official Bakin Wiki.
When creating an original 3D character, it’s a good idea to prepare motions for these reserved names first.
Of course, creating all of them at once is a lot of work, so start with the ones you need immediately and add more as necessary.
Note that when actually using a character in-game, event scripts can also trigger any motion name you define—so you’re not strictly limited to the reserved names.
Summary
In this article, building on the previous one, I covered how to add motions to a VRoid imported into Bakin.
In the previous article I said motion addition felt like too much hassle, but after actually going through it, I found it much easier than expected—and the results are great.
As both articles show, one particularly nice aspect is that you can add 3D characters and motions without going through any intermediate software like Blender.
Given how straightforward the process is, I can see Bakin-based games featuring 3D characters becoming quite popular.
Bakin does still have its share of bugs, and those rough edges are noticeable, but overall I think it’s a genuinely impressive game development tool. I’ll continue covering how to build games in Bakin going forward—check back if you’re interested.
📚 Series: RPG Maker Bakin: Game Development Guide (16/17)