
About This Article
This article explains how to open a NISA account at SBI Securities.
Since the New NISA (Japan’s revised tax-free investment program) launched on January 1, 2024, more and more people have been opening NISA accounts to try their hand at investing.
SBI Securities is one of the most popular brokers in Japan, and many people want to open their NISA account there specifically.
Opening a NISA account is not difficult. Read through this article and get started with NISA today.
NISA Account Opening Steps
The steps below assume you already have a regular trading account (general account) with SBI Securities.
If you have not yet opened a general account at SBI, either open one first by following the link below, or apply for the general account and NISA account at the same time.
Account Opening Flow — Open in 4 Easy Steps | SBI Securities (sbisec.co.jp)
If you already use SBI Securities but are not very aware of the “general account,” it was most likely opened automatically when you created your specific account or standard account.
Think of it this way: SBI Securities users put money into their general account, and then allocate that money to a specific account or a NISA account depending on their purpose.
Money can move freely within the general account, so you do not need to transfer funds separately just for NISA.

Now let’s walk through the NISA account opening process.
Note: This article reflects the application process as of March 2024. The steps at SBI Securities may change in the future.
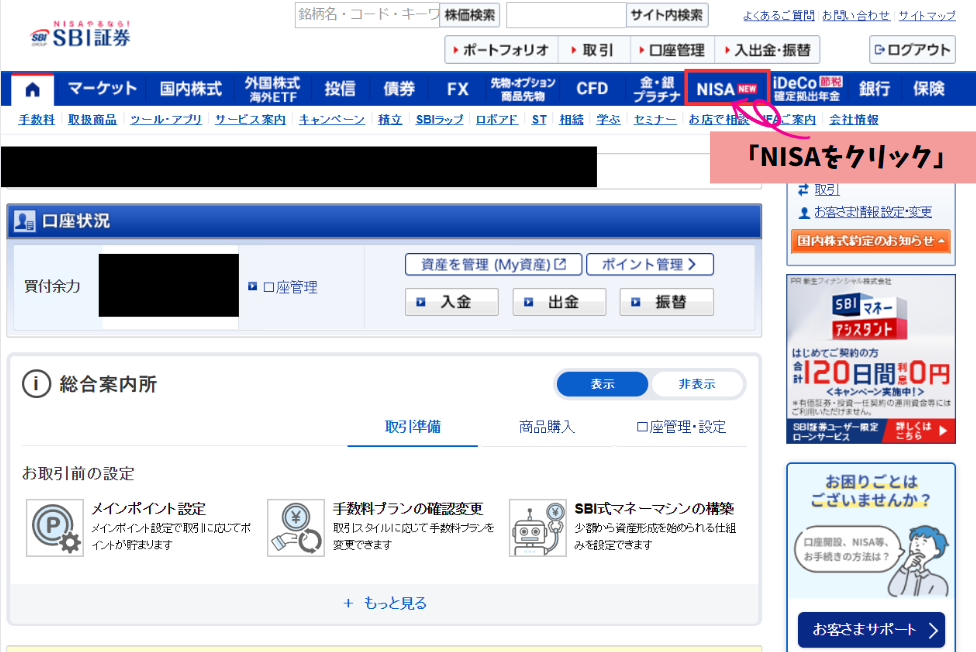
① Go to the NISA Page on SBI Securities
First, after logging into SBI Securities, click the dedicated “NISA” tab as shown in the image below.
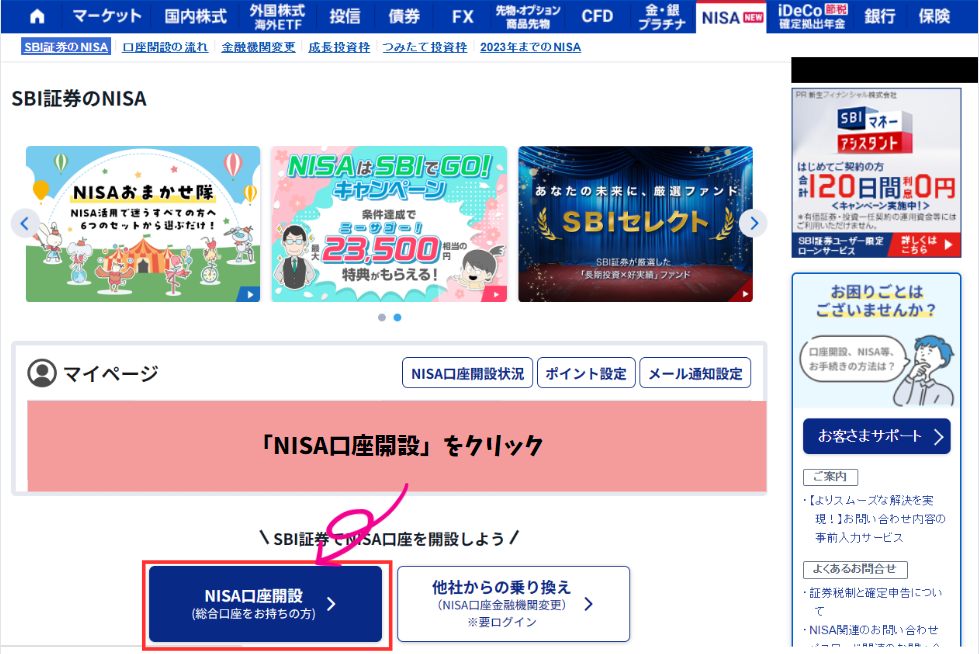
② Start the Account Opening Process from the NISA Page
The NISA page will appear as shown below.
Click the “Open NISA Account” button in the center of the screen to begin the process.
If you have not yet opened a general account, either open both a NISA account and a general account through this link at the same time, or open the general account first.
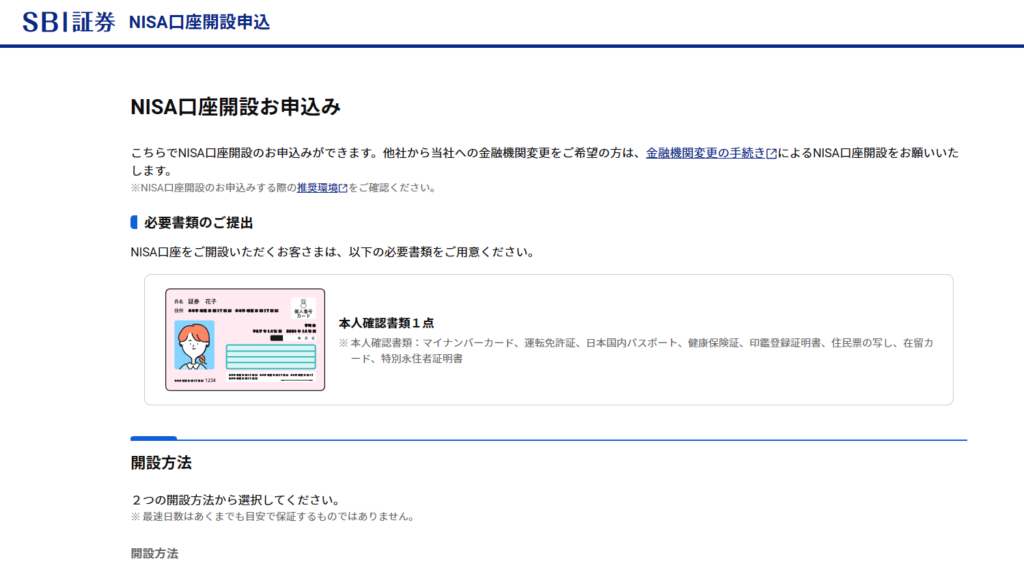
③ Choose How to Submit Documents and Review the Terms
After starting the process, a screen will appear asking you to choose how to submit your documents.
You can choose to “upload via web” or send documents by “mail” for your identity verification document (My Number Card, driver’s license, etc.).
Processing online is overwhelmingly faster and simpler, so unless you have a specific reason otherwise, online upload is the way to go.
This walkthrough uses the online upload method.
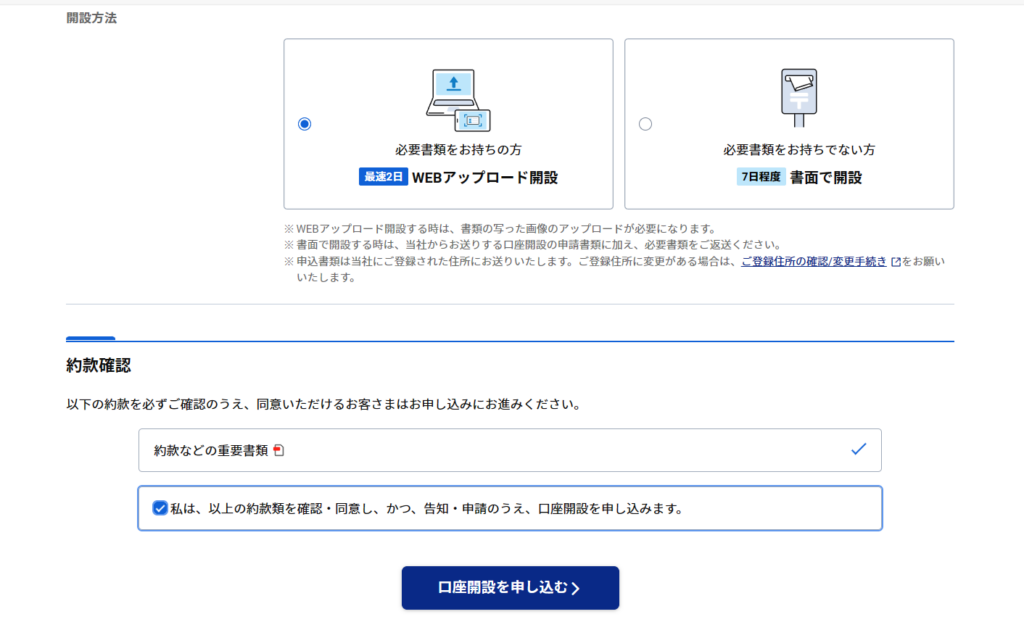
Note: On the terms review screen, you must click the “Important Documents” link to open and read the terms PDF before you can tick the checkbox below.
The terms are long and complex, so you may not be able to read them in full immediately, but at least skim them before checking the box and clicking “Apply to Open Account.”
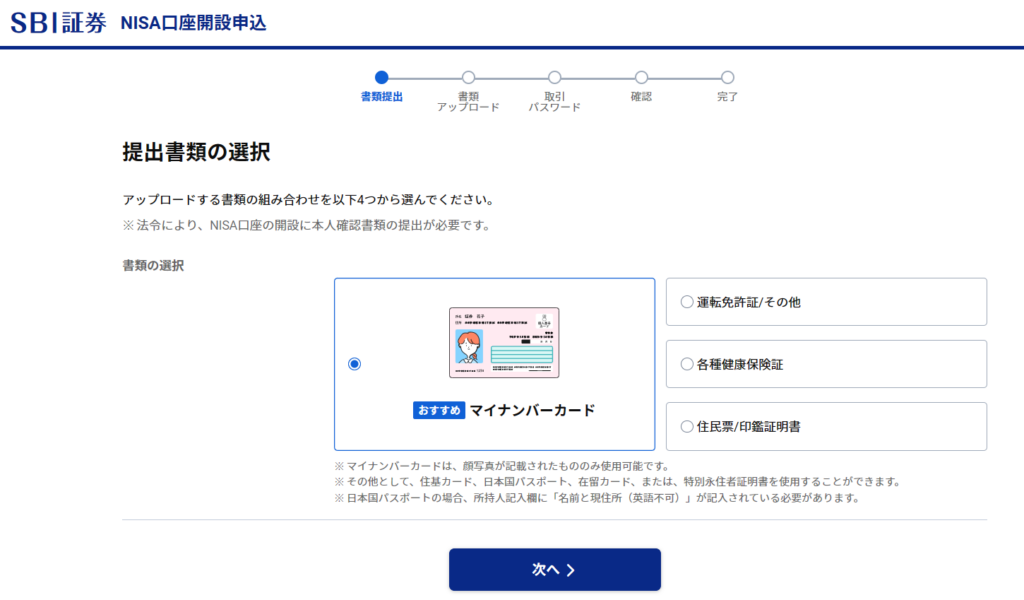
④ Choose Your Identity Document
On the next screen, you need to select which identity document you will upload (since you chose the web upload option in the previous screen).
You can use whichever identity document you have. This walkthrough uses the My Number Card.
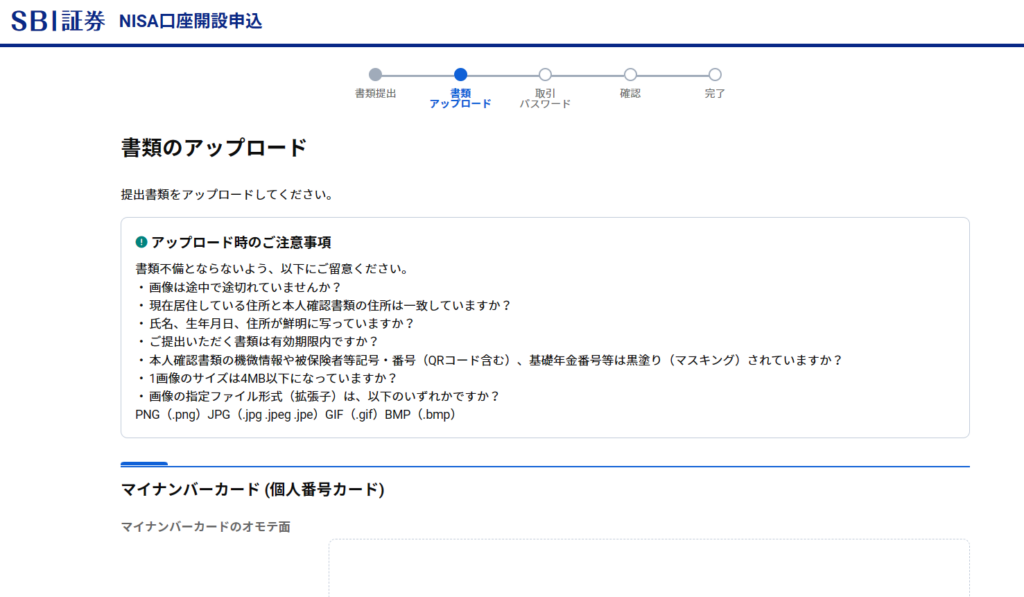
⑤ Upload Your Document
Next, a screen to upload your chosen document appears.
Since My Number Card was selected, I took a photo of my My Number Card with my smartphone, transferred it to my computer, and uploaded it.
Note that the file size limit is 4 MB or less — fairly strict — so if your smartphone takes high-resolution photos that exceed 4 MB, you will need to compress the image first using an online tool before uploading. (My photo exceeded 4 MB as well.)
There are various sites that can compress images online; I used one of those.
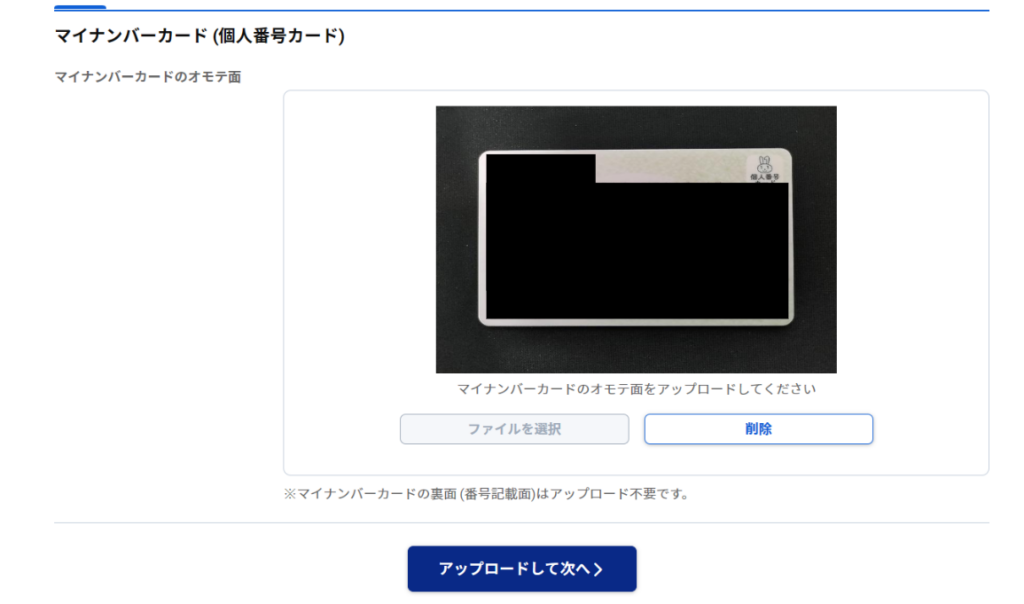
For the My Number Card, only the front side needs to be uploaded; the back side is not required (I have blacked out my personal information in the image above).
After uploading, click “Upload and Continue” to proceed.
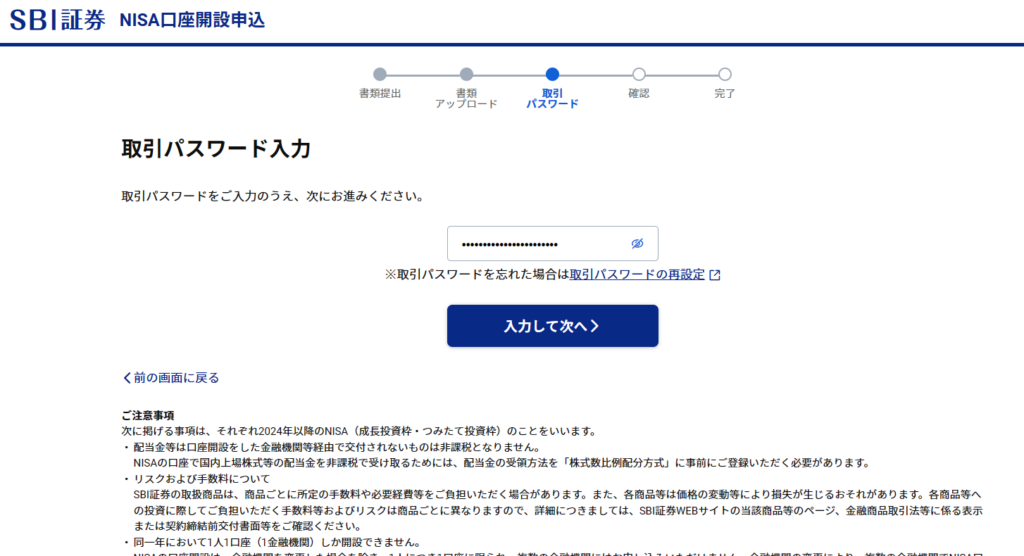
⑥ Enter Your Trading Password
Next, enter the trading password you created when you opened your general account.
When done, click “Enter and Continue.”
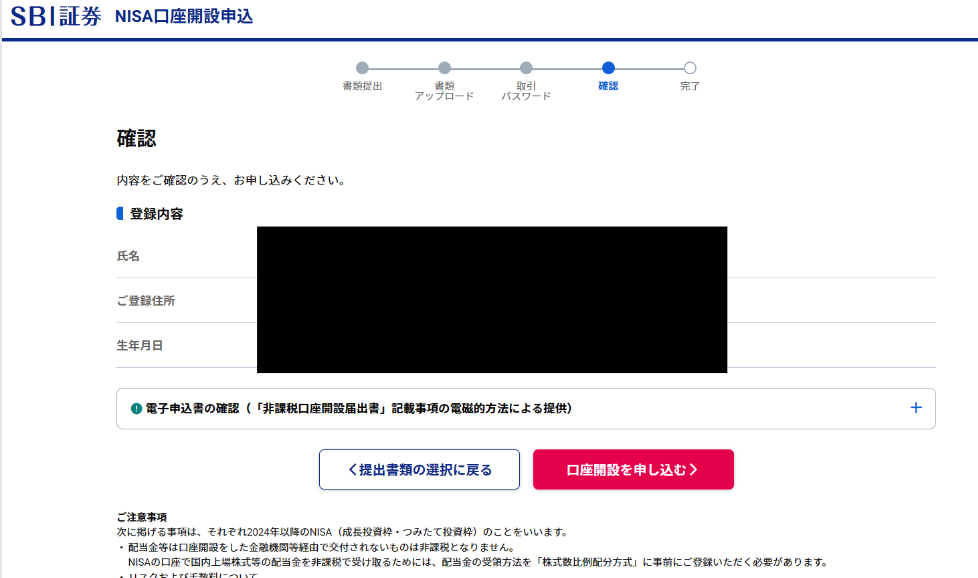
⑦ Review Your Registration Details
Finally, review your registration details.
The information shown here should already be on file with your account. Unless something like your address has changed, simply click “Apply for Account” to submit.
If any details are incorrect, stop the process, update your account information, and then restart the procedure.
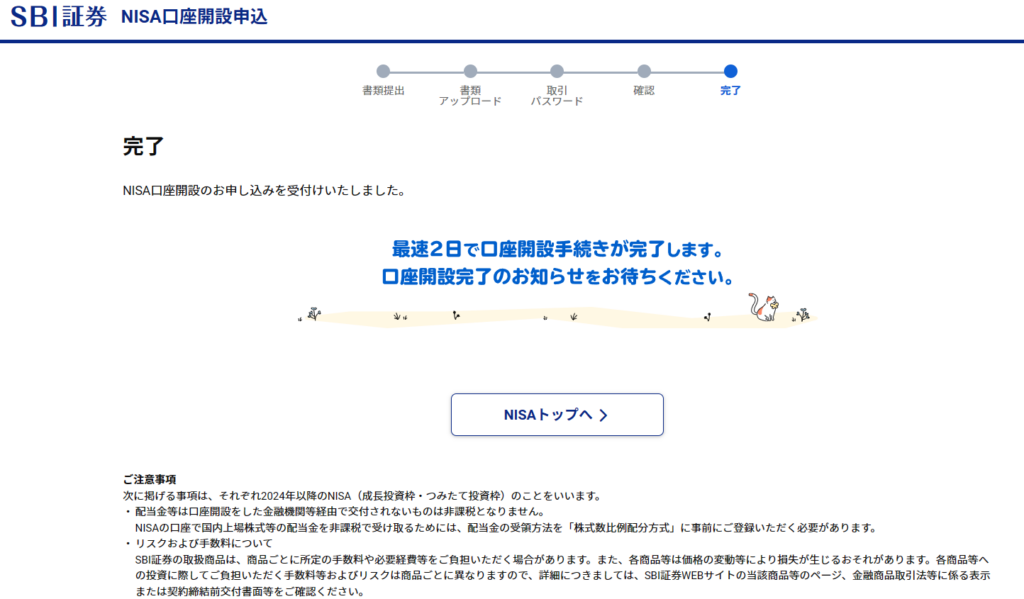
⑧ Application Complete
When the completion screen shown below appears, your NISA account application is finished.
Wait a few days for a notification that the account has been opened, then log in to confirm.
Summary
This article walked through the steps for opening a NISA account at SBI Securities.
NISA offers enormous benefits, so if you have not opened one yet, please use this guide to get started.
If you would also like to deepen your overall knowledge of investing beyond NISA, I wrote a previous article covering basic investment fundamentals — check it out if you’re interested.
See you in the next article.